How to connect HTTPS to a domain bought elsewhere
This guide is only for domains registered with a company other than Mozello. If your domain is registered with Mozello, click here.
Mozello users can link a non-Mozello domain they own to the Cloudflare service for setting up a secure HTTPS connection and improving the website's compliance with modern security and browser requirements.
Step-by-step guide
1. Create an account on the Cloudflare website.
2. After registration in a new Cloudflare account, the domain addition form will appear automatically. If it doesn't or if you're adding additional domains later, use the + Add button in the upper right corner.
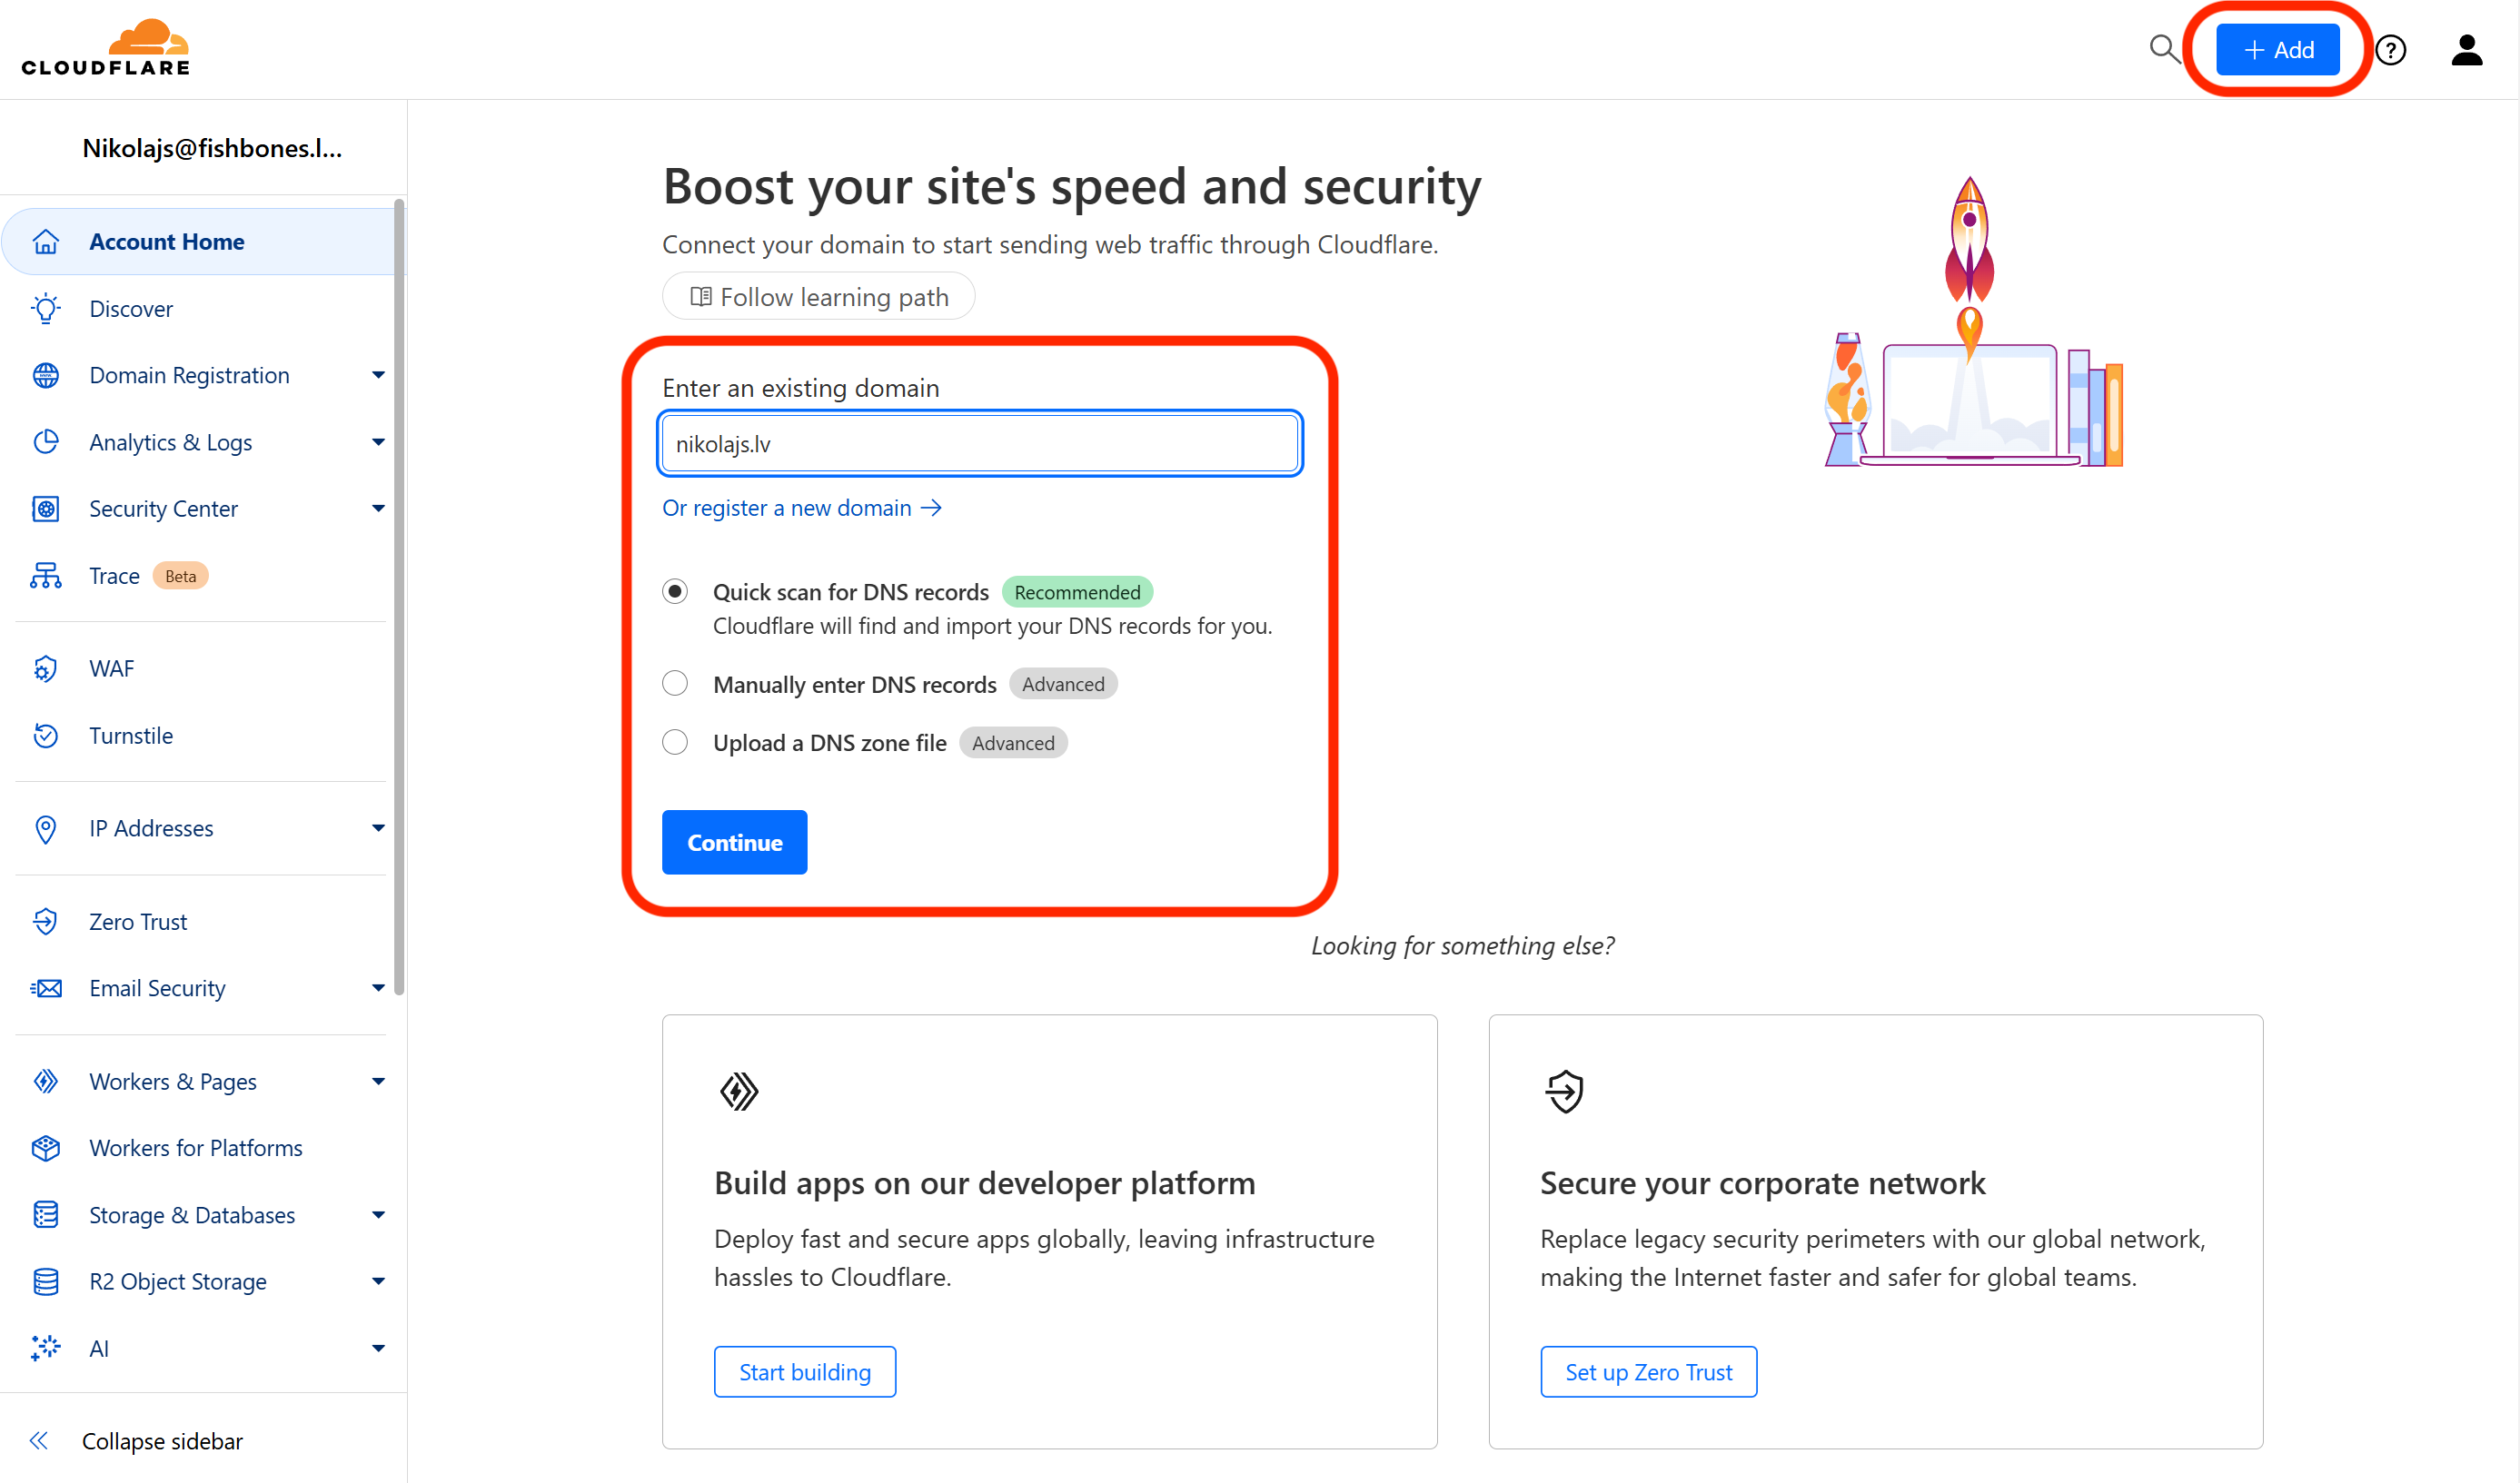
3. Enter your domain name, for example, yourdomain.com.
4. After entering the domain, a window will open for you to select your plan. Choose the free plan.
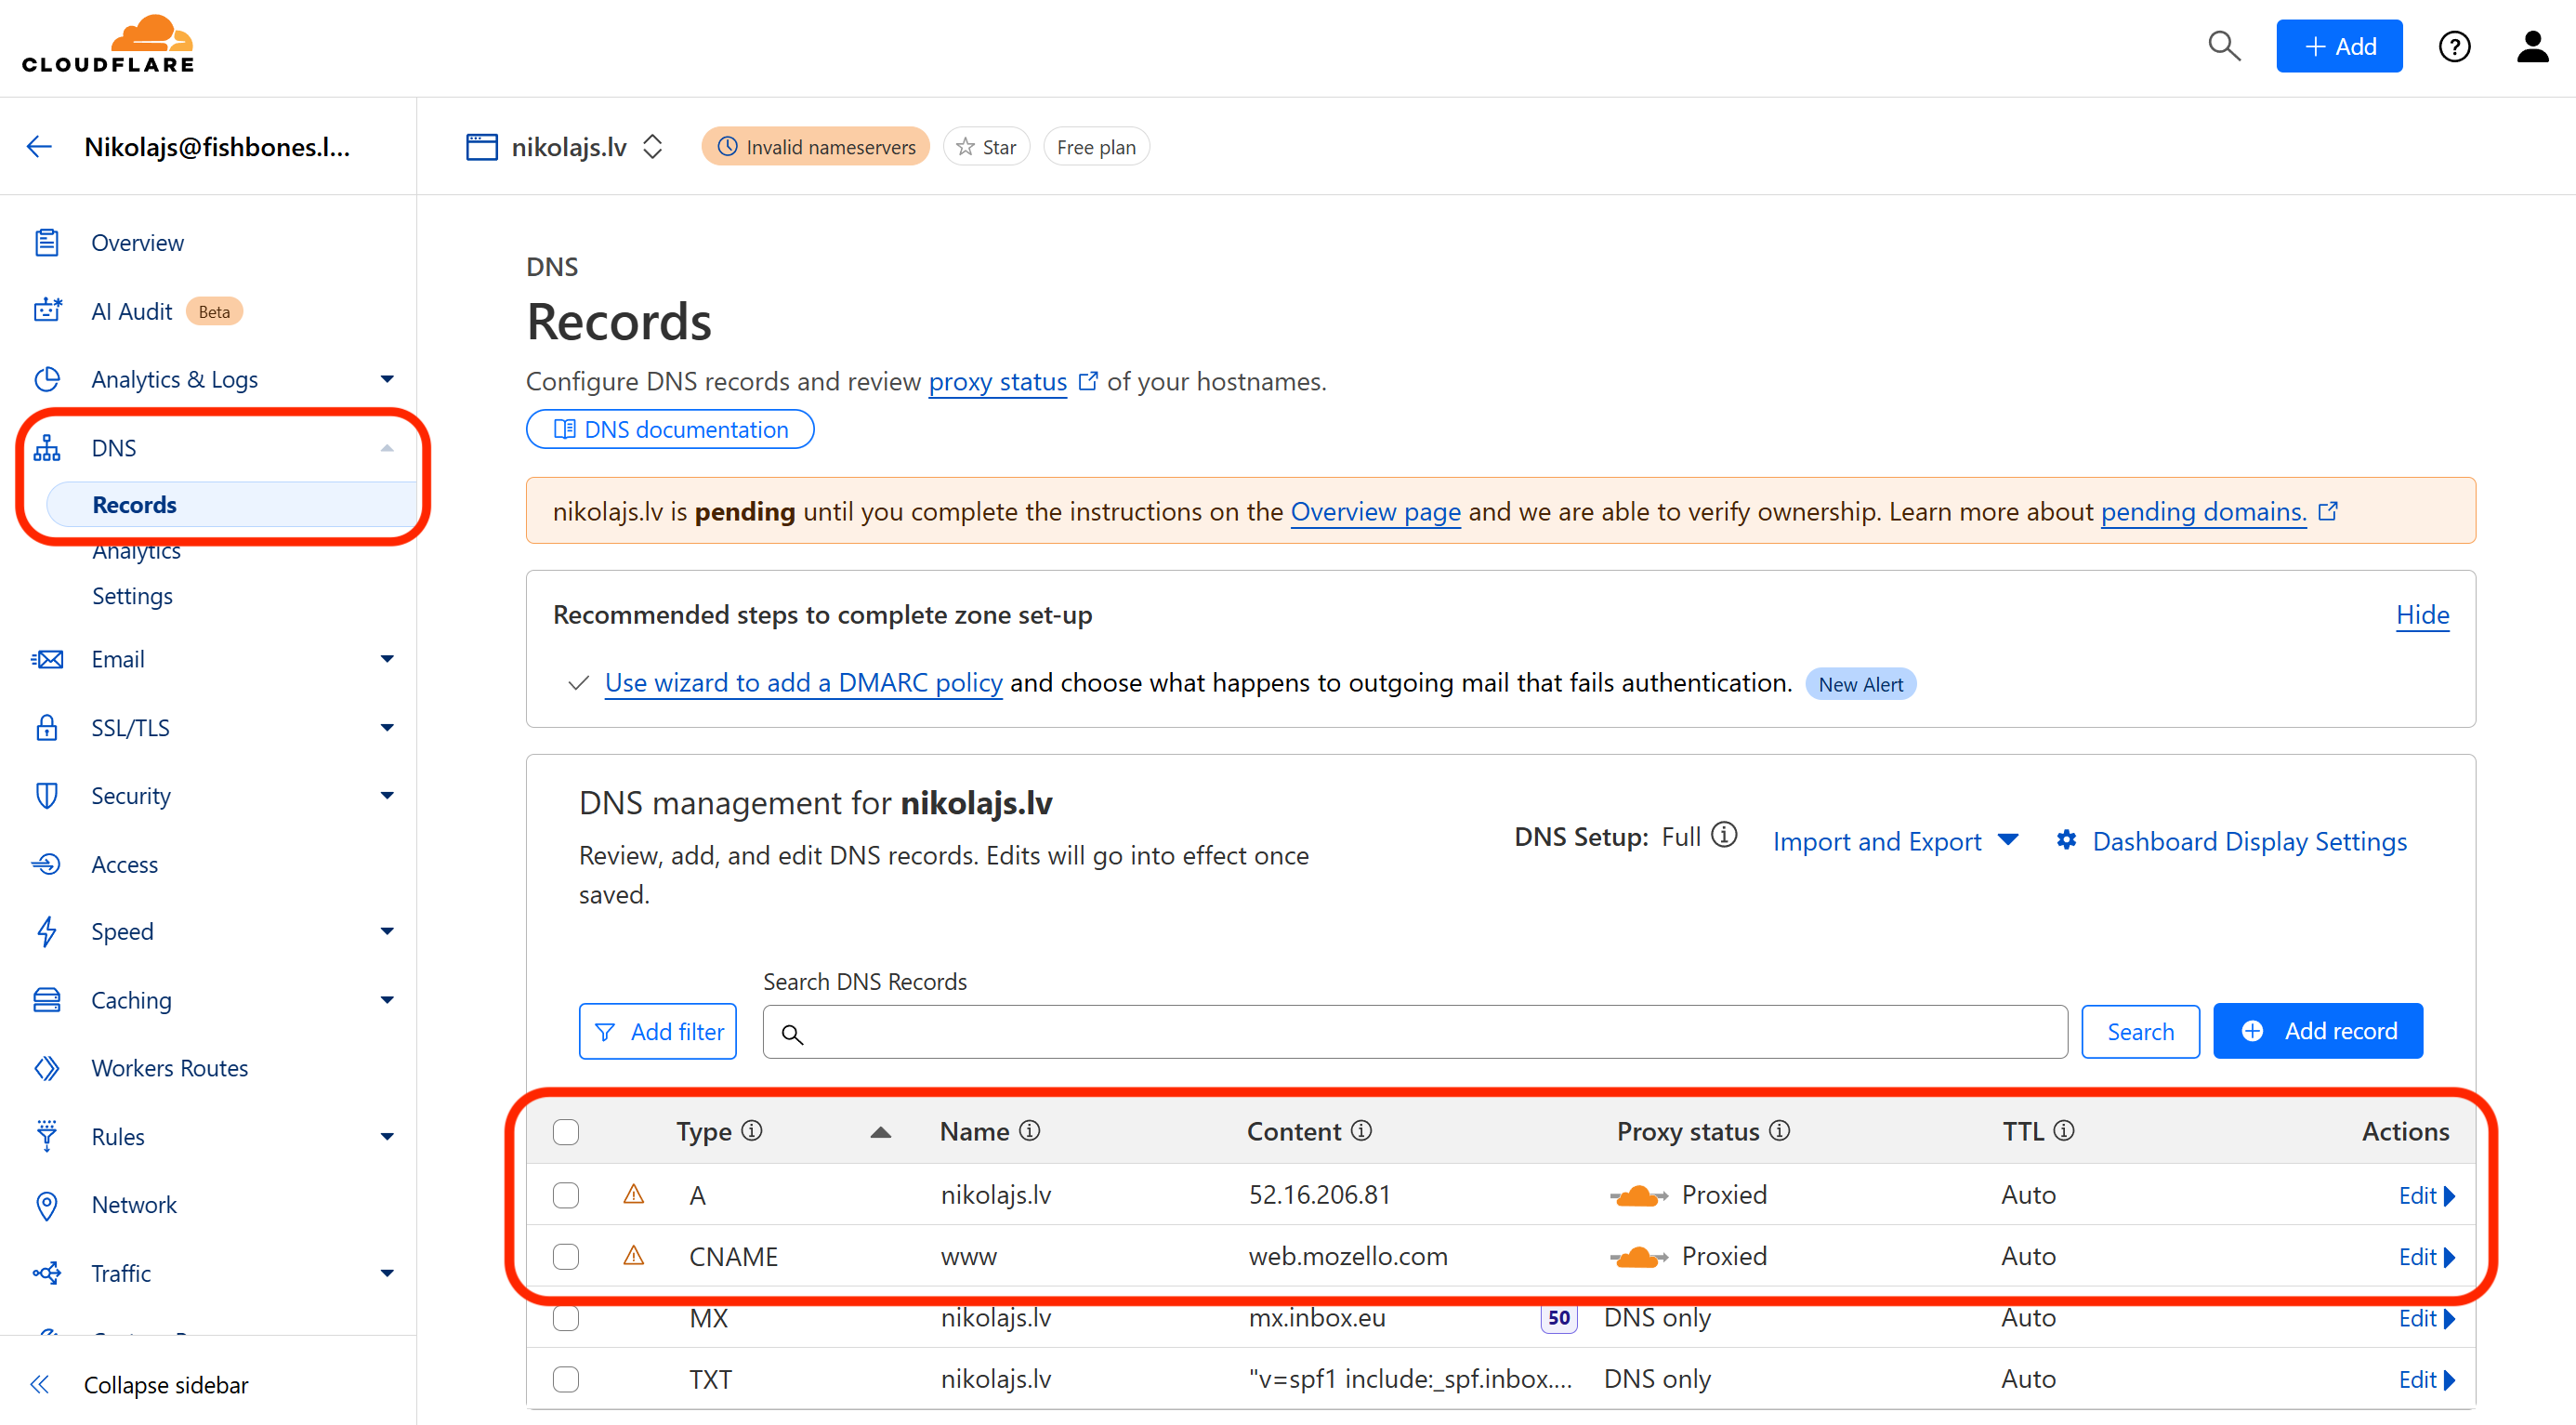
5. After selecting the plan and DNS scanning, Cloudflare will display the DNS records found. Remove or delete all A, AAAA, and CNAME records related to your main domain or www subdomain that don't align with the records described in Step 6. Keep all other records (especially MX and TXT) if they exist.
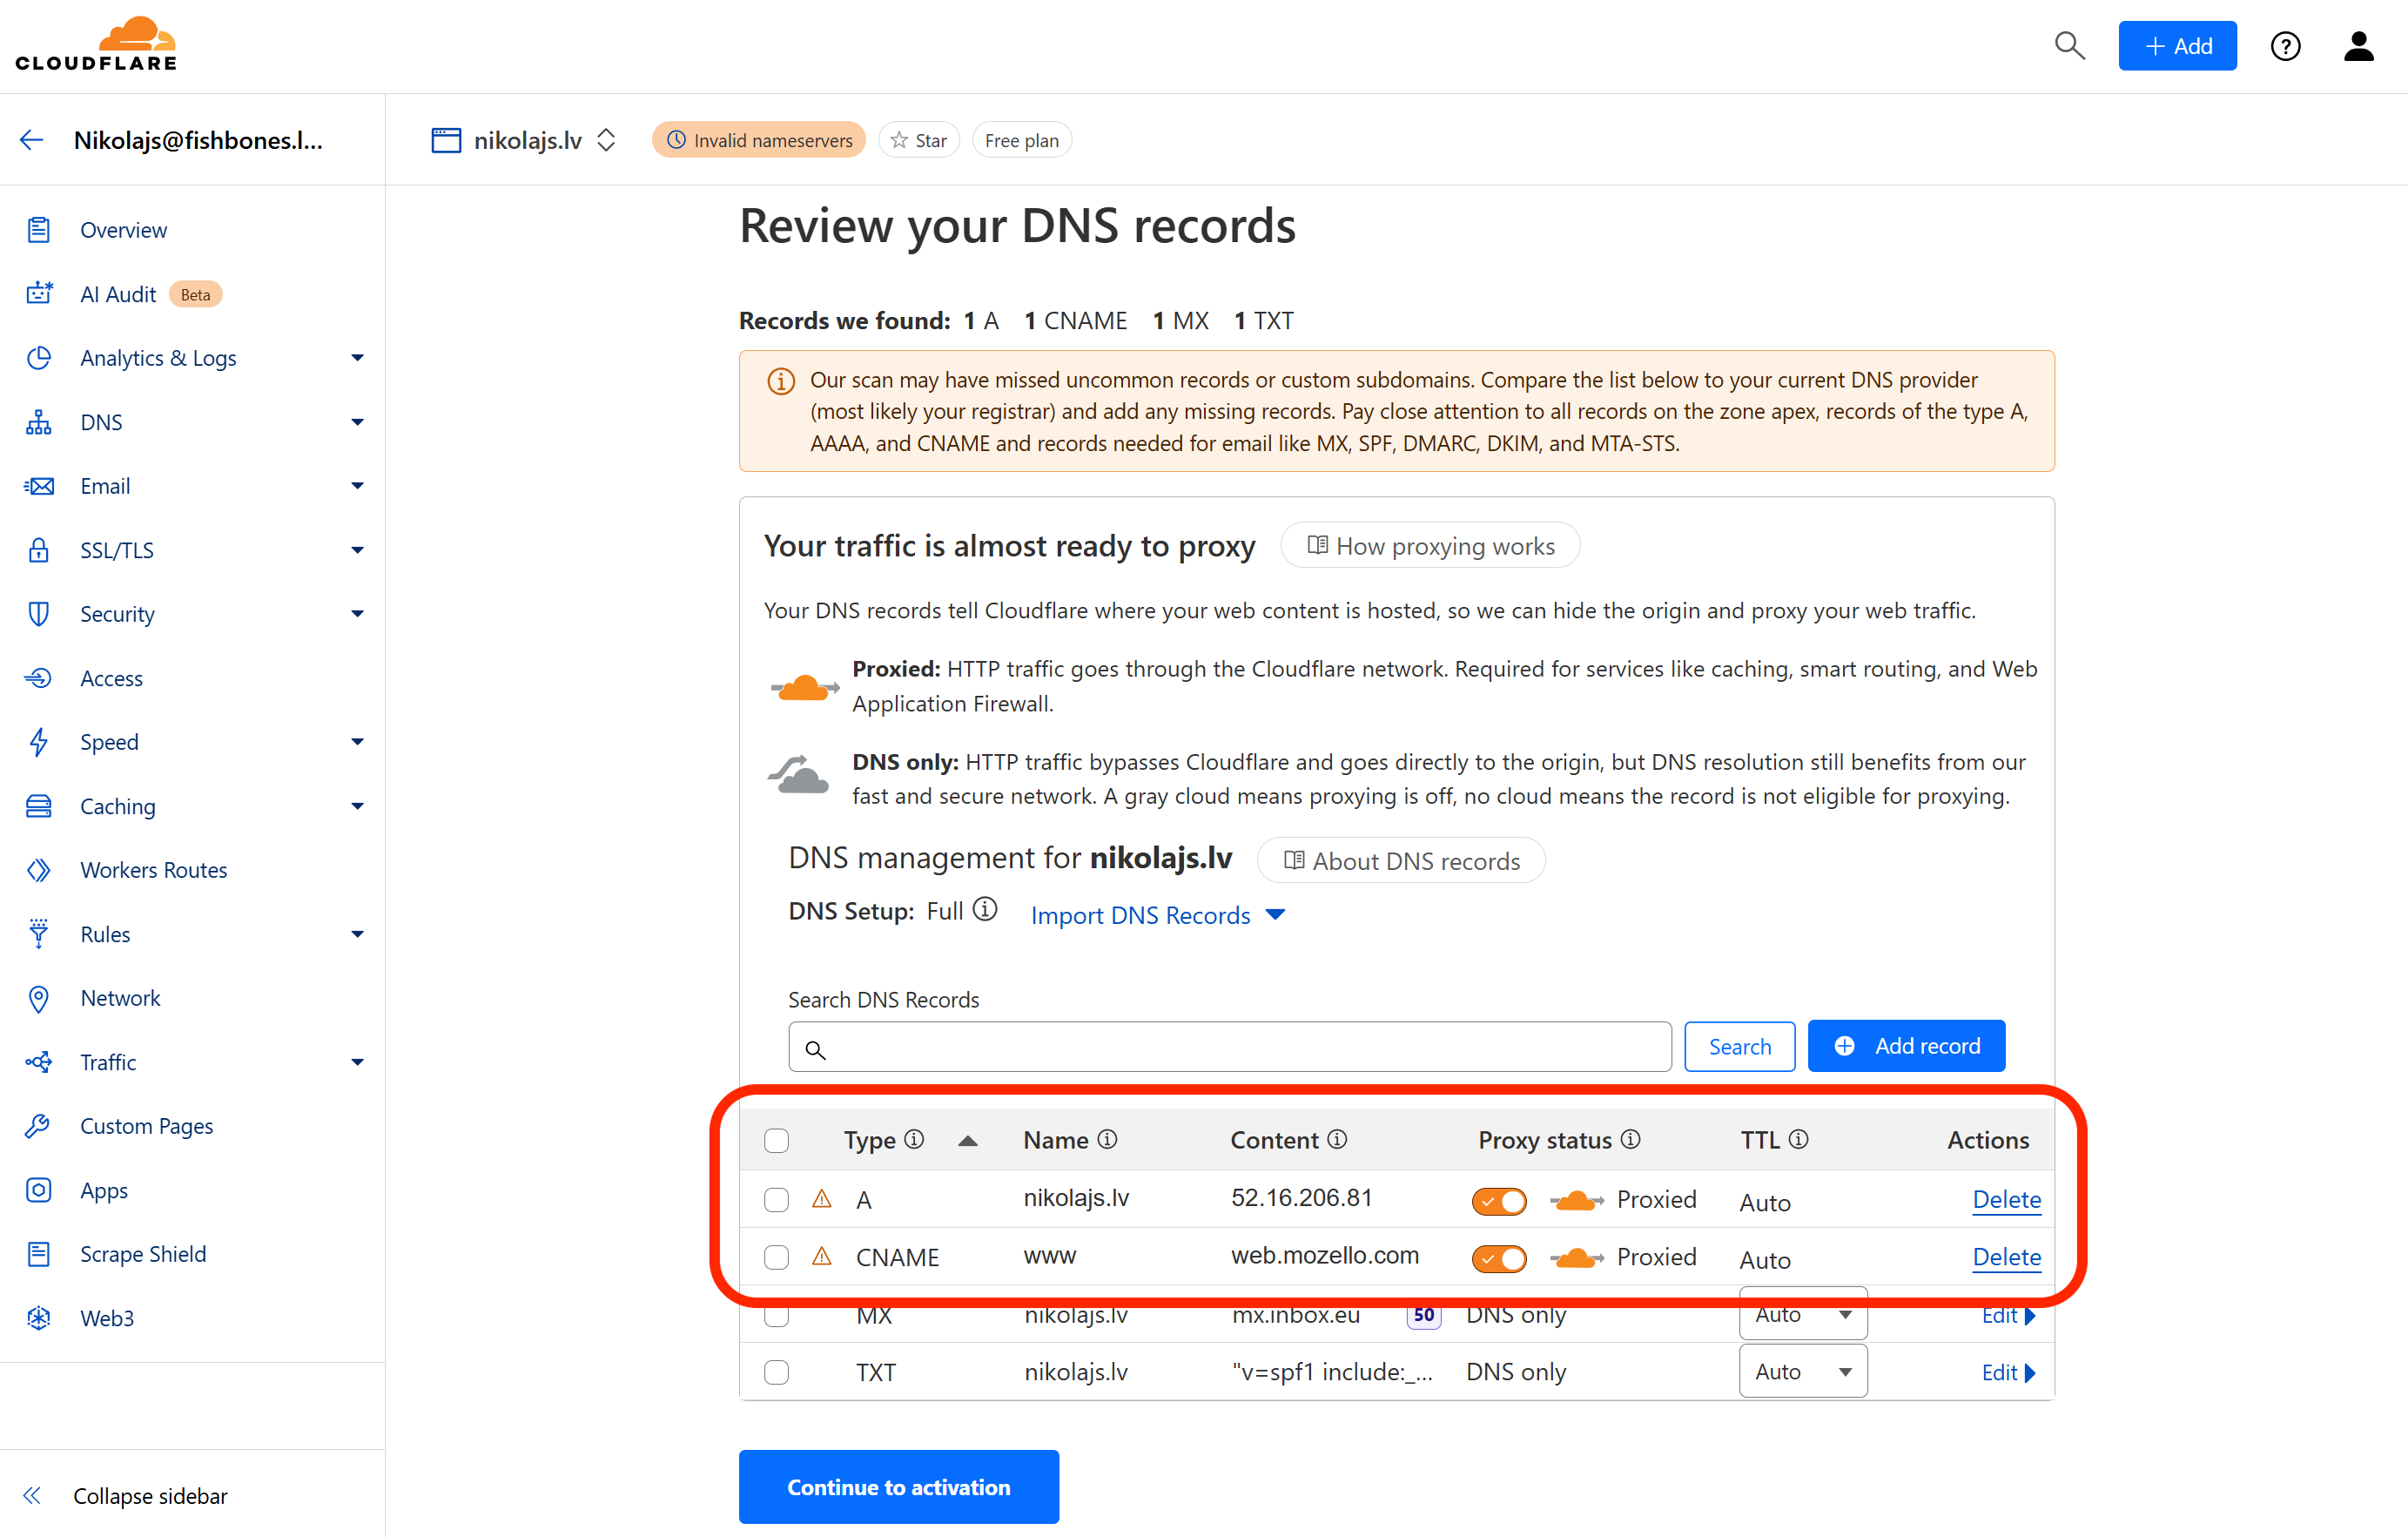
6. Make sure the correct entries are added. Mozello requires the following two entries:
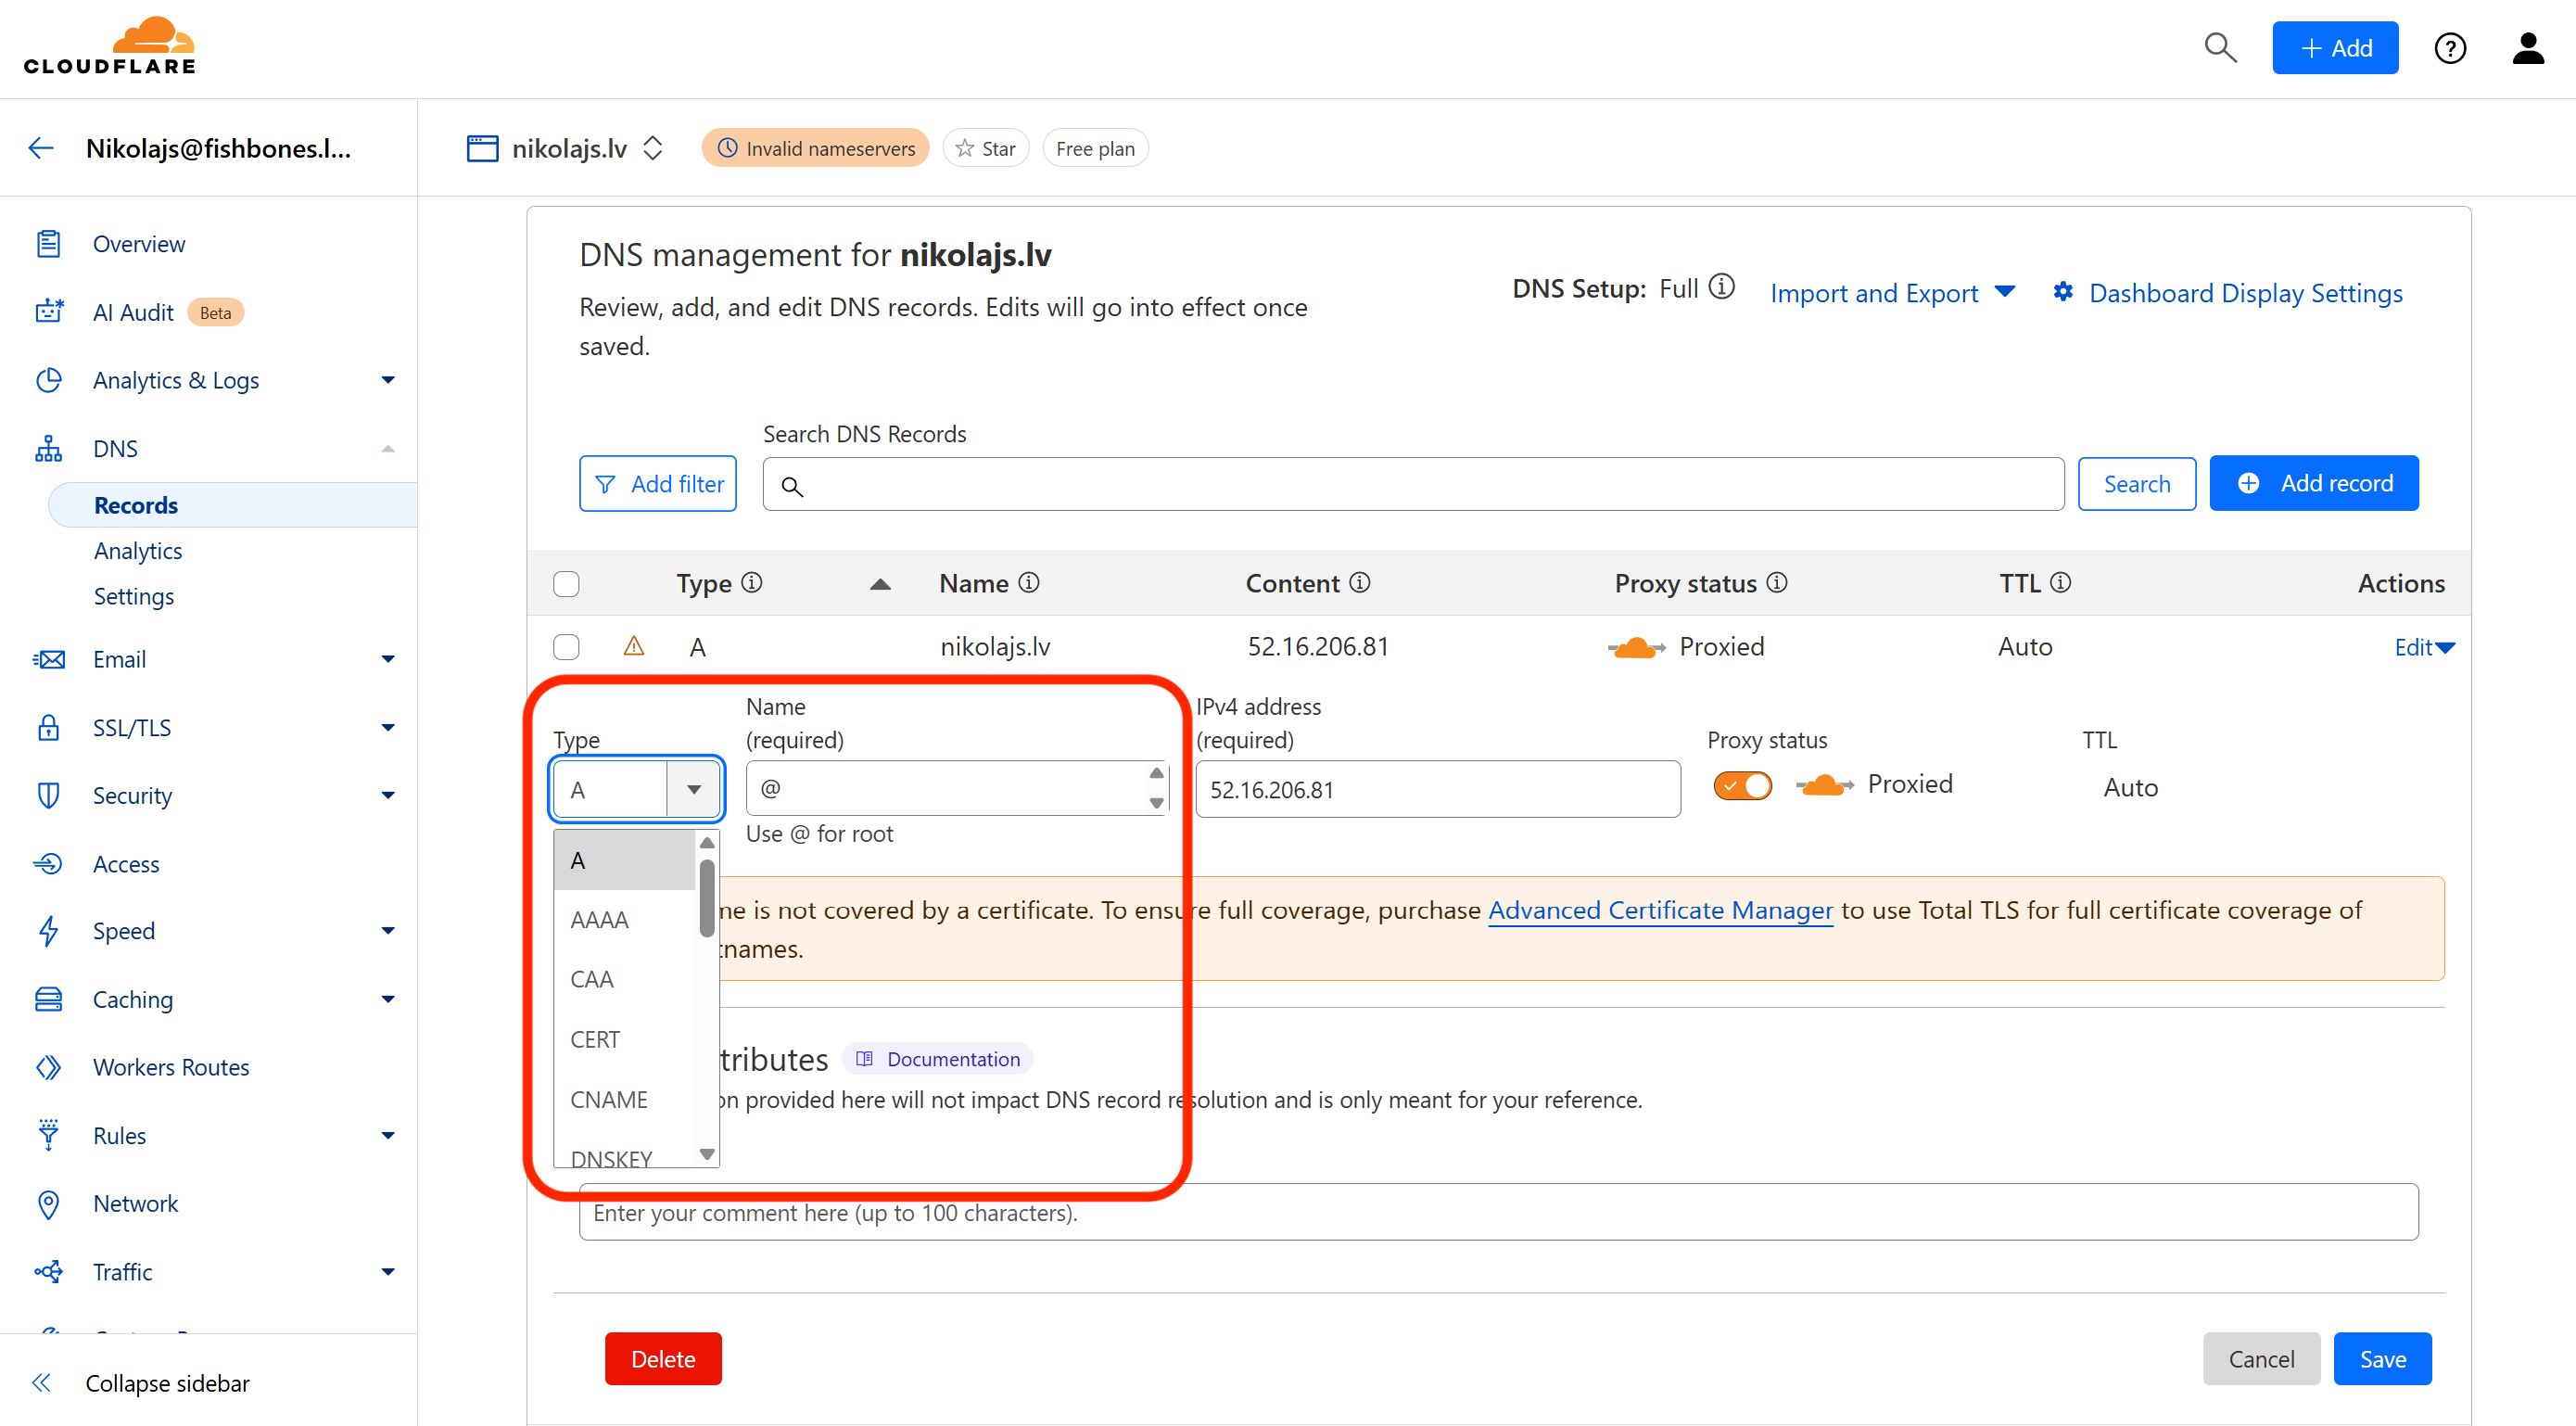
- The A entry where Name is yourdomain.com (or @) and Content is 52.16.206.81
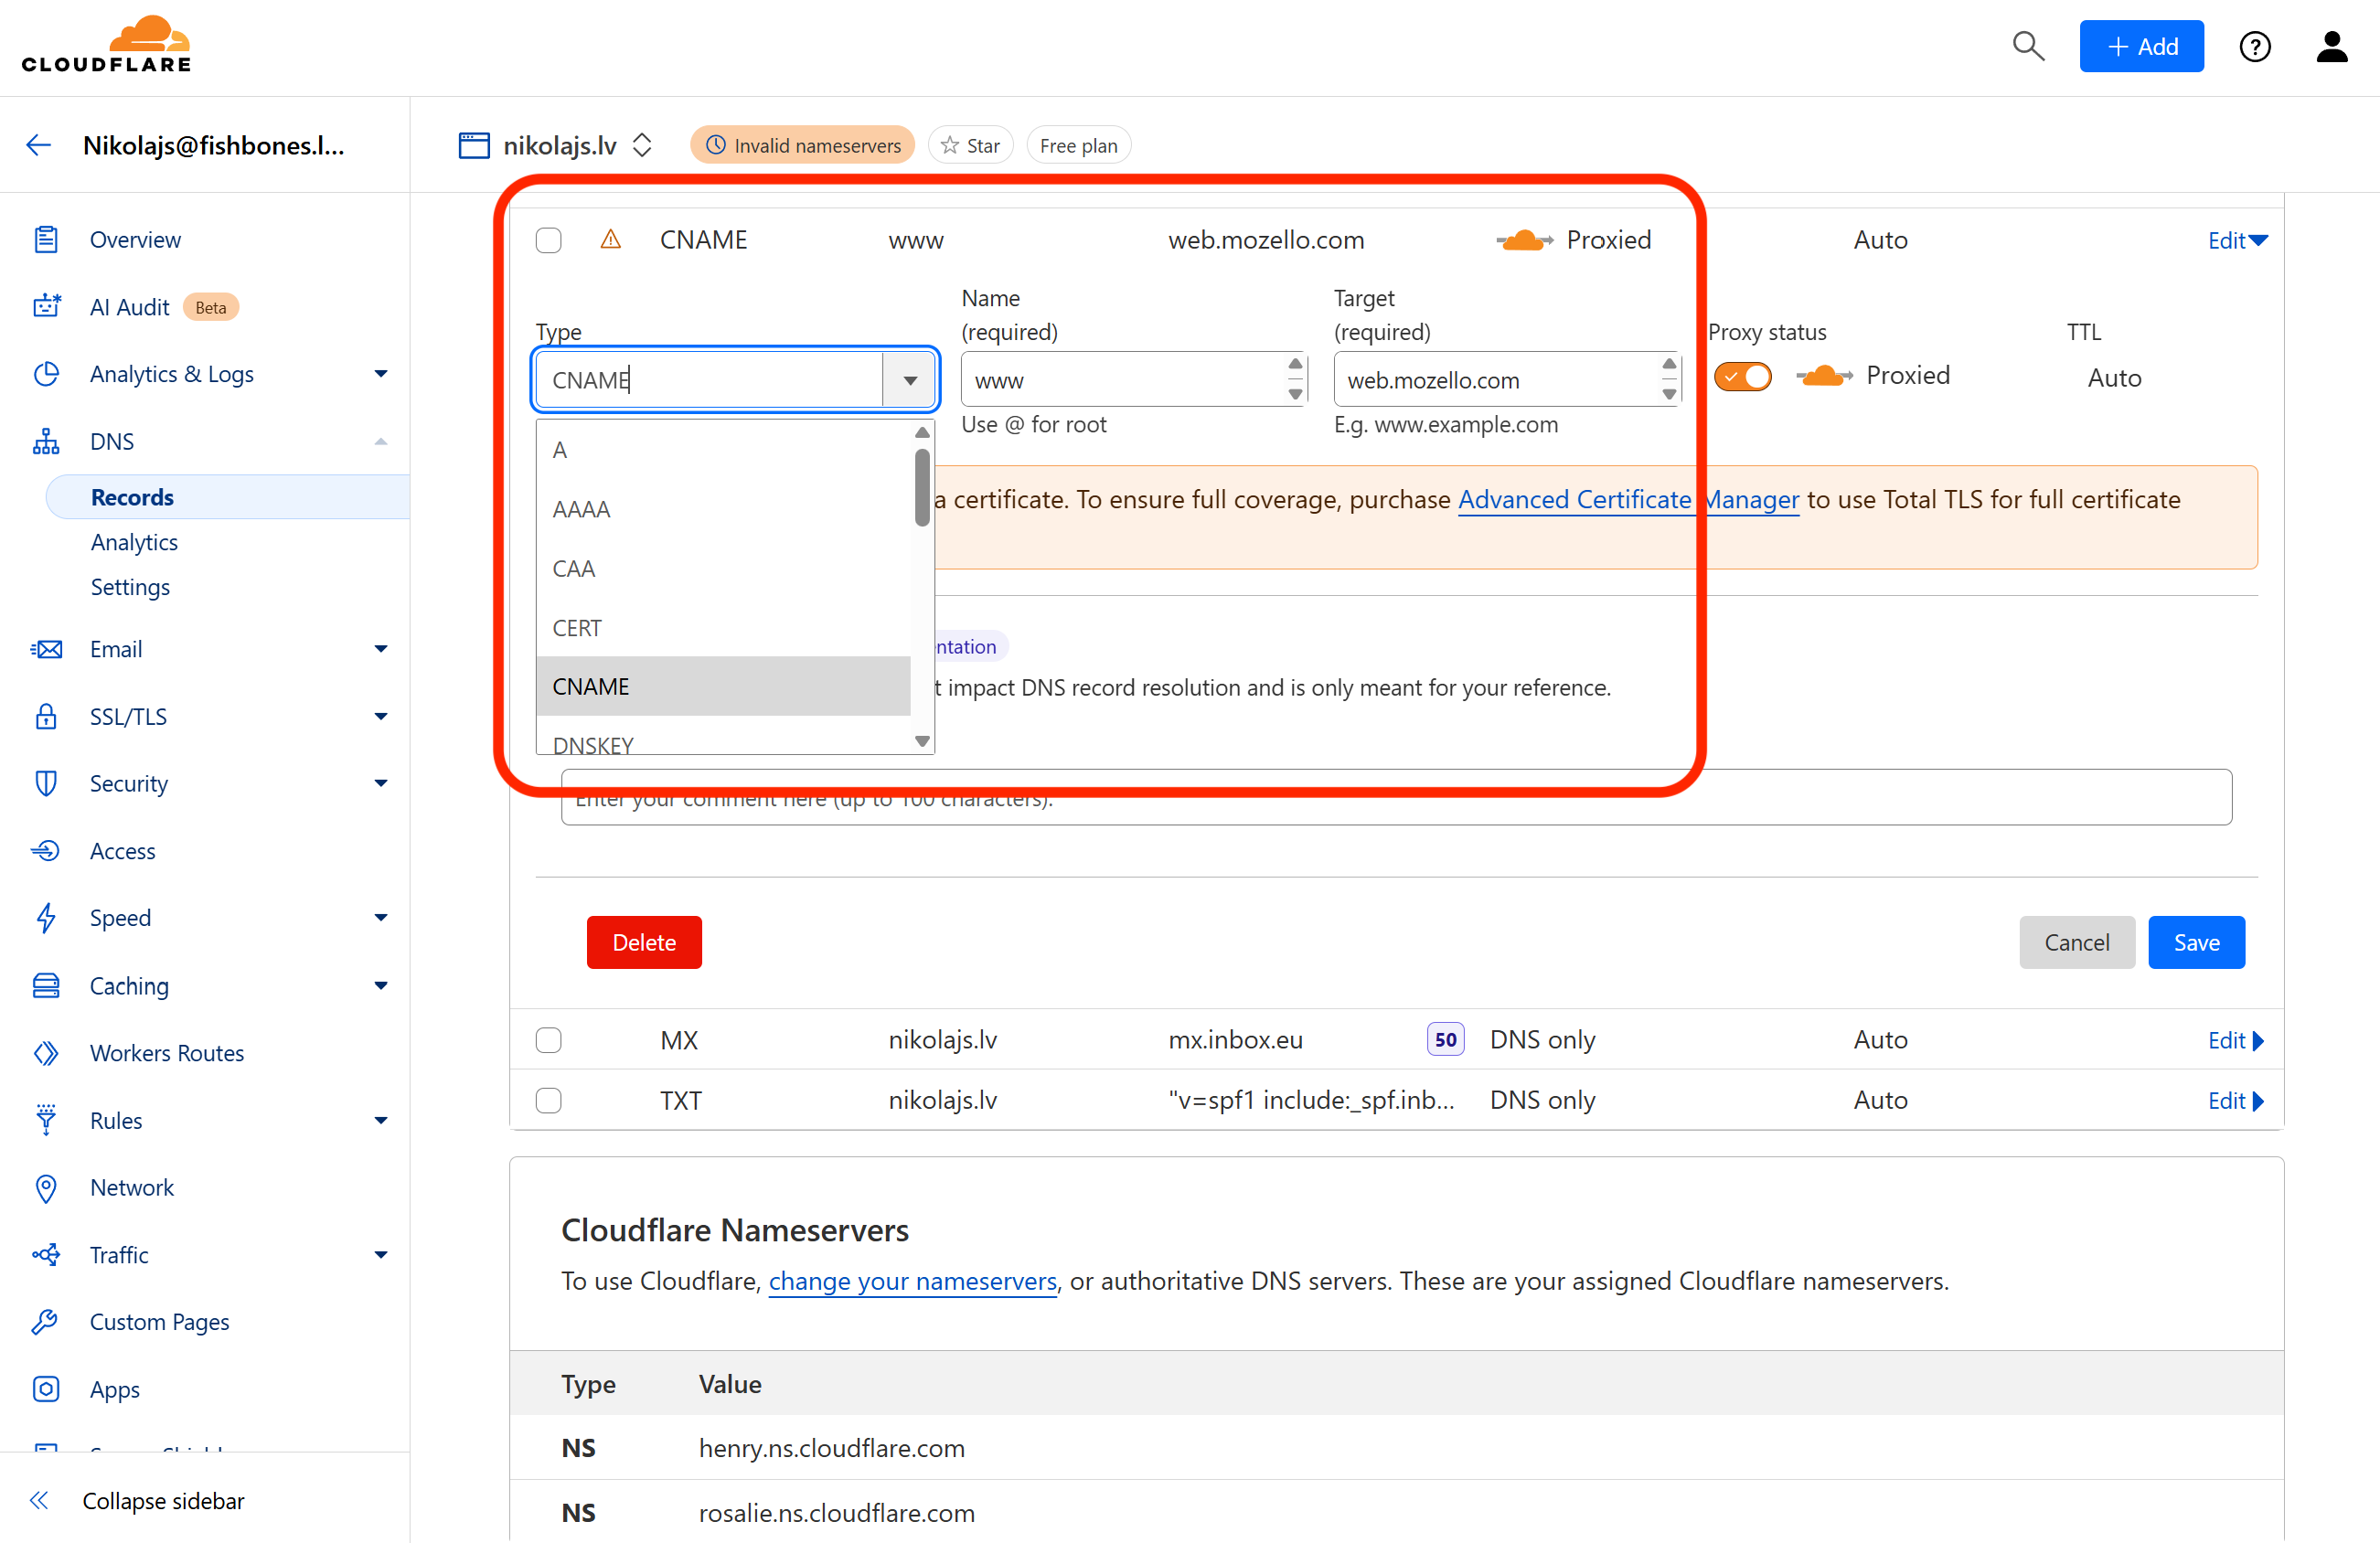
- The CNAME entry where Name is www and Content is web.mozello.com
If any of them are missing or the Name/Content value is different, add them manually by clicking the Add record button.
The A entry must be added exactly as follows (use @ next to Name as shown in the figure):
The CNAME entry must be added exactly as follows (enter www next to Name):
The final result should look similar to this image. There must be no other A, AAAA, or CNAME entries with the same Name.
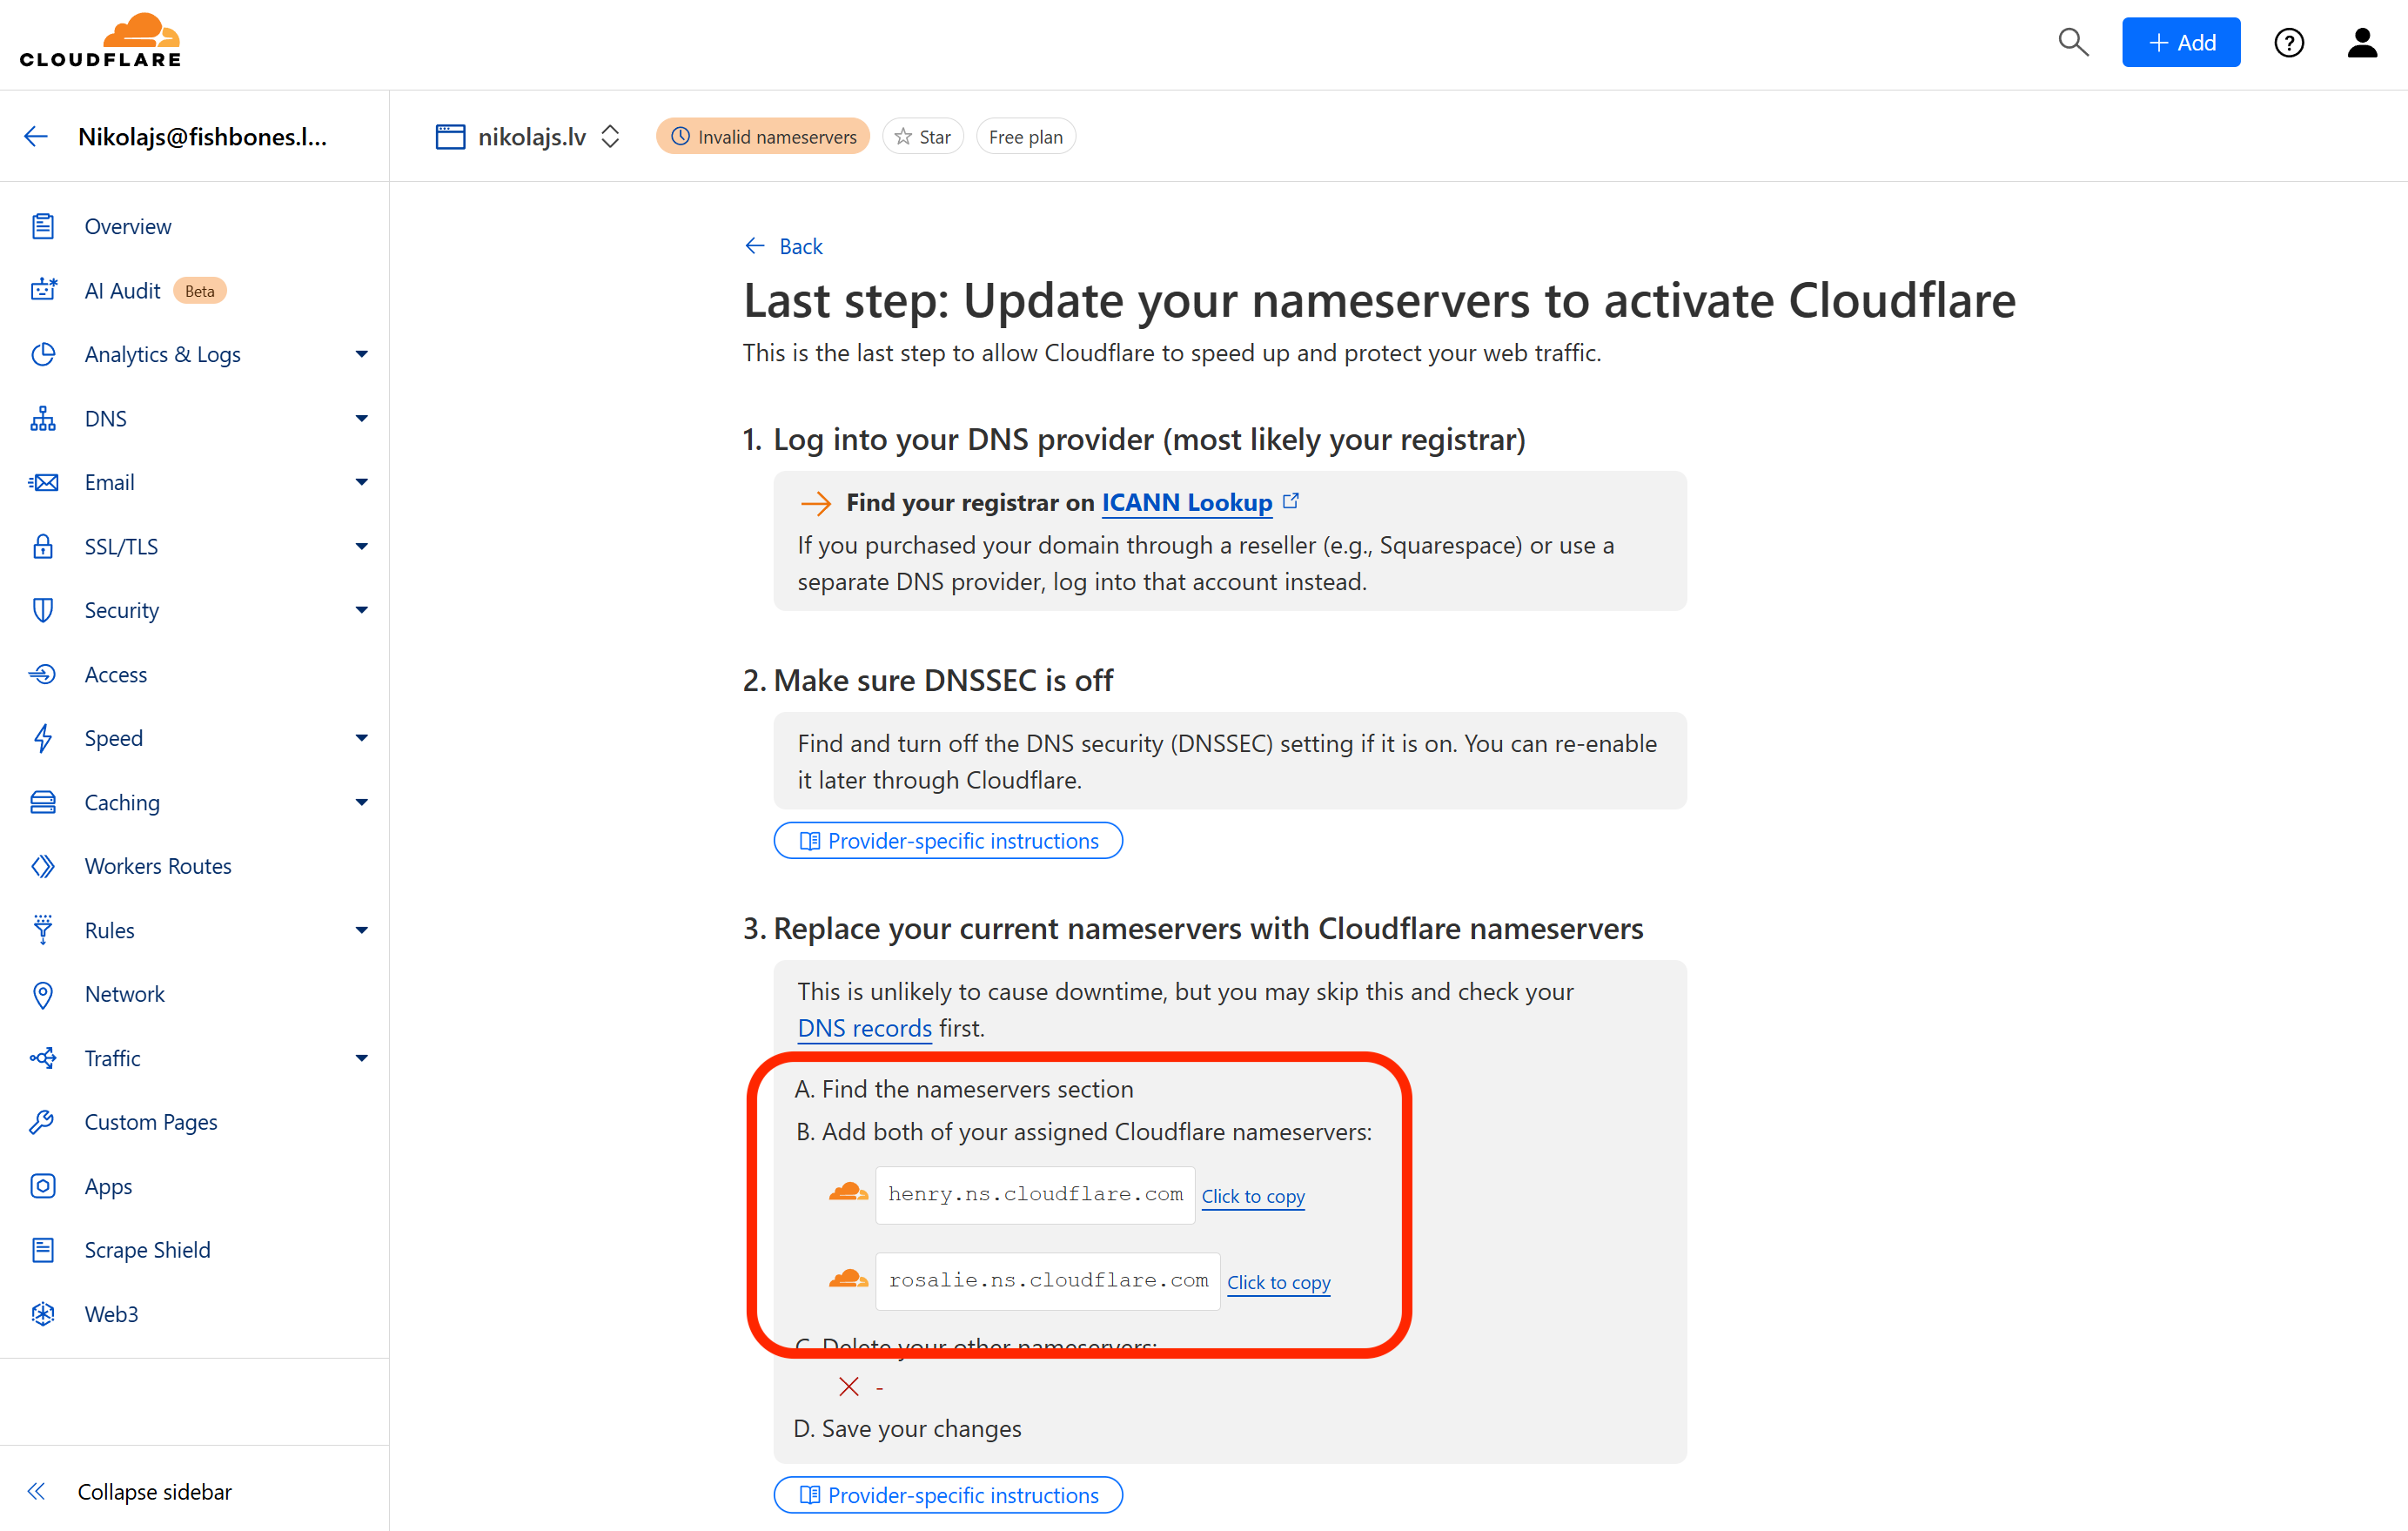
7. After adding the DNS records, continue with Cloudflare setup. When you reach the DNS section, check if the nameservers are available - they will be shown beneath the DNS records in the Cloudflare Nameservers section. Write down or copy these nameserver names, as you'll need to enter them in your domain management panel.
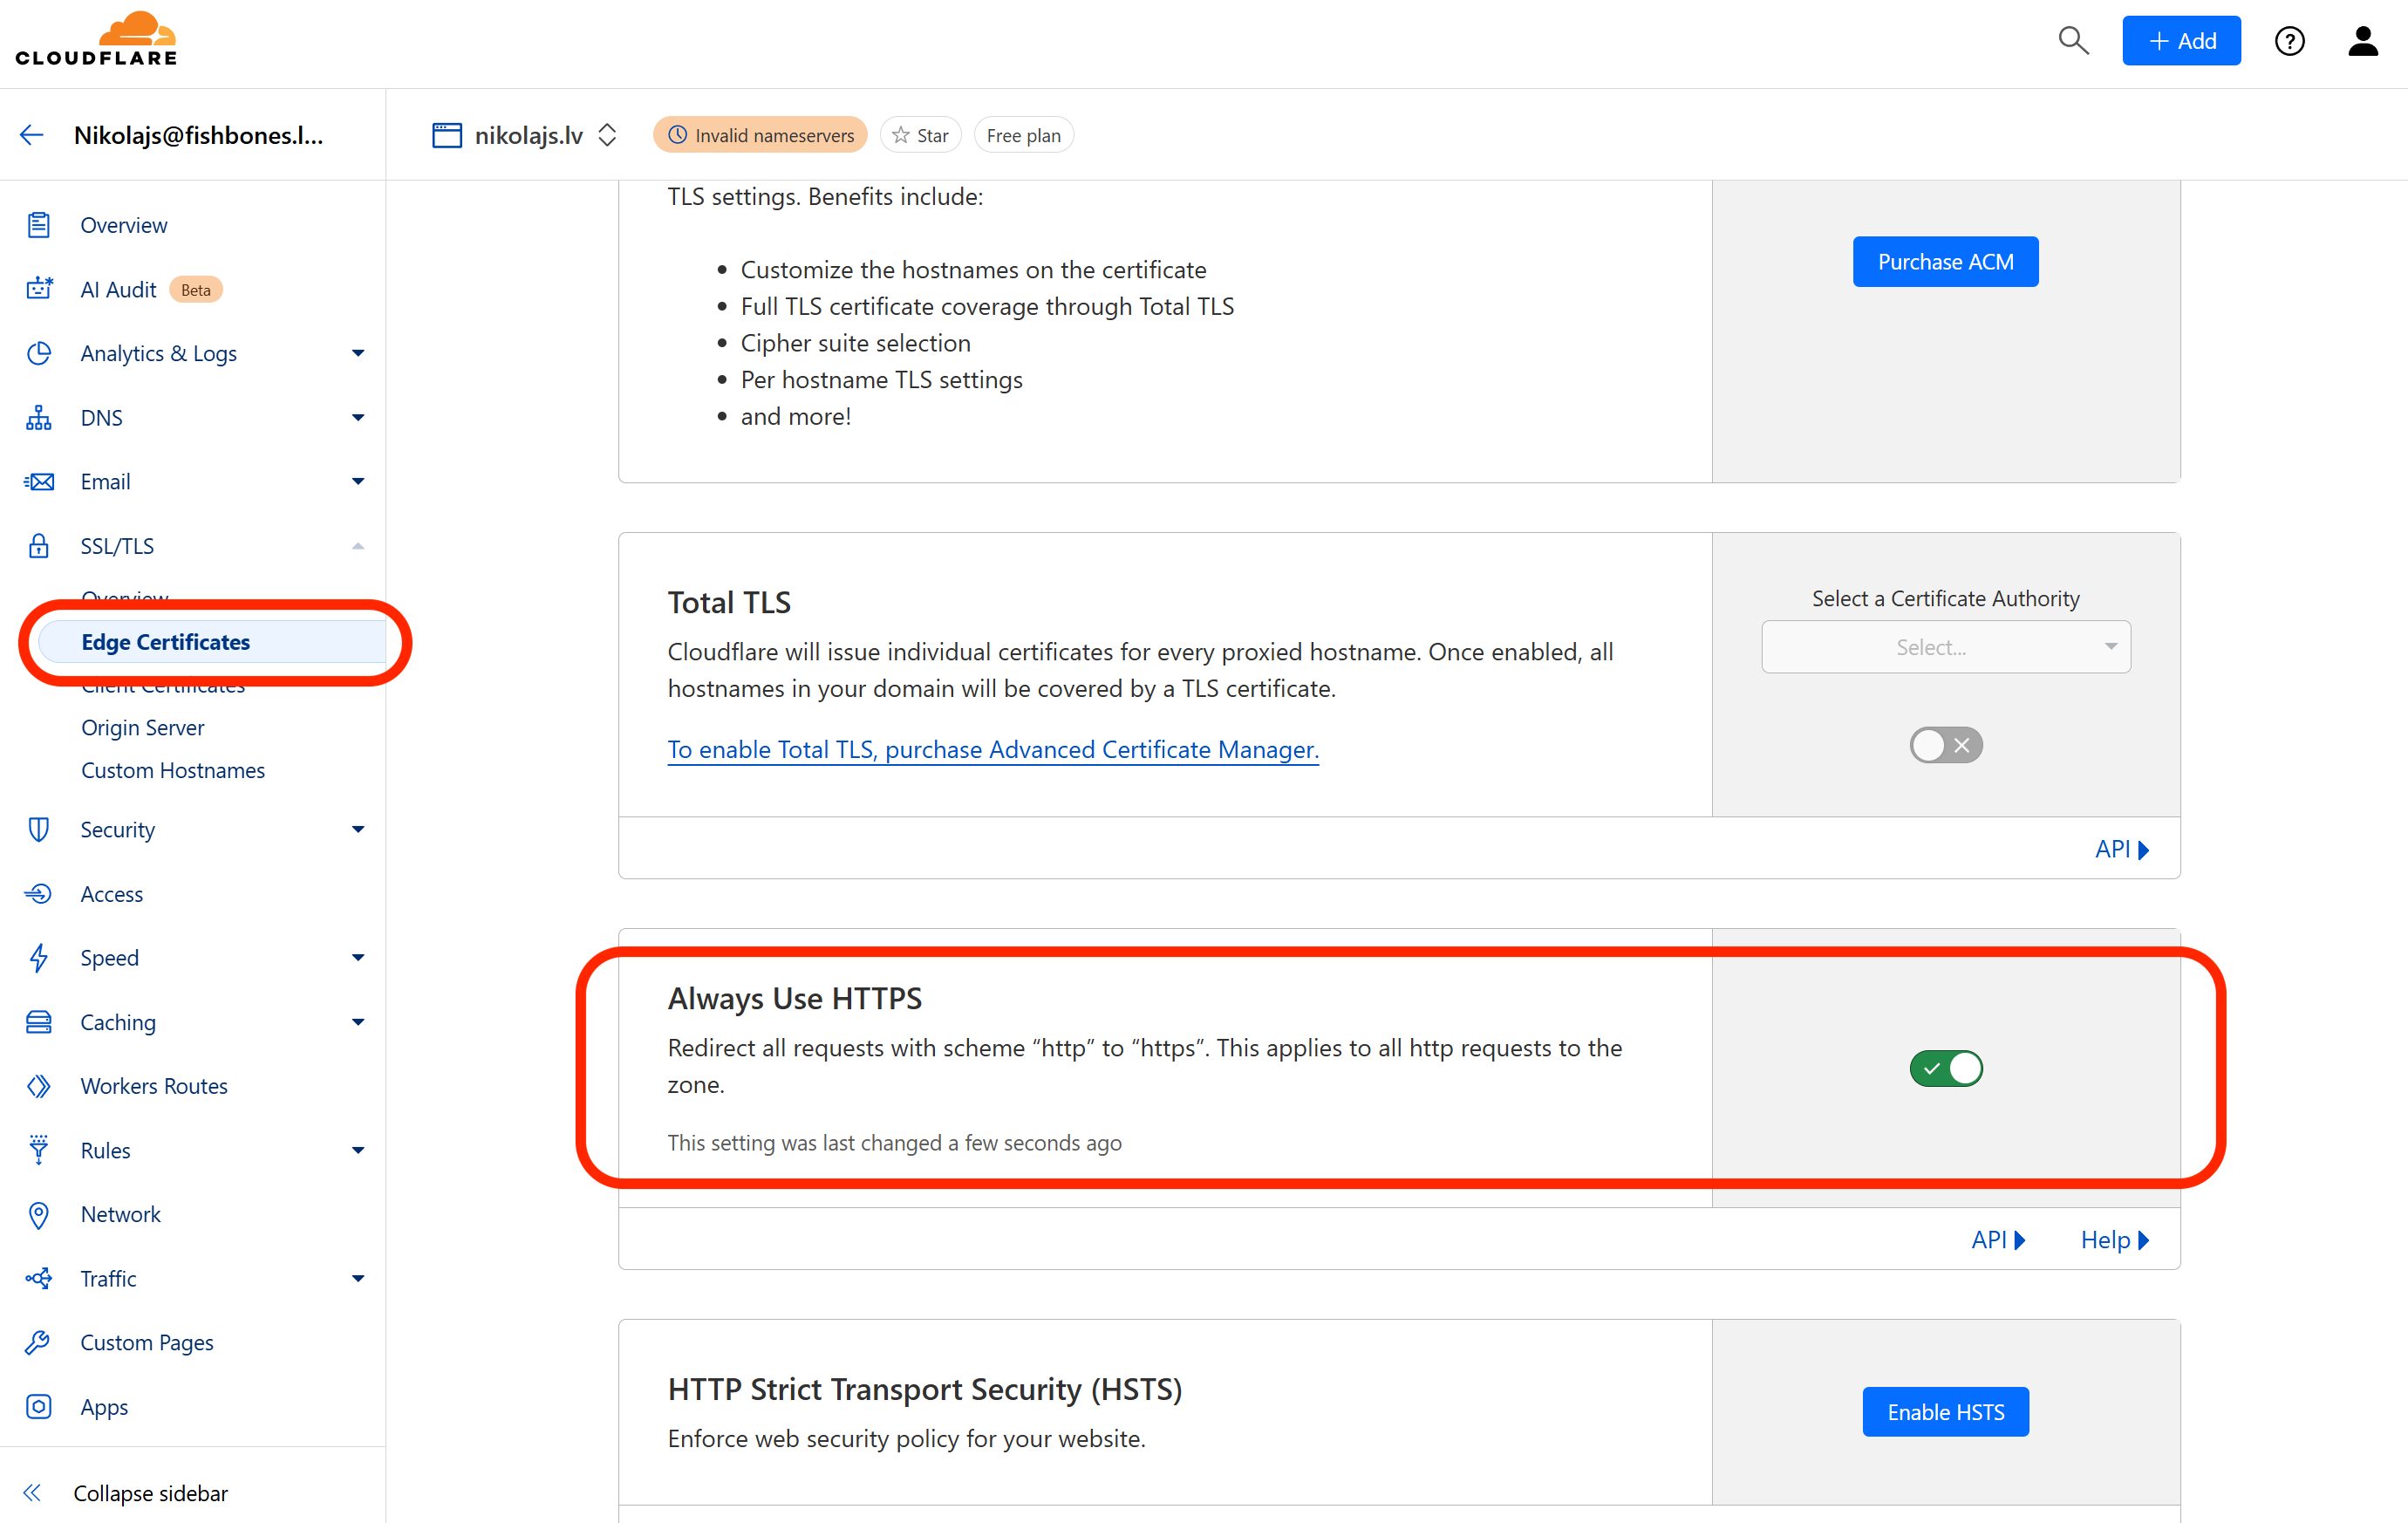
8. Next, visit the SSL/TLS section in the left-side menu and verify that SSL/TLS encryption mode is set to Flexible. If not, change it.

9. The next step is to log in to your domain management panel and change the nameservers to those specified by Cloudflare. You can find this panel where you purchased your domain. Alternatively, you can contact the customer service of the company with which you registered the domain and ask them to do it for you.
10. Then wait for Cloudflare to determine that the nameservers have been correctly changed. The waiting time can be 24 - 48 hours, but it usually takes a few hours. HTTPS will start automatically. As soon as the page is accessible with an https connection, without errors, you will know that everything is working properly.
11. Then visit the SSL/TLS -> Edge Certificates section in the left-side menu, and enable Always Use HTTPS so that your website always automatically redirects from an insecure to a secure connection.
What if it doesn't work?
If anything goes wrong, please contact our customer service and tell us exactly what is wrong so that we can help.
« Back