
Moving your business online part 2: Creating Your Website
Welcome back to our “Moving your business online” series. In Part 1: Planning Out Your Website, we covered the important early research and preparations you need to do to start off on the right foot. After completing the previous part, you should have 4 things:
- An understanding of how a website will benefit your business
- An outline of your website's structure
- Multiple keywords relating to your business
- A domain name
That was the hardest part. Now it's time for the fun stuff—building your website! We will make use of all the hard work you've already put in and, by the end of this article, you'll have your business website LIVE and ready to welcome its first visitors.
To get there, we need to complete 4 tasks:
- Create your website with all the pages you planned out in your structure
- Fill out your website with copy and photos
- Sort out the design
- Connect your social media accounts
So, log in to your Mozello website (or register if you haven't already), and let's get started.
Step 1: Building your website
Grab the outline of your website structure and make sure you're happy with it because we're about to bring it to life.
After choosing what type of website you're going to create—Website, Blog, or Store—and selecting whatever template you like (don't worry, you can change it later), you can immediately jump into putting your website plan into action.
At this point, we don't yet care how things look—our only goal is to create the pages that will make up your website. The design comes after!
To do that, click on the Pages section in the top right corner. Here you can see all the pages of your website and you can delete ones you don't need, rename existing ones, and add all sorts of new pages.
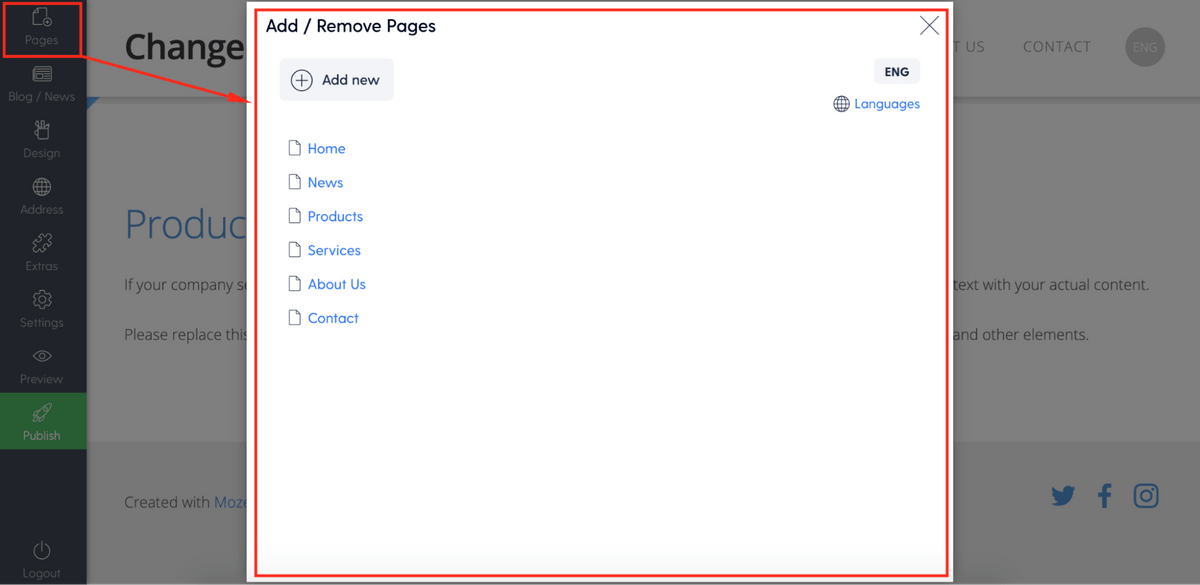
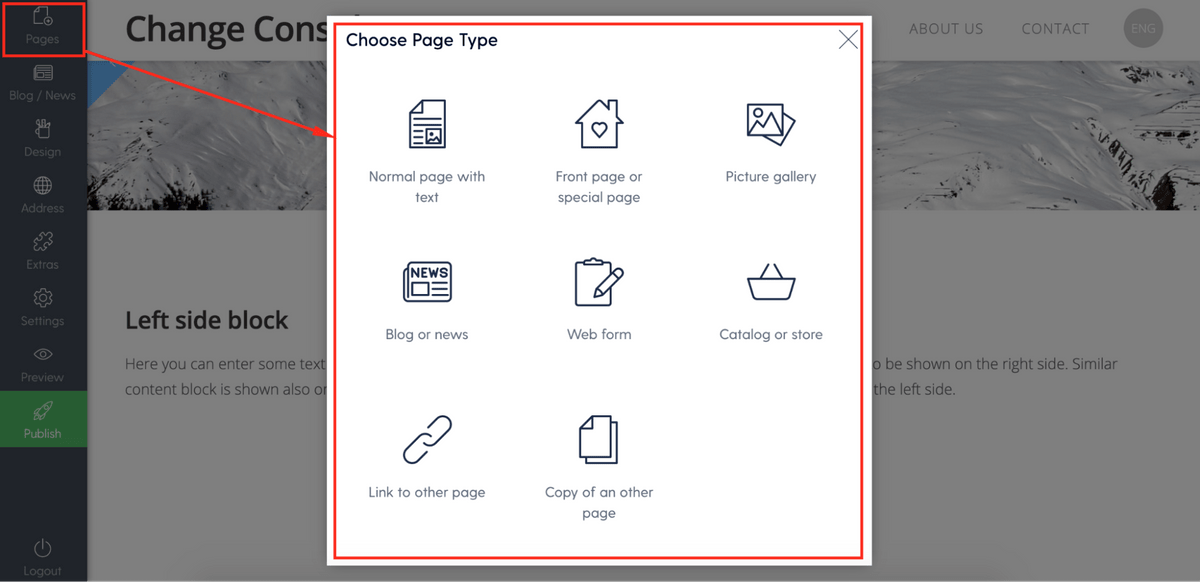
Simply start adding all the pages you have planned out one by one. With Mozello's versatile options, you can add whatever you had in mind—normal pages, catalogs, galleries, a blog, and more:
If you're planning to sell some products and you've added a catalog or store, then you can also already populate it with some placeholder products just to see what it looks like.
When the list of pages looks exactly like the list you have in your plan, then Step 1 is complete! Next up, let's fill it up with text and images!
Step 2: Fill your website with content
You can put your website plan to the side now. For this next step, you'll need the keywords that you researched earlier.
Some other things that will come in handy are some product and business photos as well as descriptions. Since this is a “Moving your business online” guide, then you should already have some of these from previous business endeavors. If you don't, no worries—you can prepare them on the go.
Simply start going through each of the pages you have created and add texts and photos that you want to use. Add your contact info on the “Contact us” page, add a description of who you are on the “About us” page, and, of course, don't forget to craft your homepage to your liking.
What should you include on each page? Check out this guide where we cover this very question.
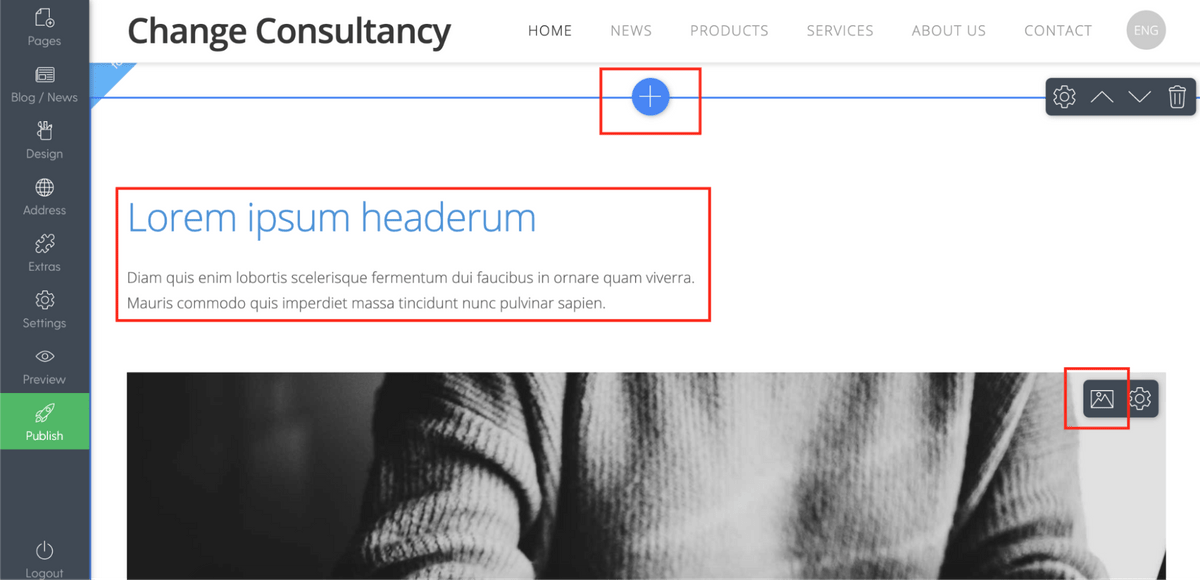
How can you add new sections on your pages and change texts and photos? It's simple - go to the page you want to edit and:
- Click the “+” wherever you want to add a new content section
- Click directly on the text to edit and format it
- Click on the image icon to upload your own image
Don't forget about your keywords! When writing the texts, it's important to include the keywords you researched in the previous part. Including these keywords will help your website appear on Google when people search for things related to your business. Explore this complete SEO guide to make sure you take advantage of all the SEO benefits Mozello has to offer.
Pro tip
If you're still unsure about what kind of content to include on certain pages and how to structure them, then don't hesitate to sneak a peek at what your competitors are doing and borrow some ideas from them.
Also, don't worry if things aren't perfect from the very start. You can come back and change anything and everything whenever you think of some better texts or find some better photos.
When you have added all the texts and images you want to your website, we can move on to a bit of visual design.
Step 3: Design and branding
In this step, we'll make sure that your website looks great and people recognize your business.
Choose a better template
Remember that template you chose at the very beginning of your website creation? Well, now that you have added some photos and texts, maybe you're not happy with your choice anymore.
Don't worry, you can still change it and find a template that suits your needs better. To do that, simply head over to the “Design” section in the right column menu and select “Change Design”. You can then browse all the available templates, try them out, and choose which speaks to you the most.
We were purposefully avoiding design up until this point because now it should be easier to understand what works and what doesn't with all the texts and photos already added.
Of course, you don't HAVE to change templates. If you're happy with what you've been working with so far, then leave it as it is!
But what if you find the perfect template, but don't like the colors or the fonts?
Then you can change them!
Colors and fonts
In the same place where you found the “Change Design” option (in the “Design” tab from the right menu), you'll also see the options to “Change Colors” and “Change Font Scheme”.
After navigating to the former, you can easily change the color scheme for any template. The presets offered should be enough to find suitable colors, however, if you know exactly what you want and it's not available from the given color schemes, then you can make further changes by navigating to the “Advanced” tab underneath the preset colors.
It's even easier when it comes to fonts. After clicking “Change Font Scheme”, you'll see a long list of various fonts that you can quickly and easily try out until you find the scheme that suits you best.
Next up, let's add your business logo.
Logo and favicon
Adding your logo is as easy as everything else—simply click on your business name in the top section of the website and you'll be able to change it by either rewriting it or adding a picture of your logo:
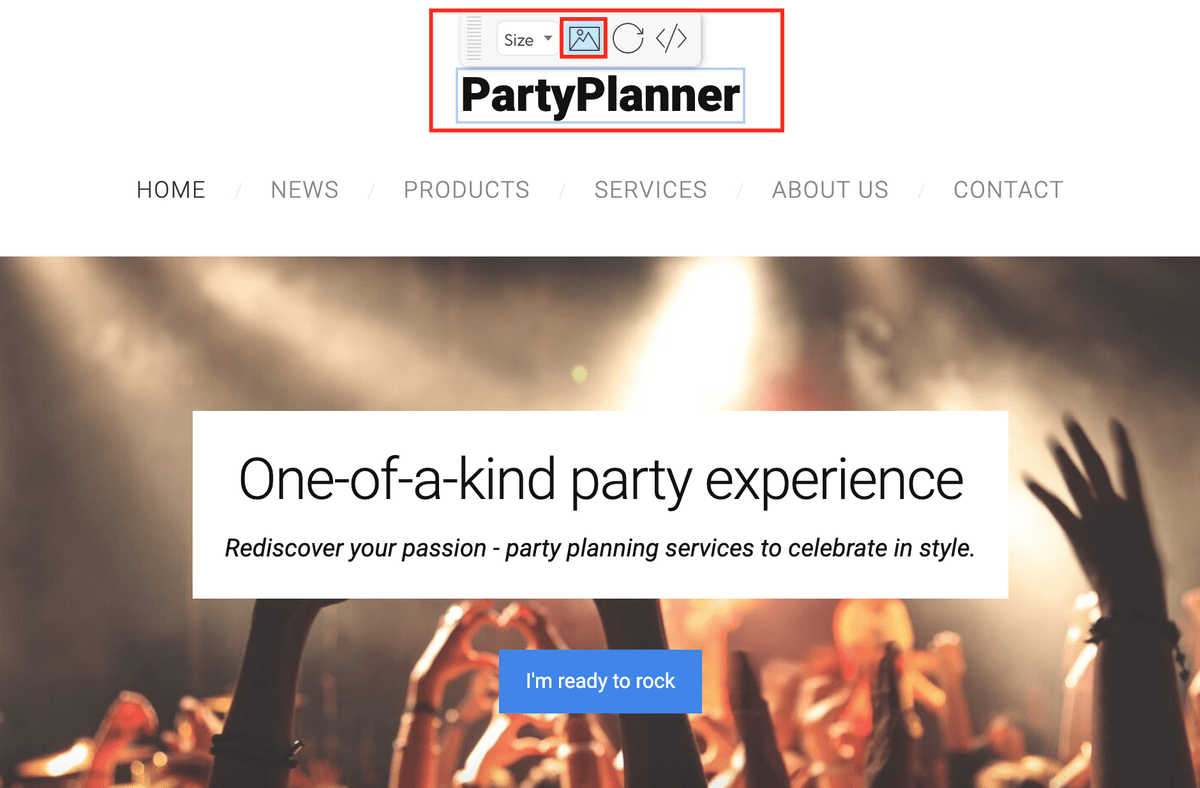
If you choose to use an image, make sure it's high quality so you don't look like an amateur.
With Mozello, you can also add a website icon, also known as a favicon, to make your website look more professional. A favicon is a small logo that appears on your website tab in the browser here:
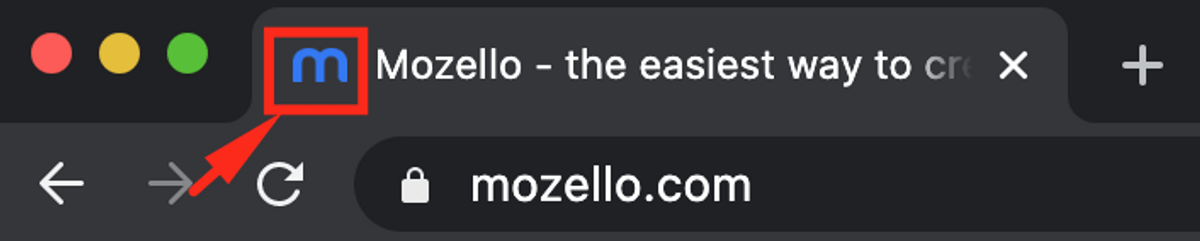
To add a favicon, simply head over to the Settings menu and you'll see the “Website Icon” section where you can change it to your own branded logo.
Nice! Your website is nearing completion!
Step 4: Connect your social media accounts
Your website is almost ready! One more little thing we need to do is to connect your social media accounts.
People often rely on social media to discover more about the business and learn the latest news, so it's good practice to have social media icons appear somewhere on your website.
You'll find the social media icons in the footer of your website and you can add links by clicking on any of them, which will open the following page:
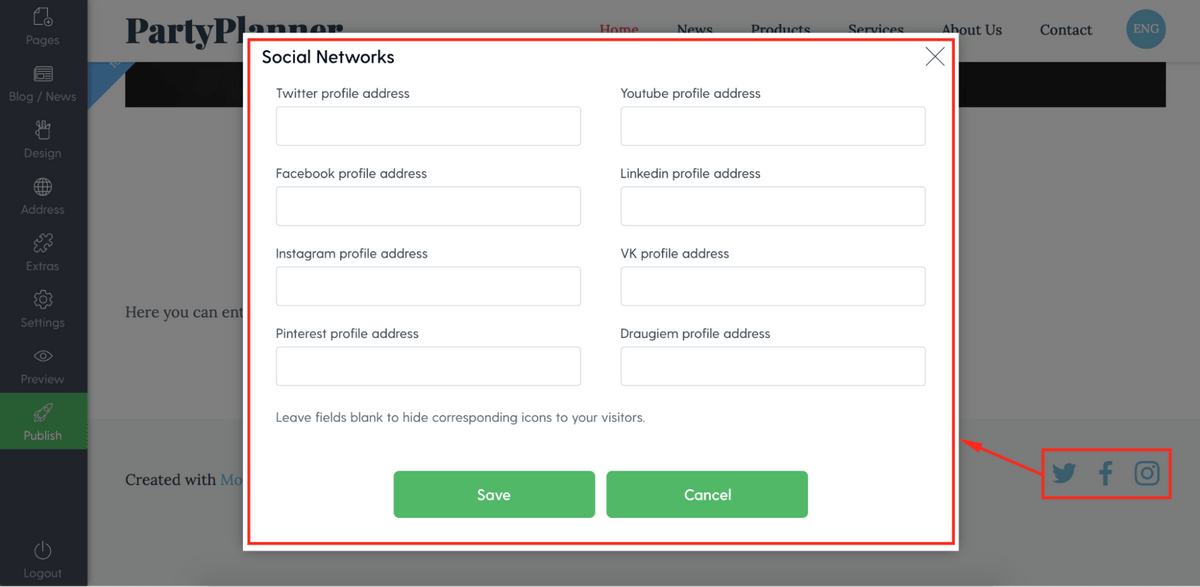
Simply add the links to your social media profiles for the networks that you're active on and that's it!
Congratulations—you have built a website!
You have created the structure, populated it with content and photos, polished the design, and added social media links—your website is ready to be put to use.
At this point, you can add your products, if you're planning to sell anything, and some blog posts, if you created a blog section.
Run through everything one more time and do some final checks to make sure everything is in order and when you're happy with the result, it's time for that big moment:
Click the green Publish button!
And just like that, your website is live. It's a good idea to show it to some friends to see what they think.
In the next part of the series, we'll cover all the things you should connect to your website to supercharge it. You'll learn how to connect and use Google Analytics for tracking visitors, how to use Google Search Console to find out how your website is performing on search engine result pages, how to add a Facebook Pixel for your marketing activities, and more.
Stay tuned!