How to create your own online store with Mozello - step-by-step walkthrough.

E-commerce is booming and more and more people are taking their shopping online. For anyone looking to sell goods or services, setting up an online store has become an integral part of growing their business.
An online store:
- helps you reach potential clients and sell at any time of the day or night;
- helps you reach clients across the country and around the world;
- enables you to boost sales
- makes it possible for your business and your products to be found on Google and other search engines (SEO)
- enables more effective digital marketing activities;
- improves the credibility and visibility of the company.
In this tutorial you will learn how to create your own online store, using only skills you already have and Mozello.
View step-by-step video tutorial.
Step 1: Register: quick and easy
Registration is free and does not take more than a minute of your time.
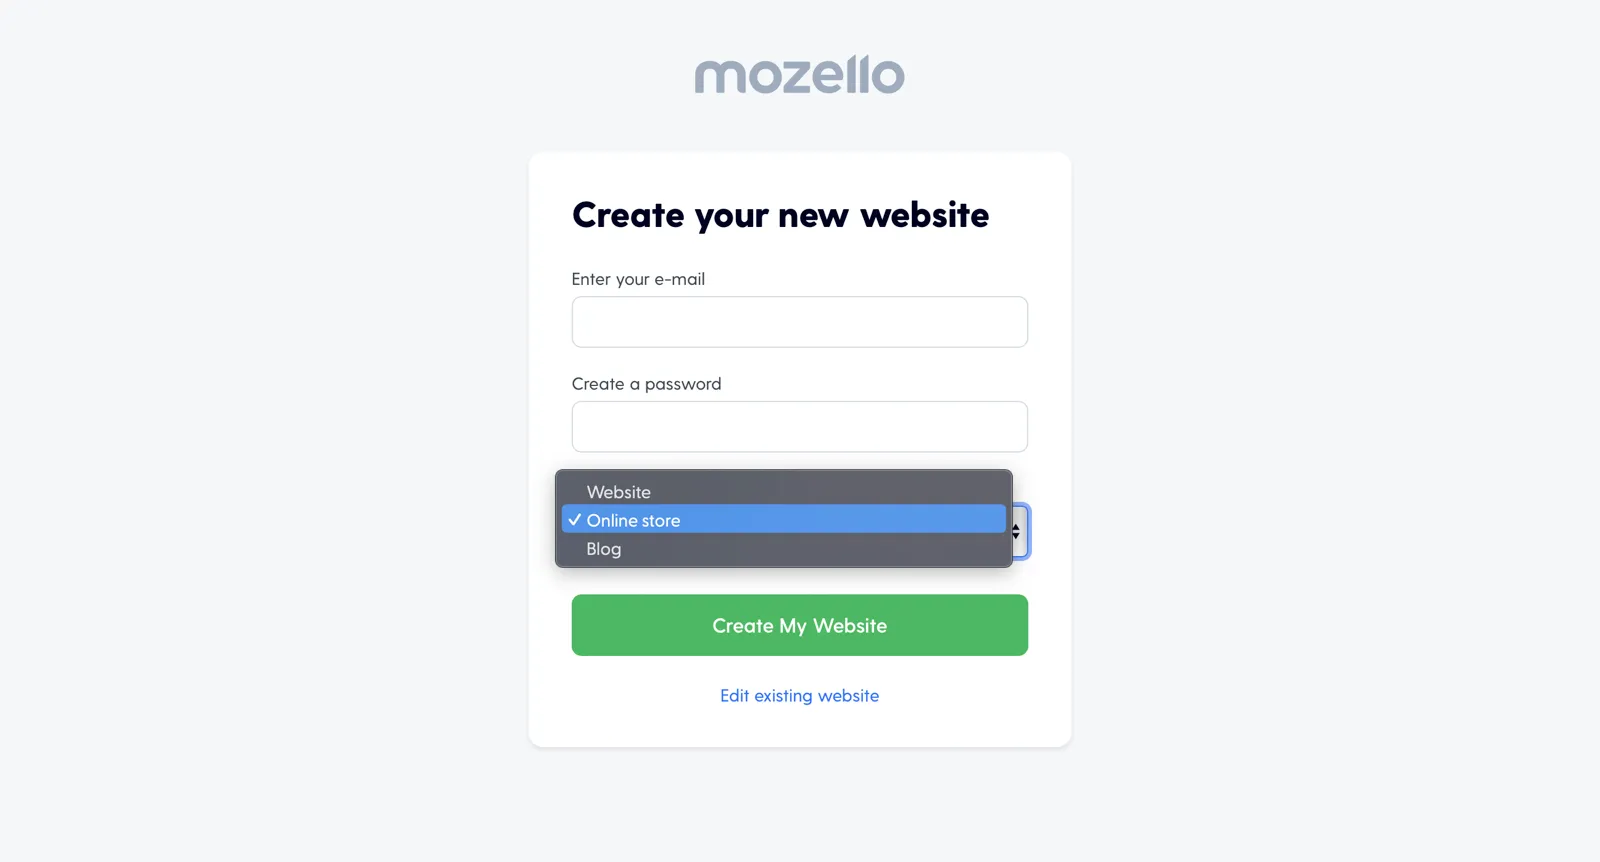
- Log in to the Mozello website and click on Create Online Store.
- Enter your e-mail address and choose a password.
- Next, enter your shop’s name or brand (you can change it later) and click Done!

Step 2: Choose and customise the design of your online shop
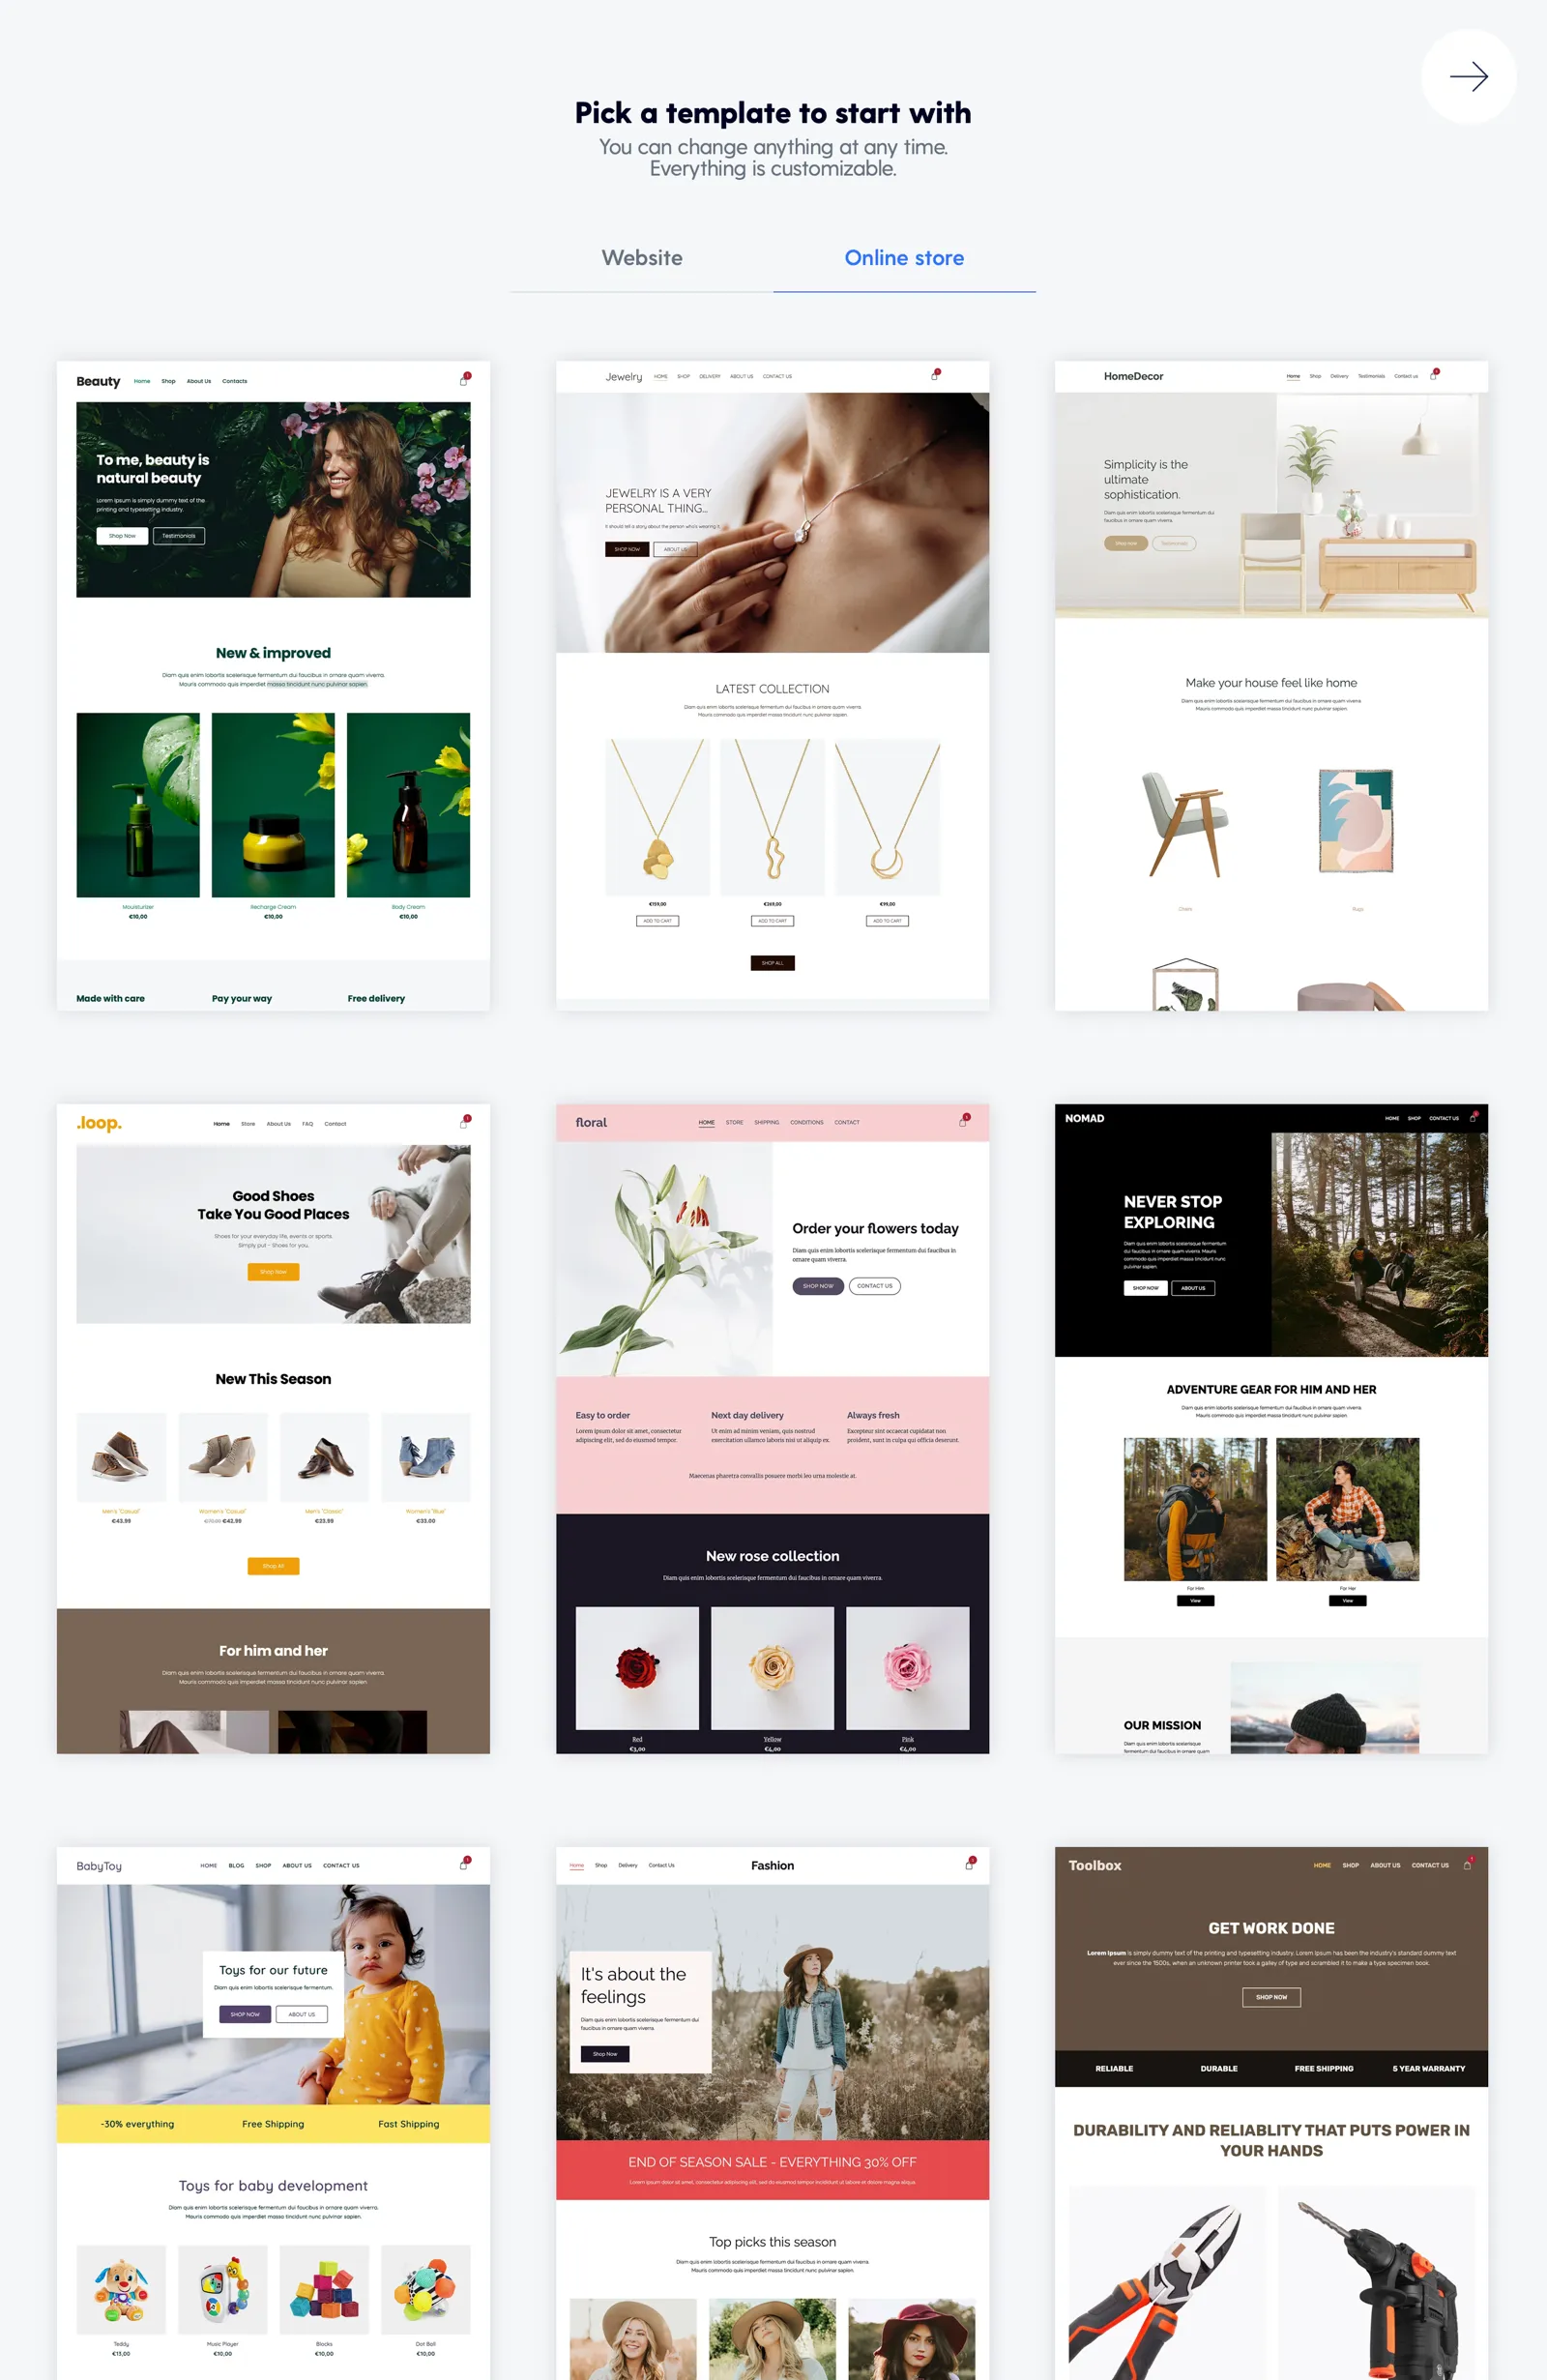
First, choose one of the design templates. All the templates are adaptable and will look great on computers and mobile devices, but most importantly, you can customise any design to suit your preferences and your brand.
You can change the design template at any time without losing the information you have entered.
Once you have chosen the design, you can customise it in detail.
2.1. Add your logo
Adding your logo improves visibility, strengthens the brand, and builds trust.
If you don’t have your own logo yet, don’t worry! There are a few ways to create it:
- Make your own logo using one of the logo creation platforms.
- Find a professional freelance designer.
- Look them up on Fiverr or 99designs, and find someone to draw your logo for a relatively low price.
To insert the logo:
- select the field with the name of your website at the top of the page and click on the image icon.
- A window will then open where you can add all the versions of your logo (main version, light version, dark version). These versions will be only necessary when you'll use different color backgrounds. In the field Your logo place the version that you want to use as the main one.
- Once you upload the logo, you can adjust its size.
![]()
![]()
2.2. Create the main page
Mozello automatically creates a page called “Home”. You can instantly start to personalise it to your liking.
The home page is the place for you make the first impression of your business, presenting visitors with the key information.
The home page should answer questions like:
- HOW your product can help the client
- WHAT you sell
- WHAT you are (logo/company name)
2.2.1. Customize the main menu
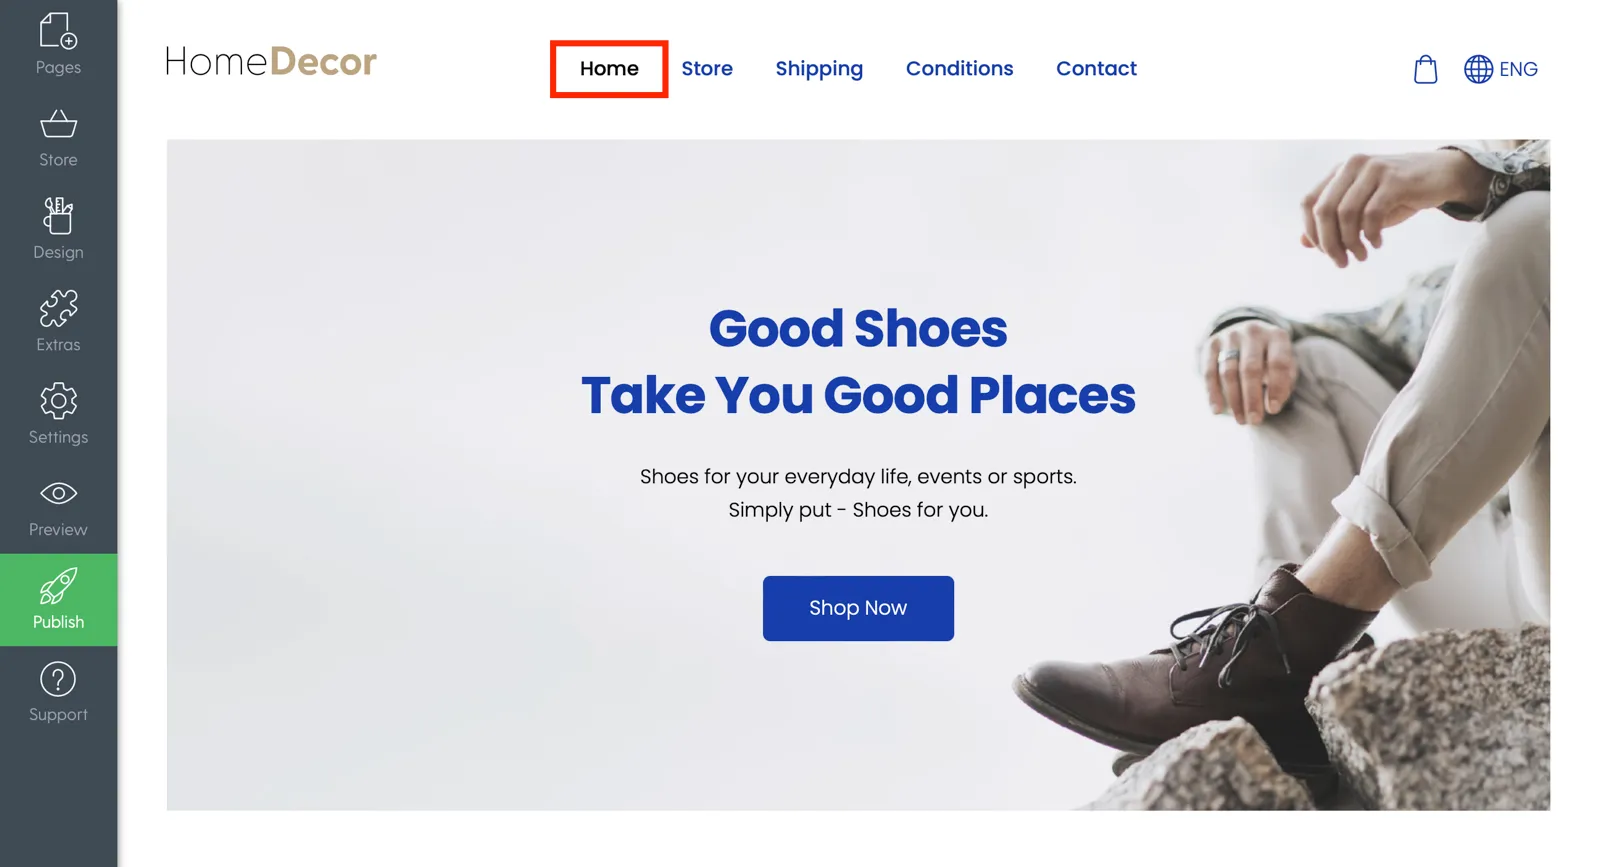
You can customise the layout of the main menu by hovering over the menu and clicking on the settings icon shown in the picture.
There you can choose menu style options. For example, make the menu transparent and merge with the banner or many other options.
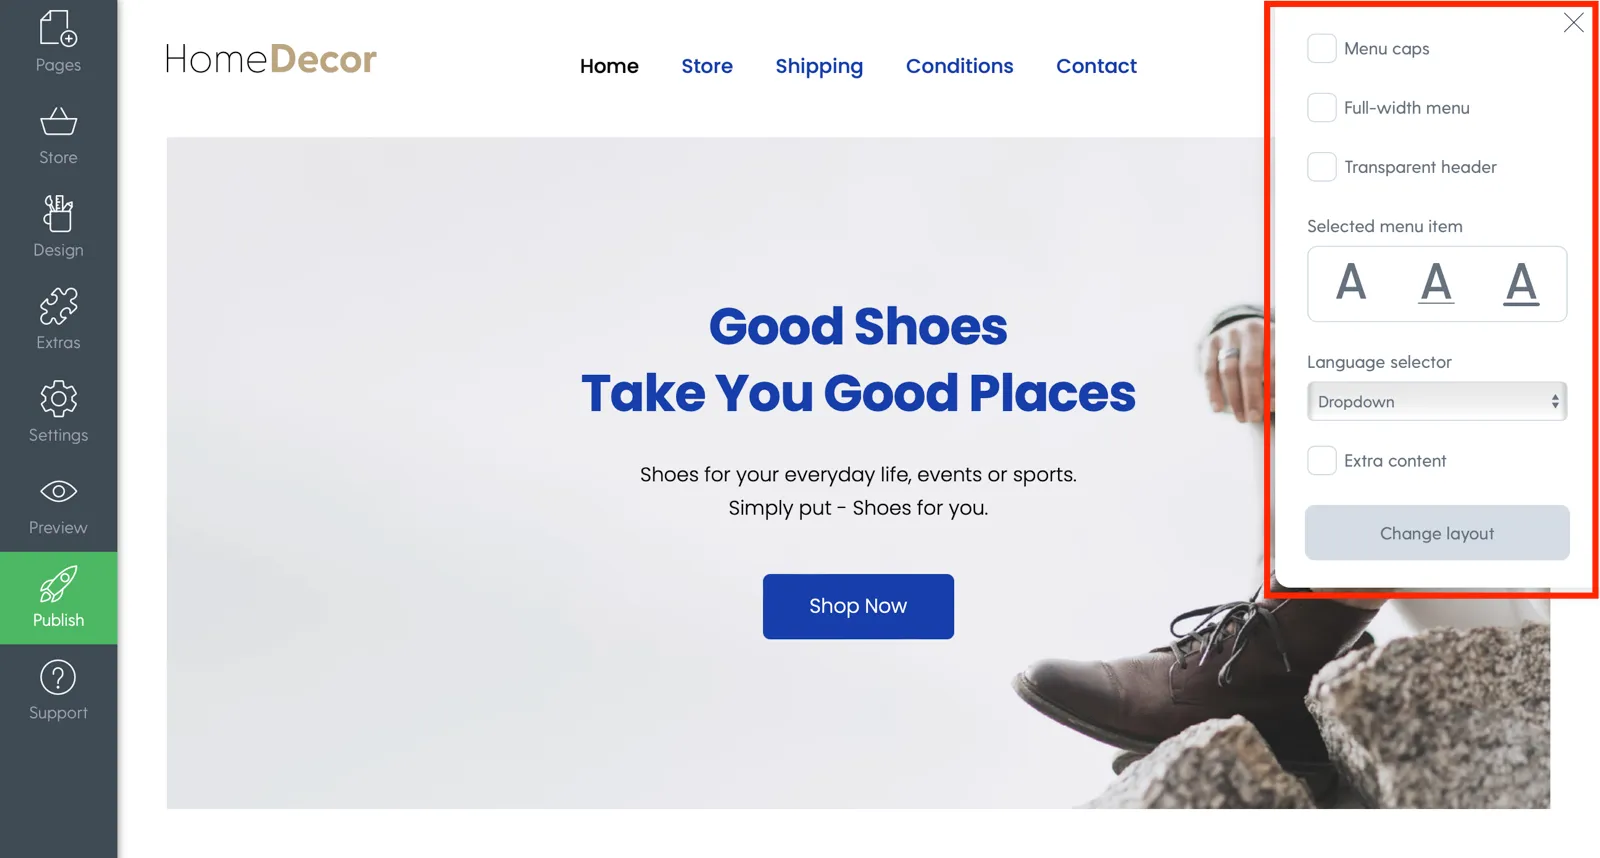
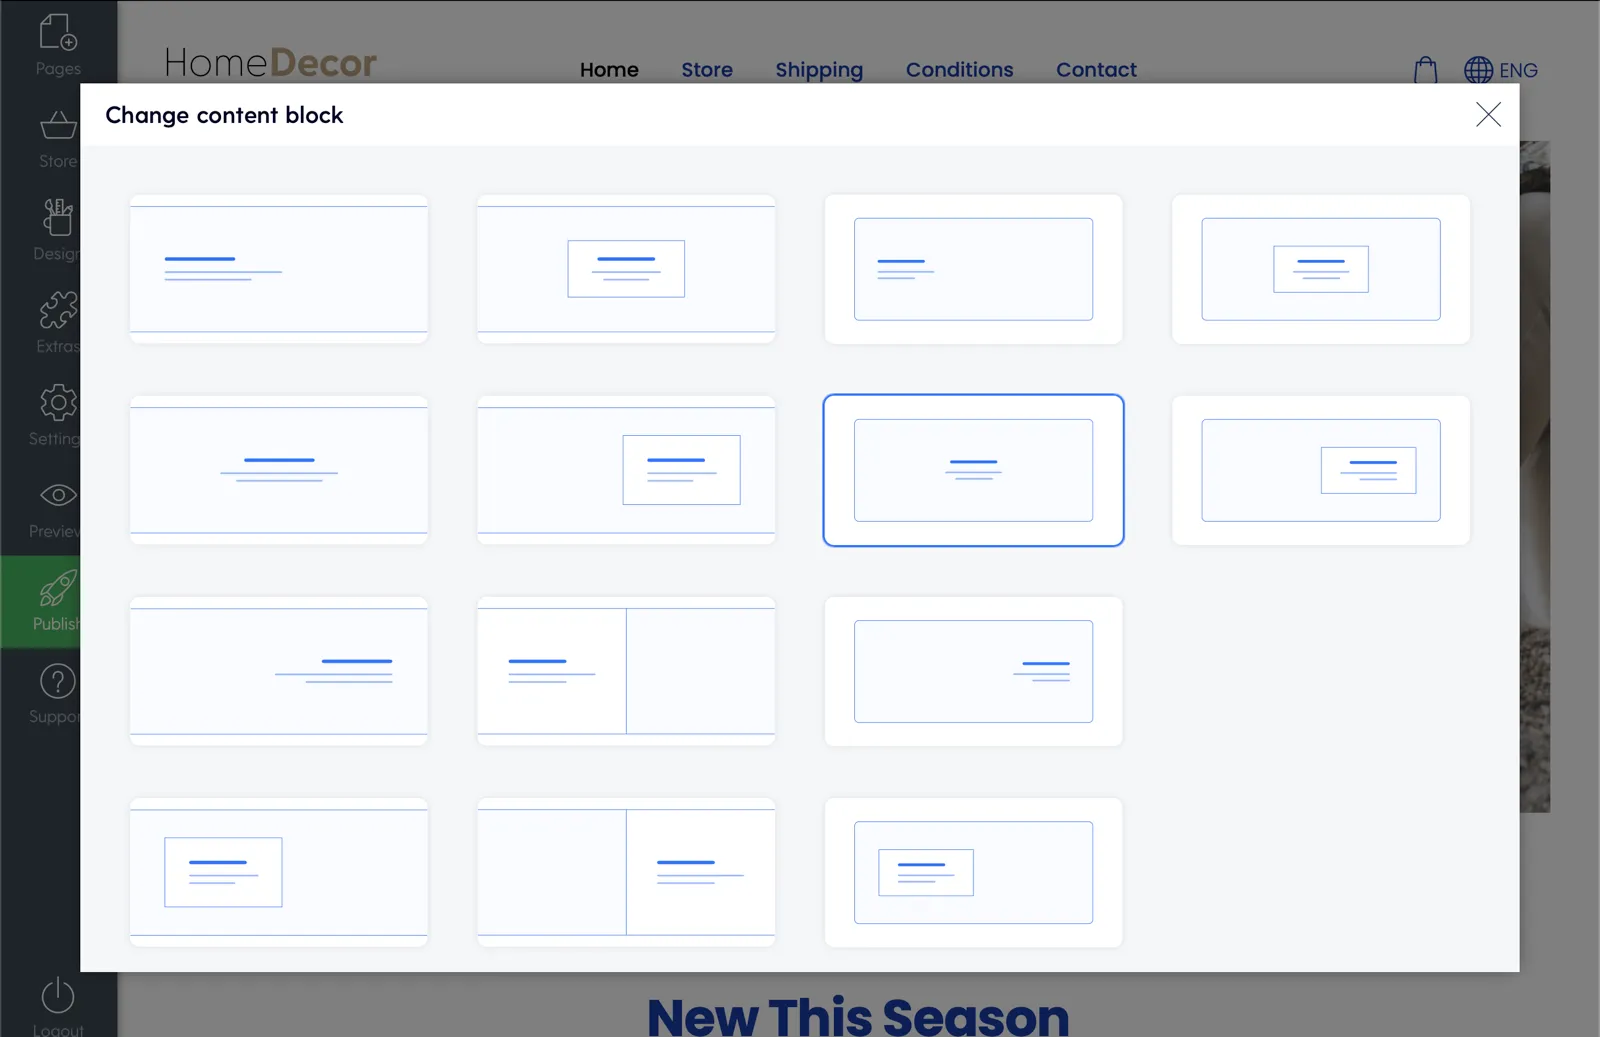
To change the layout of the menu, click on the button Change layout.
We recommend choosing a layout that works well with your logo. If the logo is vertical, it is better to go with a design where the logo is above the menu, but if the logo is horizontal, you can choose the kind you like.


Video: How to edit website header and footer.
2.2.2. Personalise the main banner
You can customise the look of your banner by pressing the settings button.
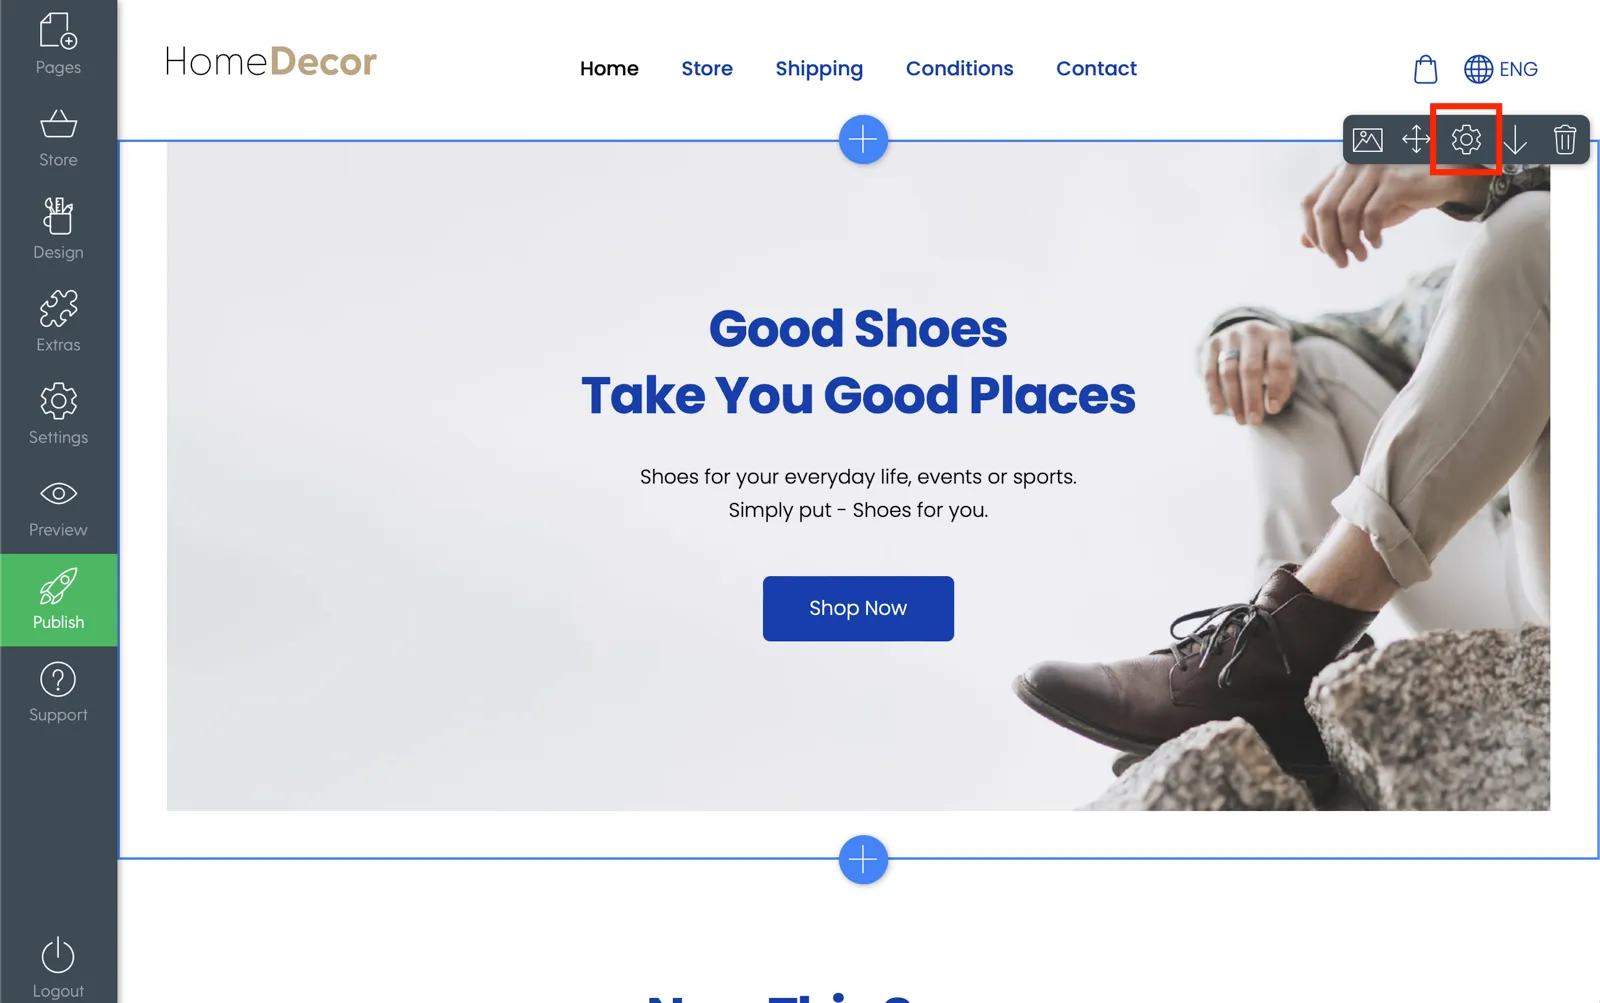
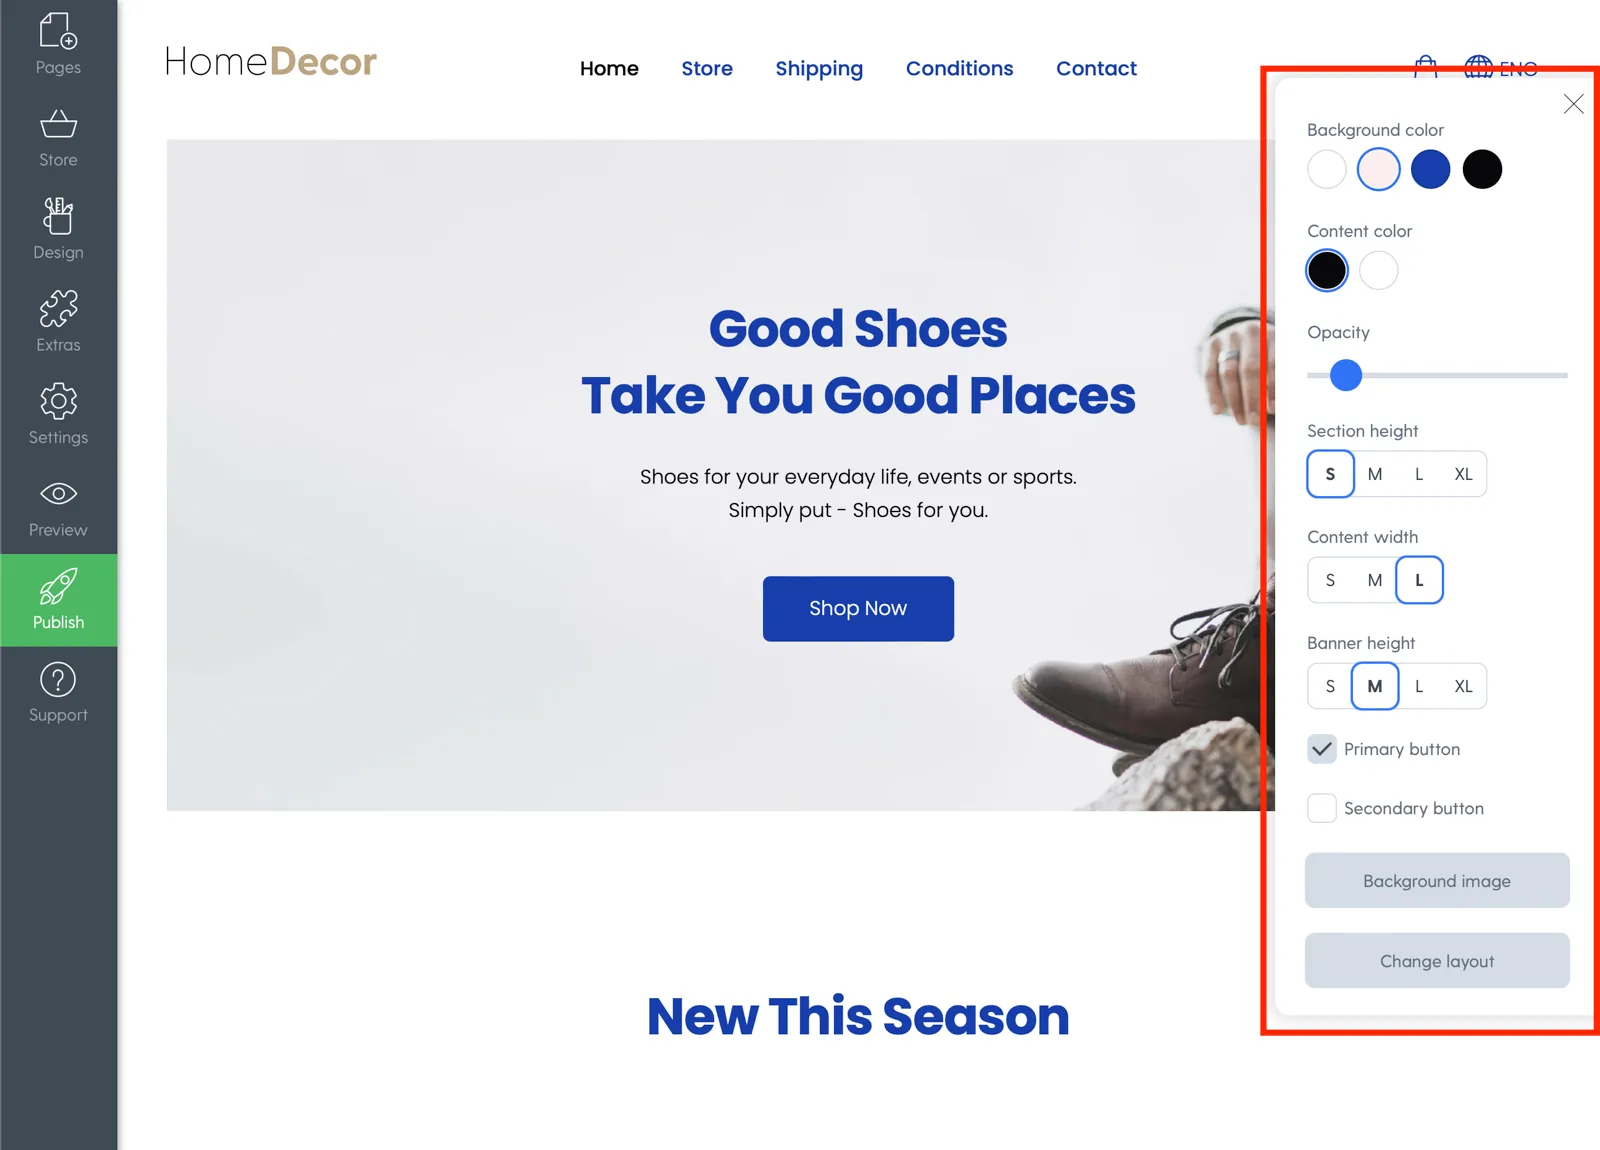
A window will open where you can adjust multiple banner parameters:
- change the background color,
- adjust height,
- adjust width,
- choose the number of buttons,
- change the background image,
- change the banner layout,
- and other options.
Once the banner is set up, add some content blocks and tell your customers more about yourself and your products.
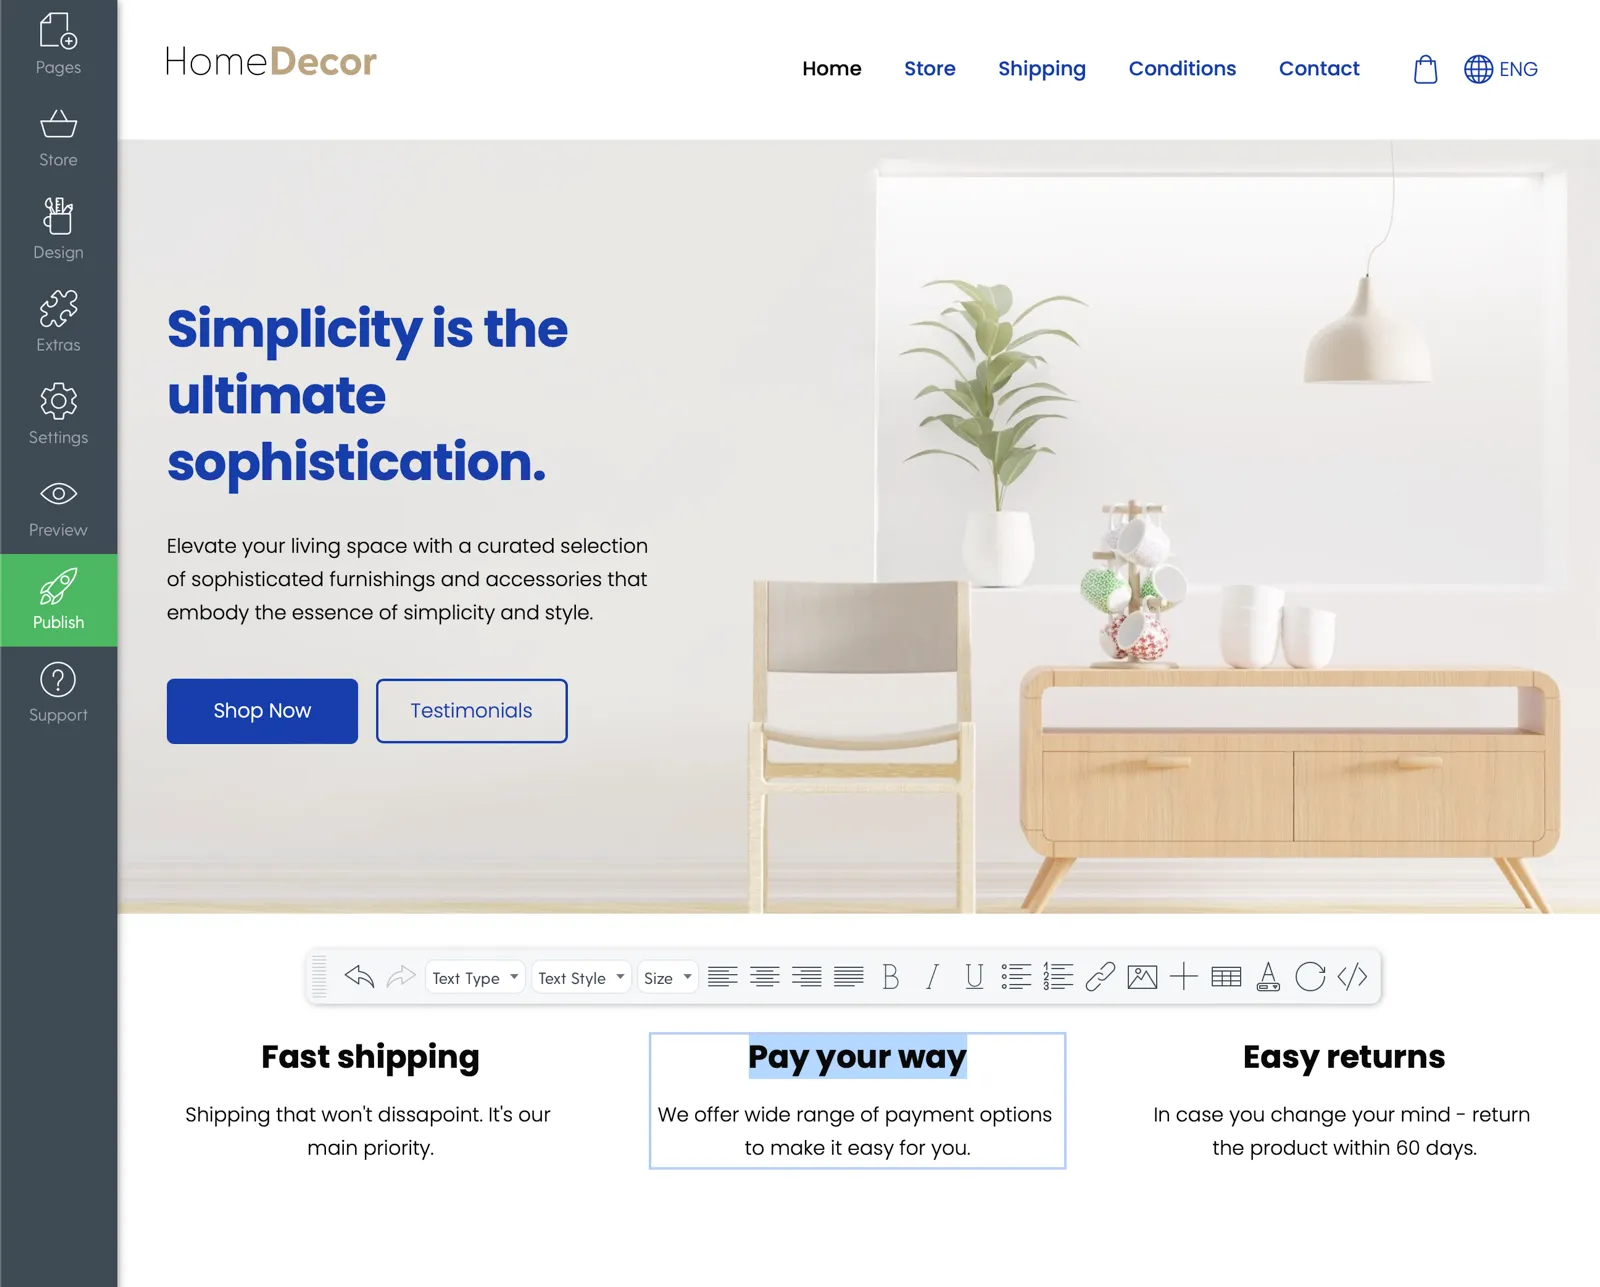
Tips for successful texts:
- Make sure the texts are short, clear, and to the point. Attention spans are only getting shorter and nobody will be into reading a Wiki page.
- Focus on the benefit to the customer.
- Button texts must be designed as calls to action. For example, if you create a button for the Contacts page, you can enter ‘Contact us’ as the button text: this will help direct your website’s guests to a specific action.
Video: How to format online store text.
Tips: How to write website texts that work and get results
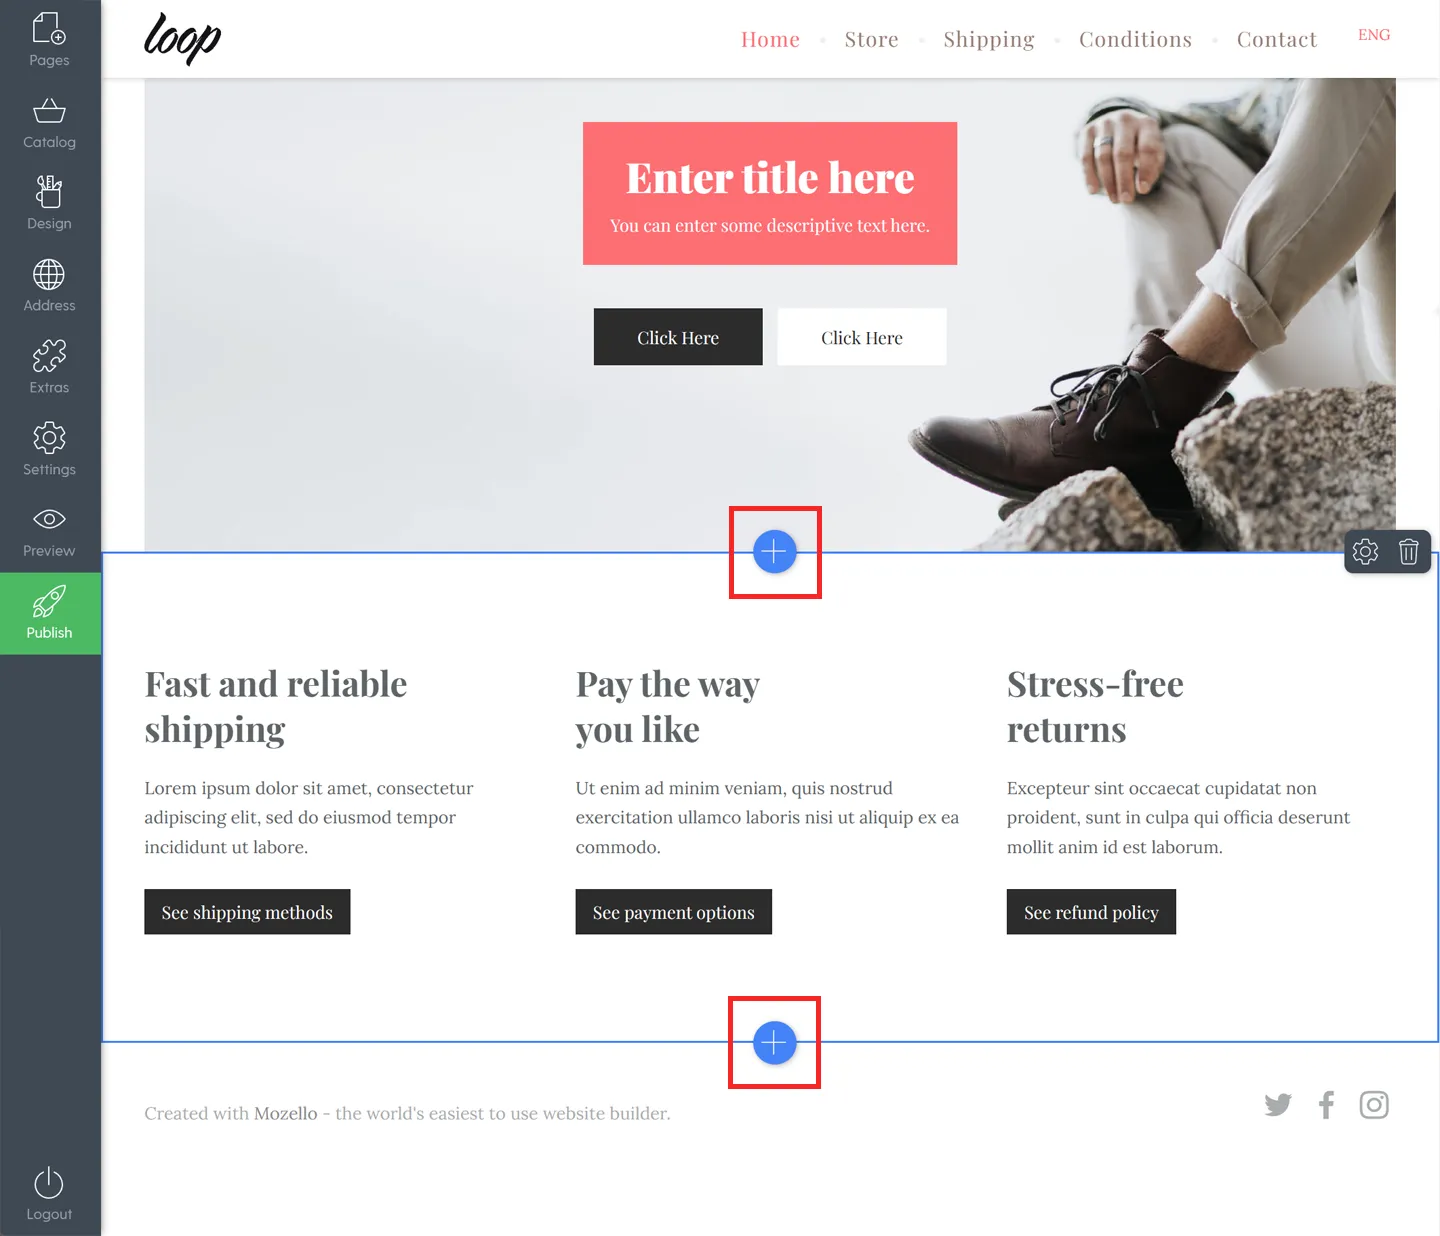
2.3. Add new content blocks and customise their design
With Mozello, you can easily add new content blocks to expand your website with structured information.
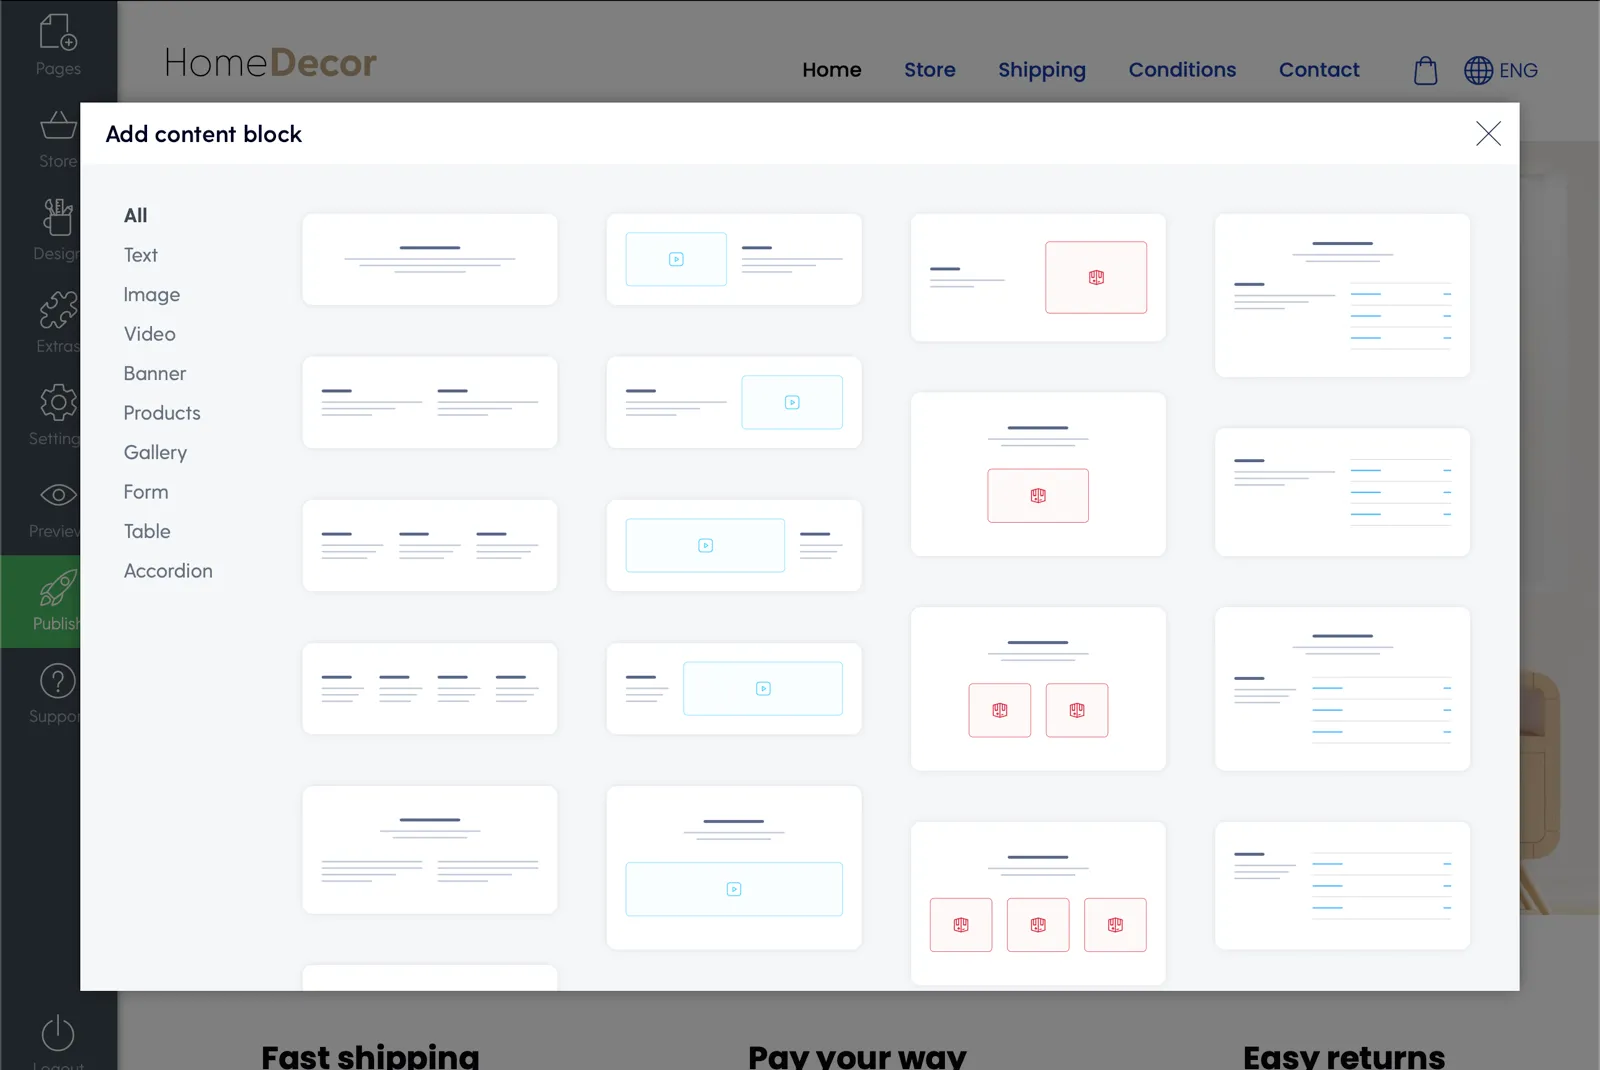
To add a new content block, click on the + symbol above or below an existing block. A window will then open where you can select the type of your new content block.
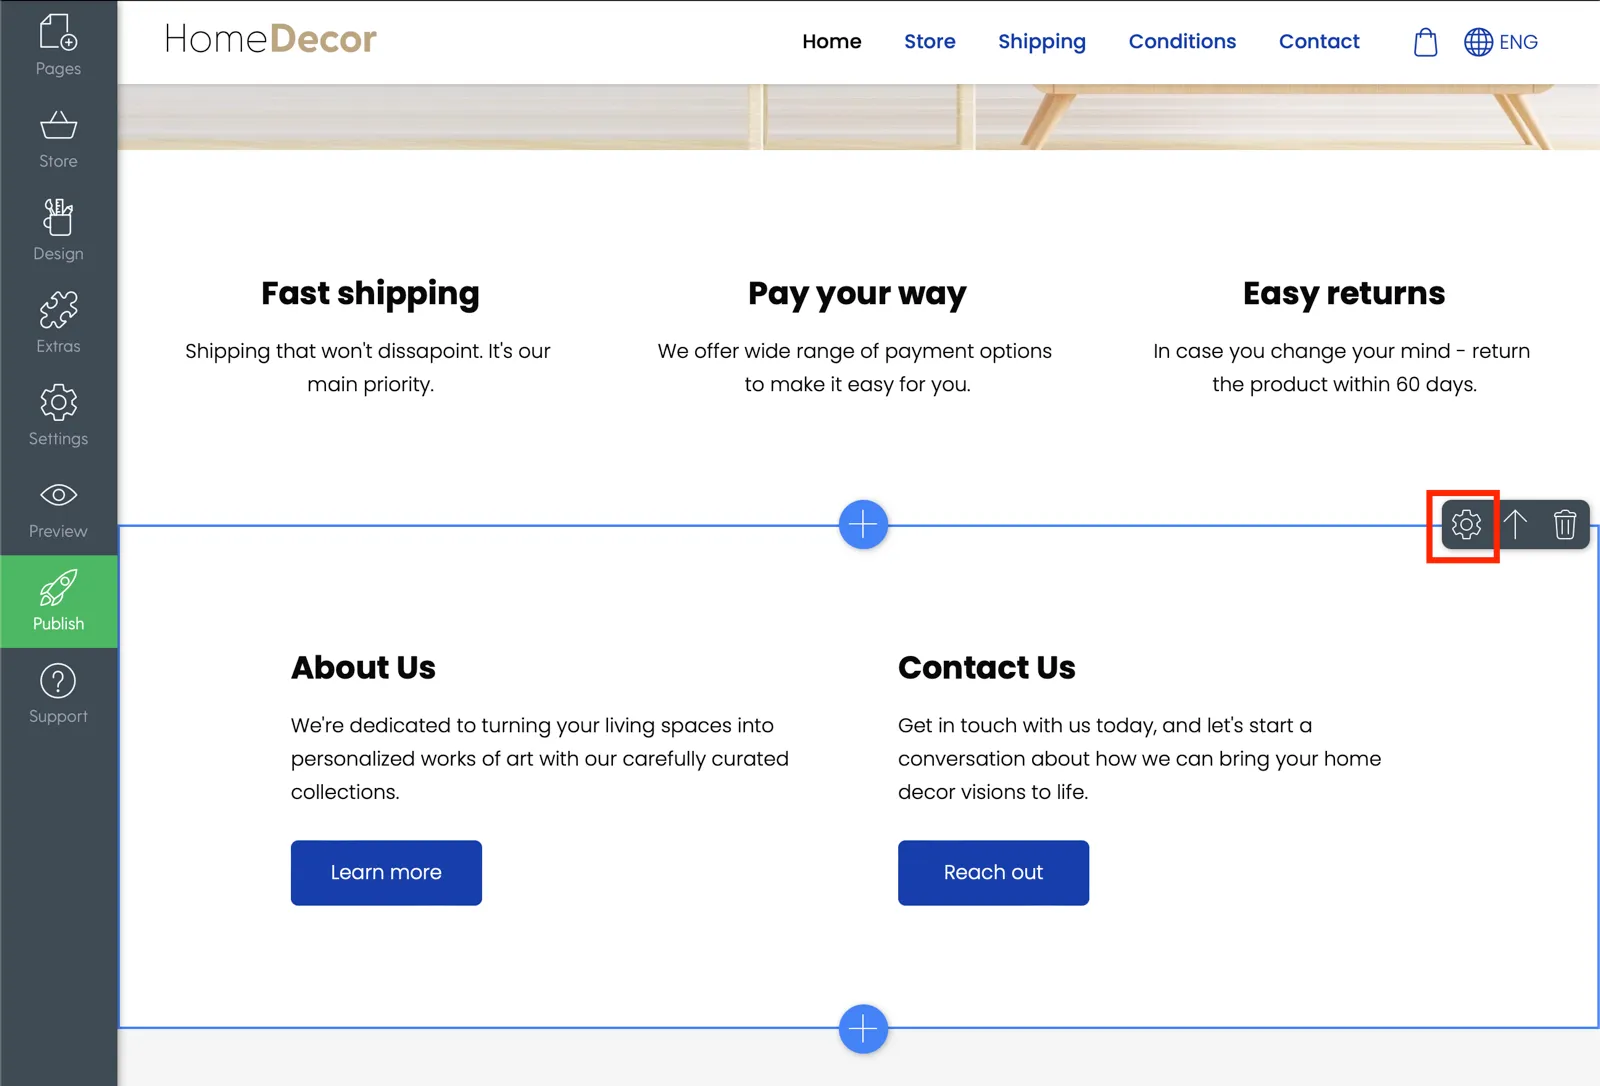
Once you add the content block, you can edit its design by clicking on the settings icon at the top right corner of the content block.
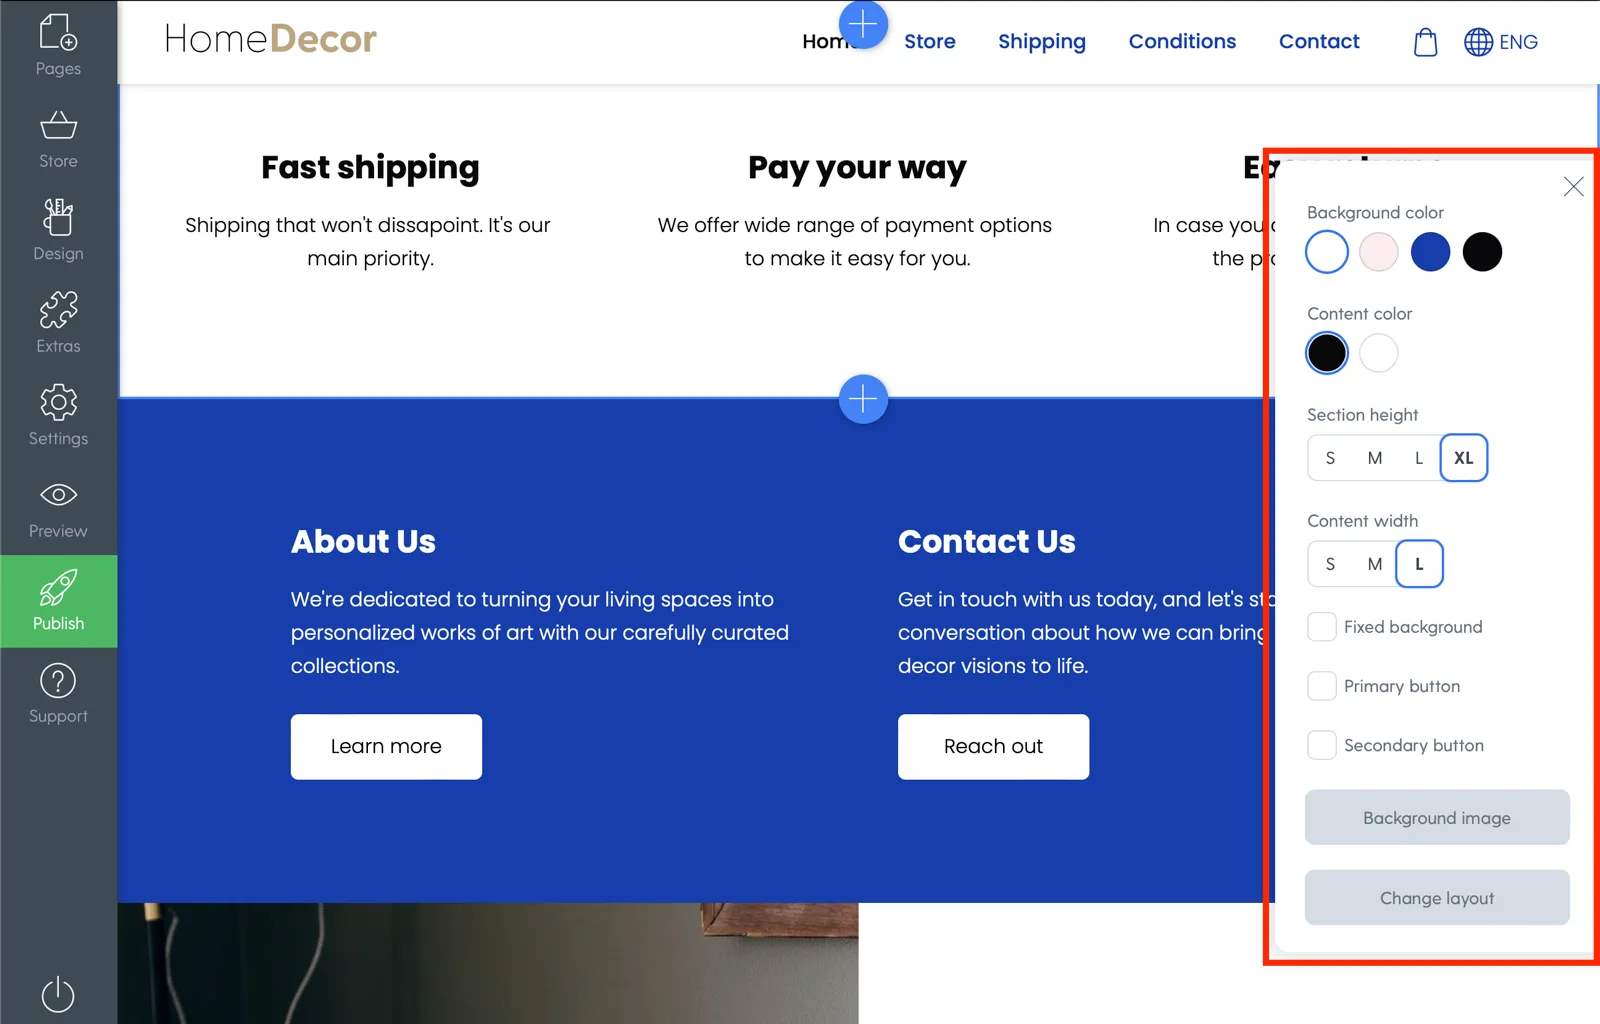
Open the customisation settings for the content block:
- Background and content colour,
- height and width of the block,
- number of columns and rows in the content,
- other options depending on the type of the block you choose.
Video: Editing the content layout.
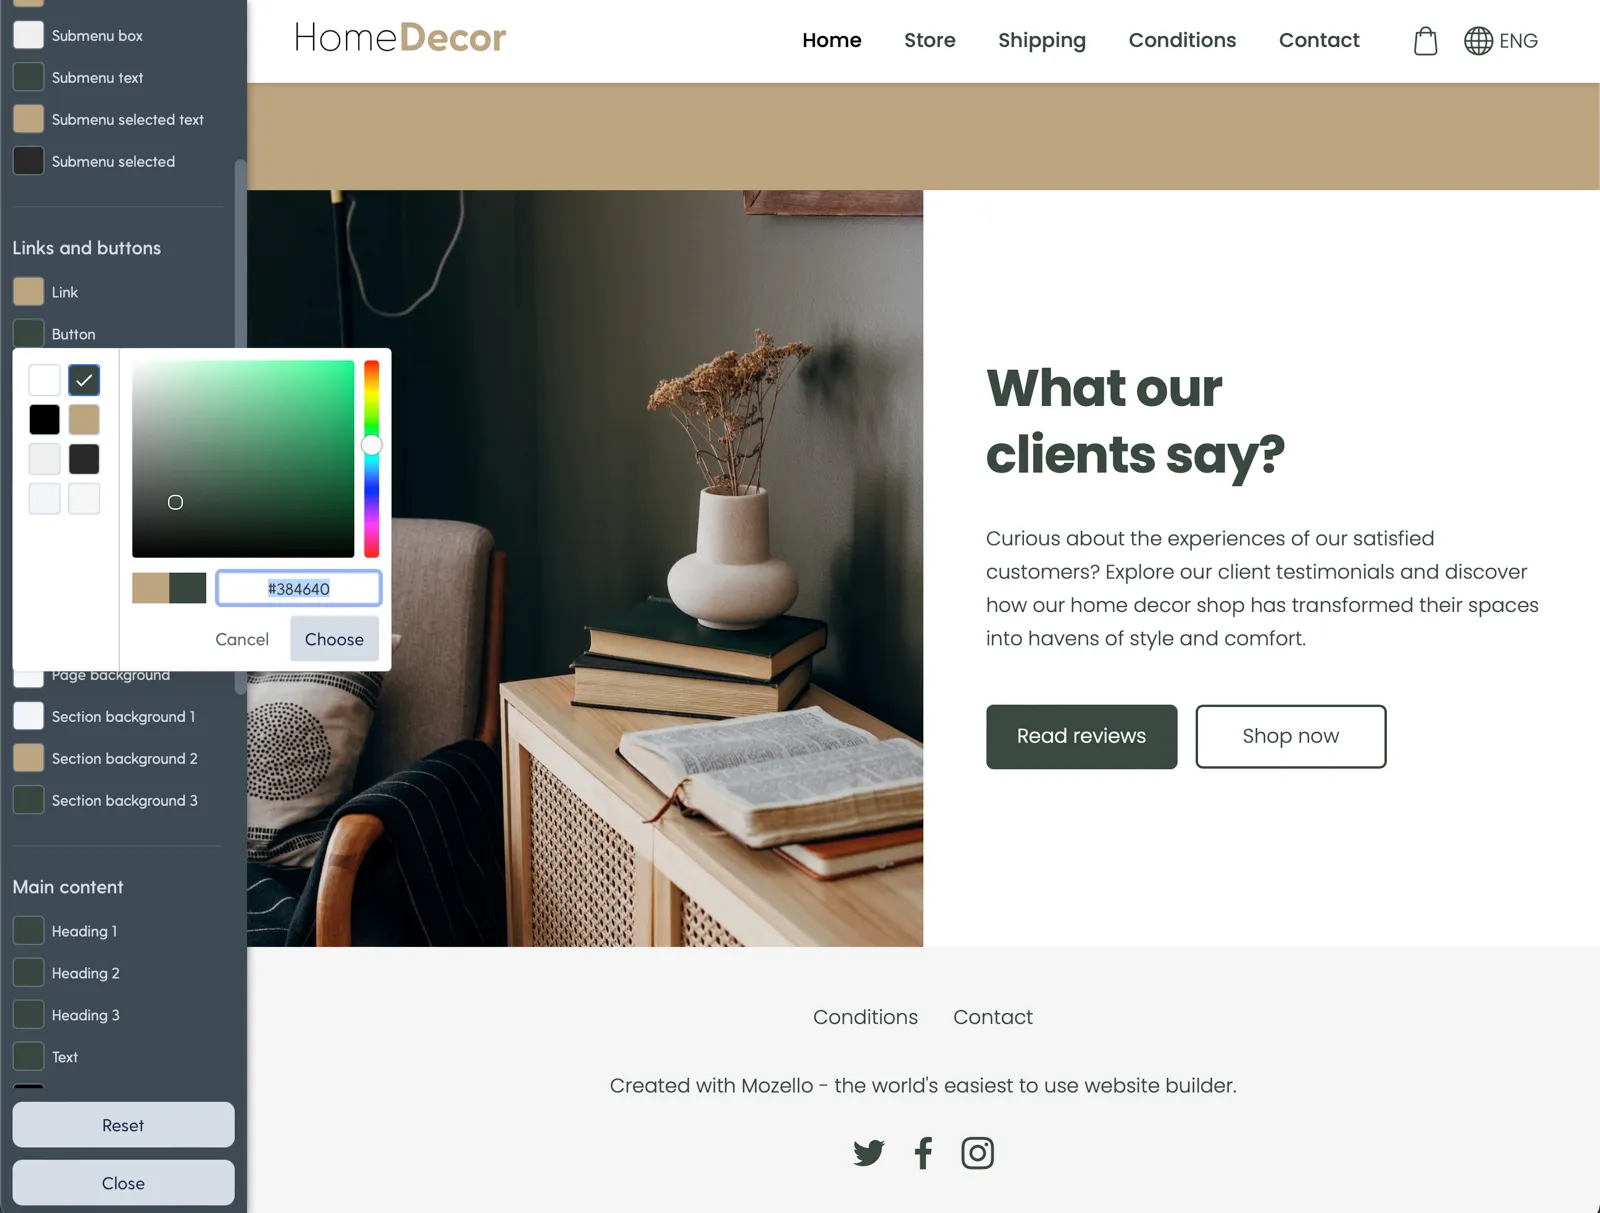
2.4. Edit the colours
You can change the colours of your online store to match your brand style.
- In the main toolbar, select Design and click Change Colours.
- Choose from the colour combinations already offered, or edit the elements individually by clicking on the Advanced button.
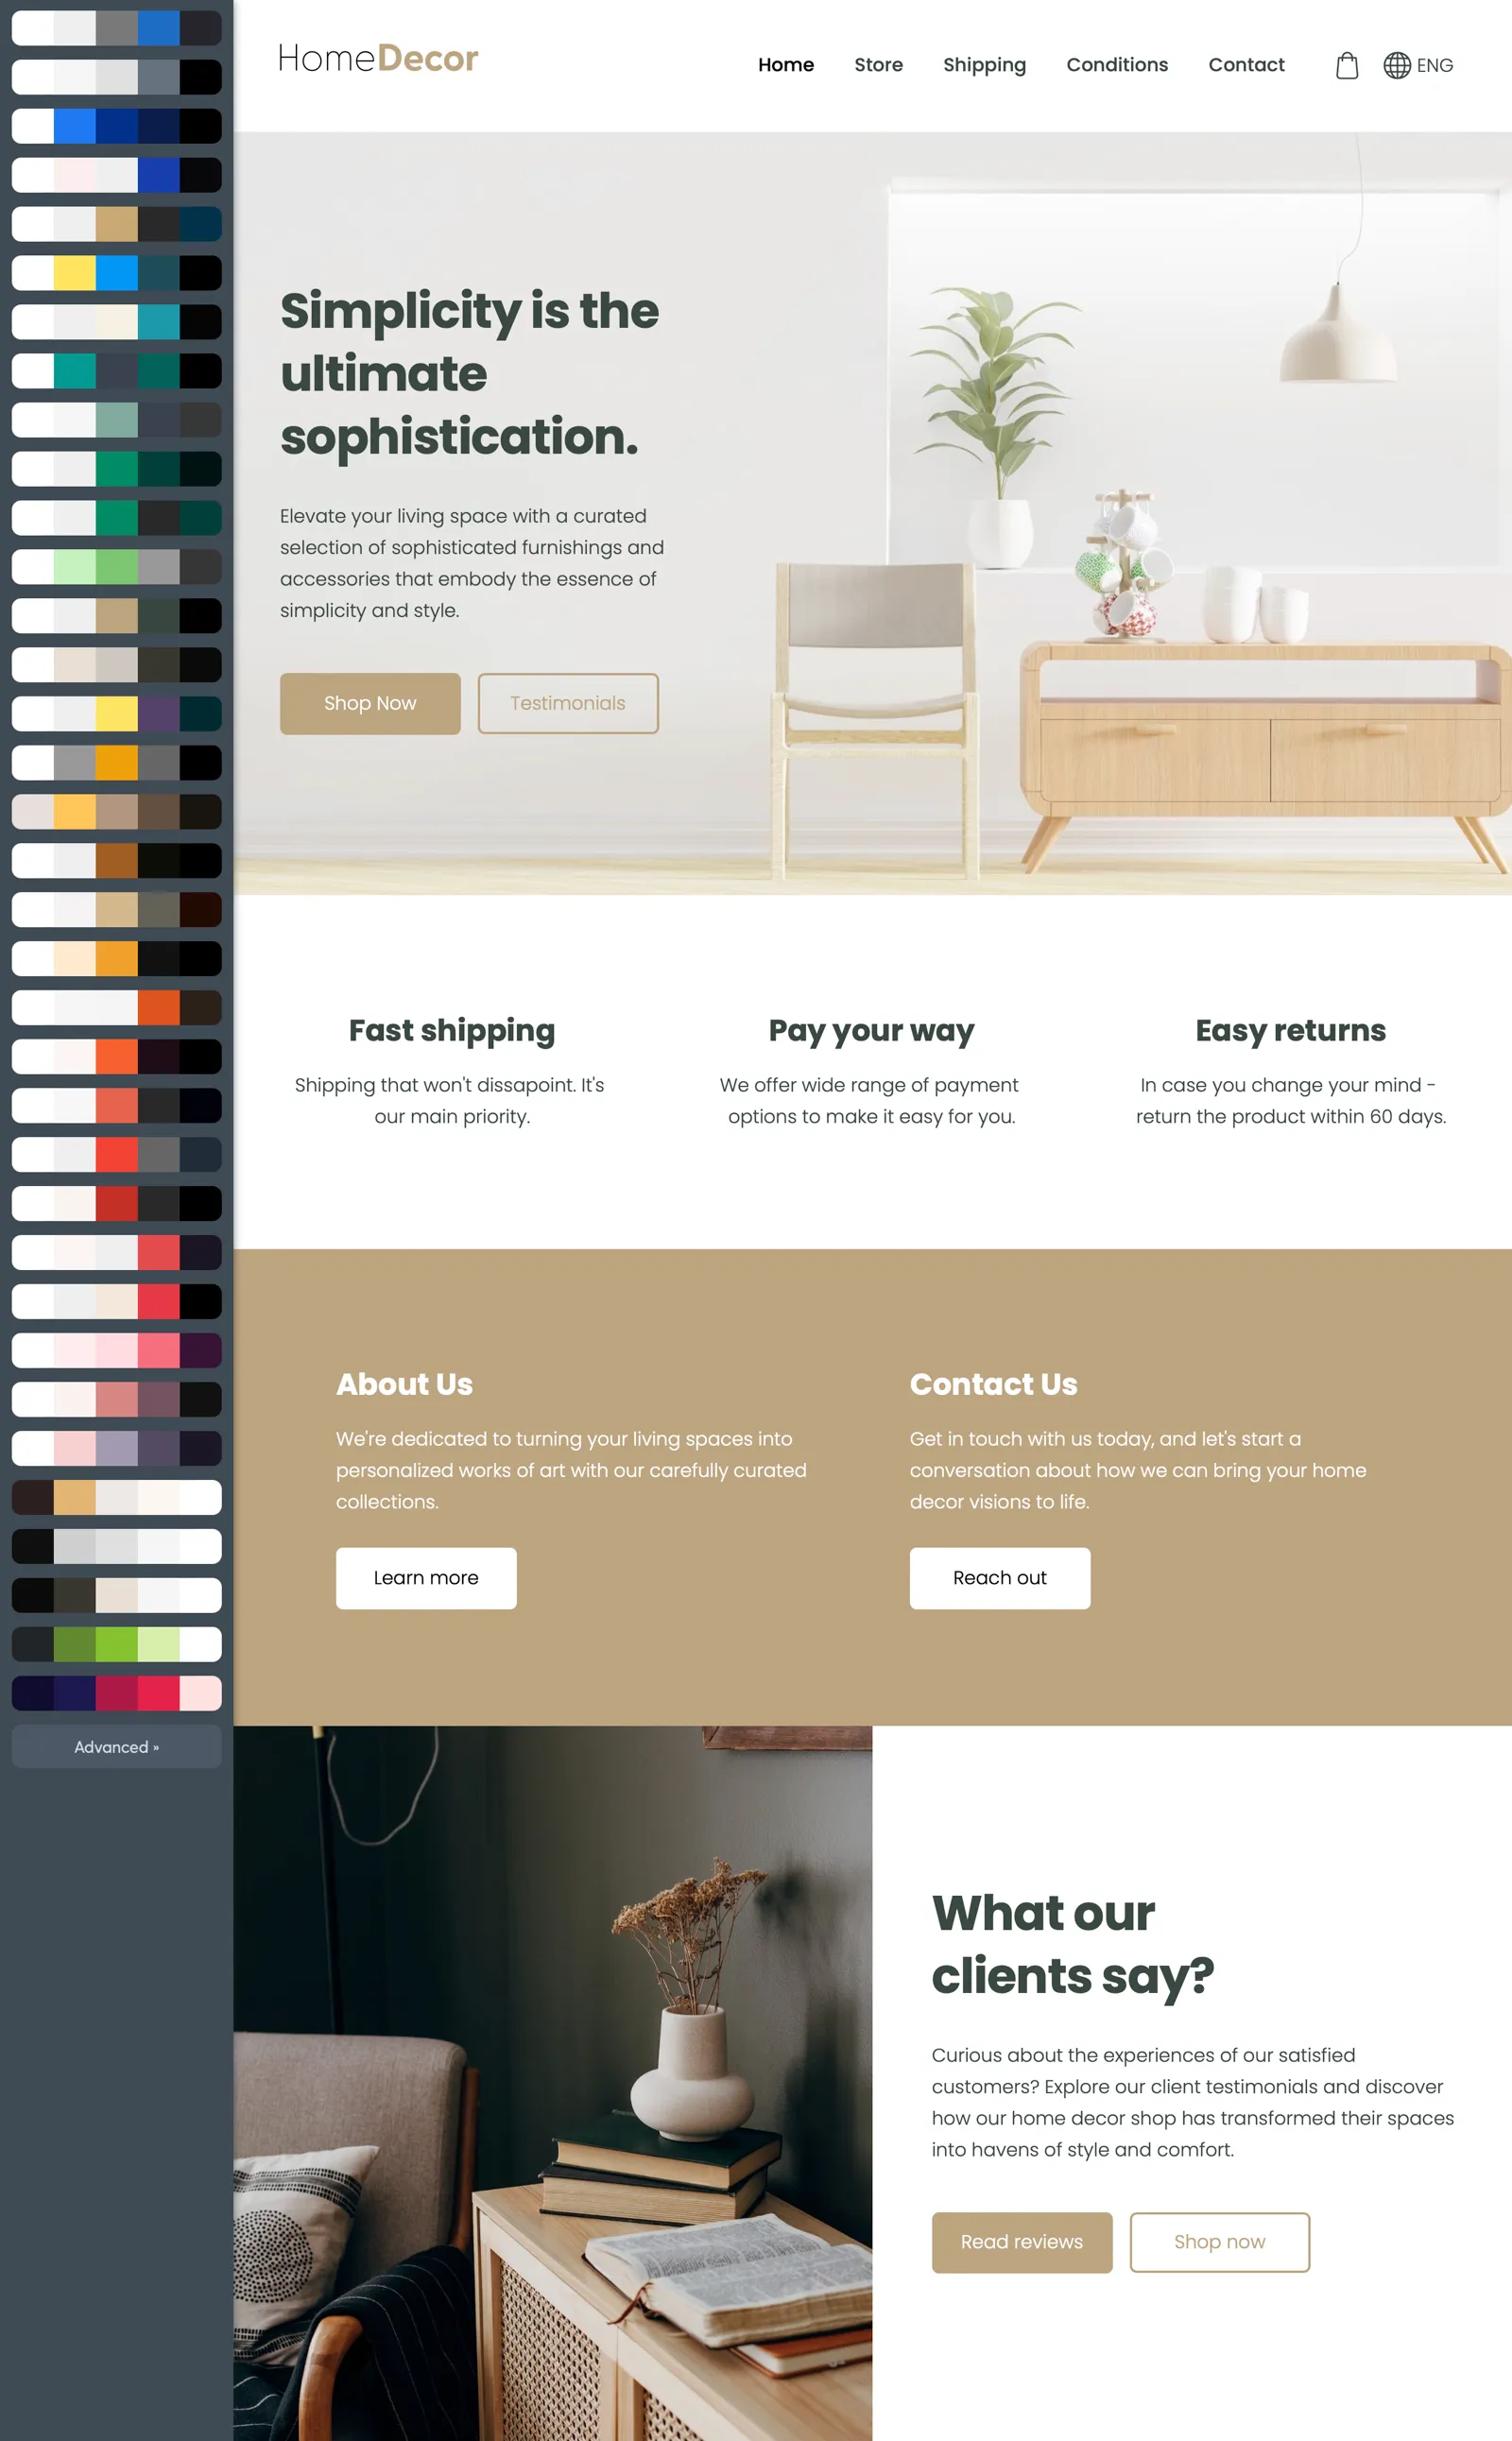
Colour is an integral component of a brand, but when designing your online store, we recommend not getting to carried away with it: choose no more than 2–4 main colours.
The coolors.co tool is of great help for choosing colours and creating balanced colour combinations.
Video: How to customize your online store colors.
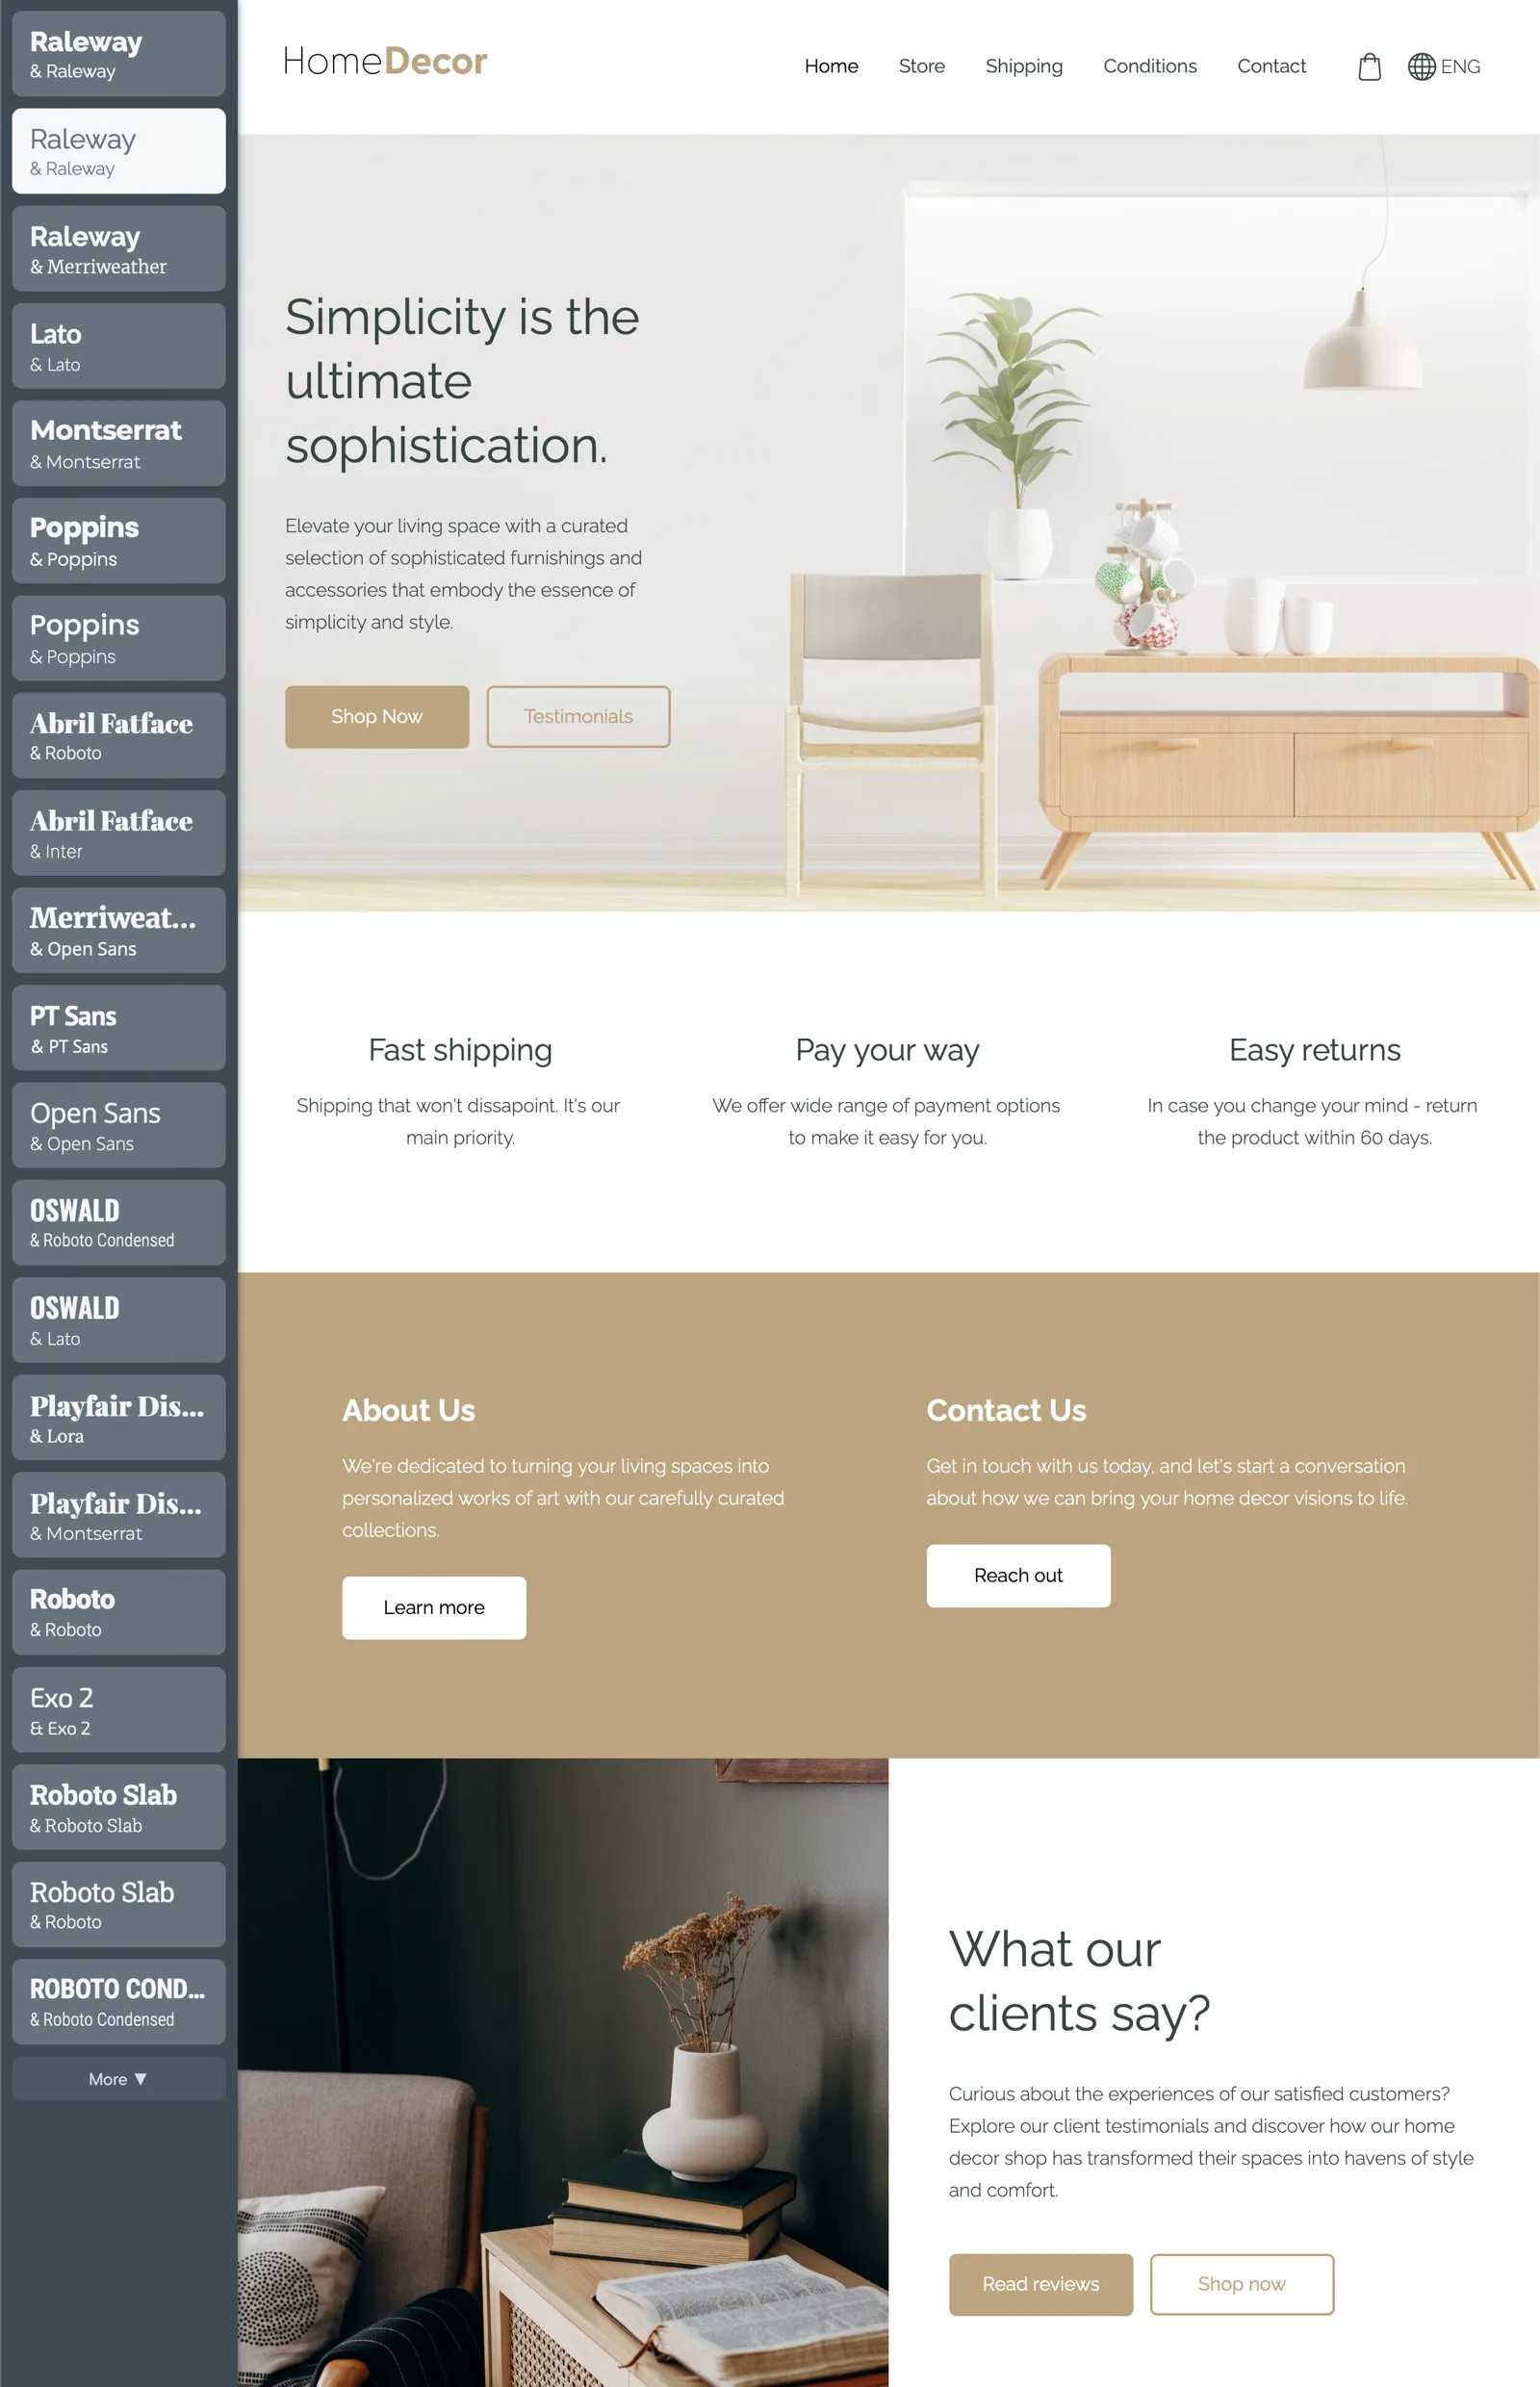
2.5. Choose a font combination
Choose the font combination that best suits your brand style.
- Select the Design in the main toolbar and click Change Font Scheme
- Choose one of the font combinations offered.
Video: How to change fonts on your online store.
Step 3: Add your products to your online store
Select the Store on the main toolbar to open the catalog manager.
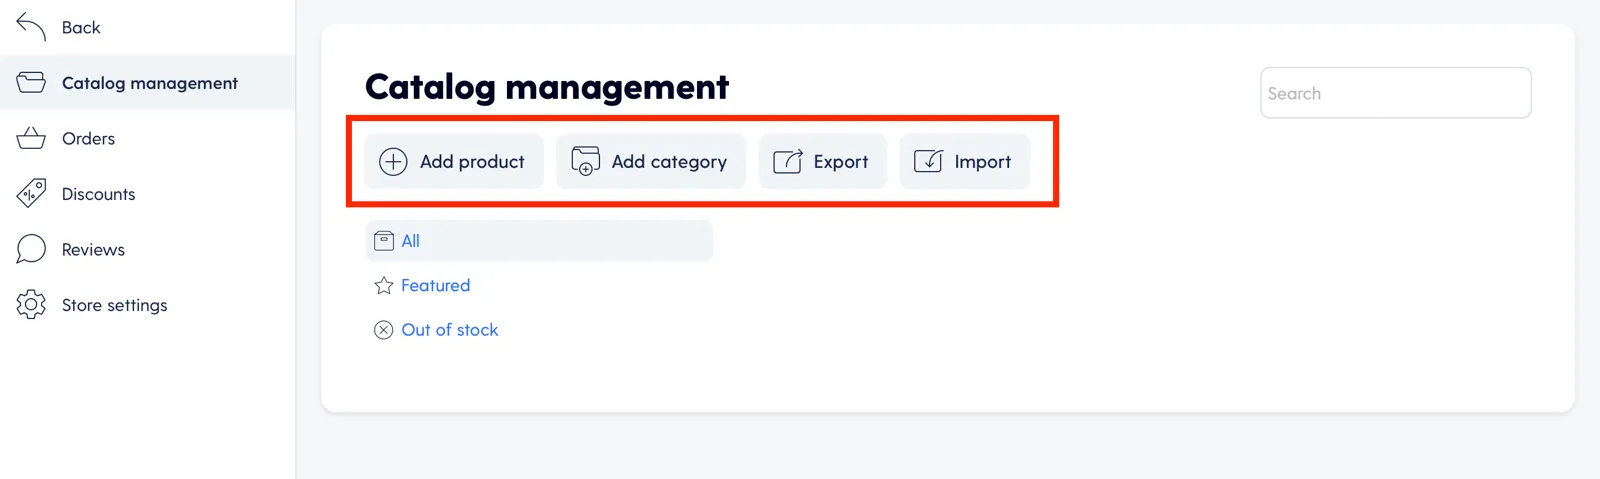
Important! In the Store menu, you can always find all the most important settings and options for your online store.
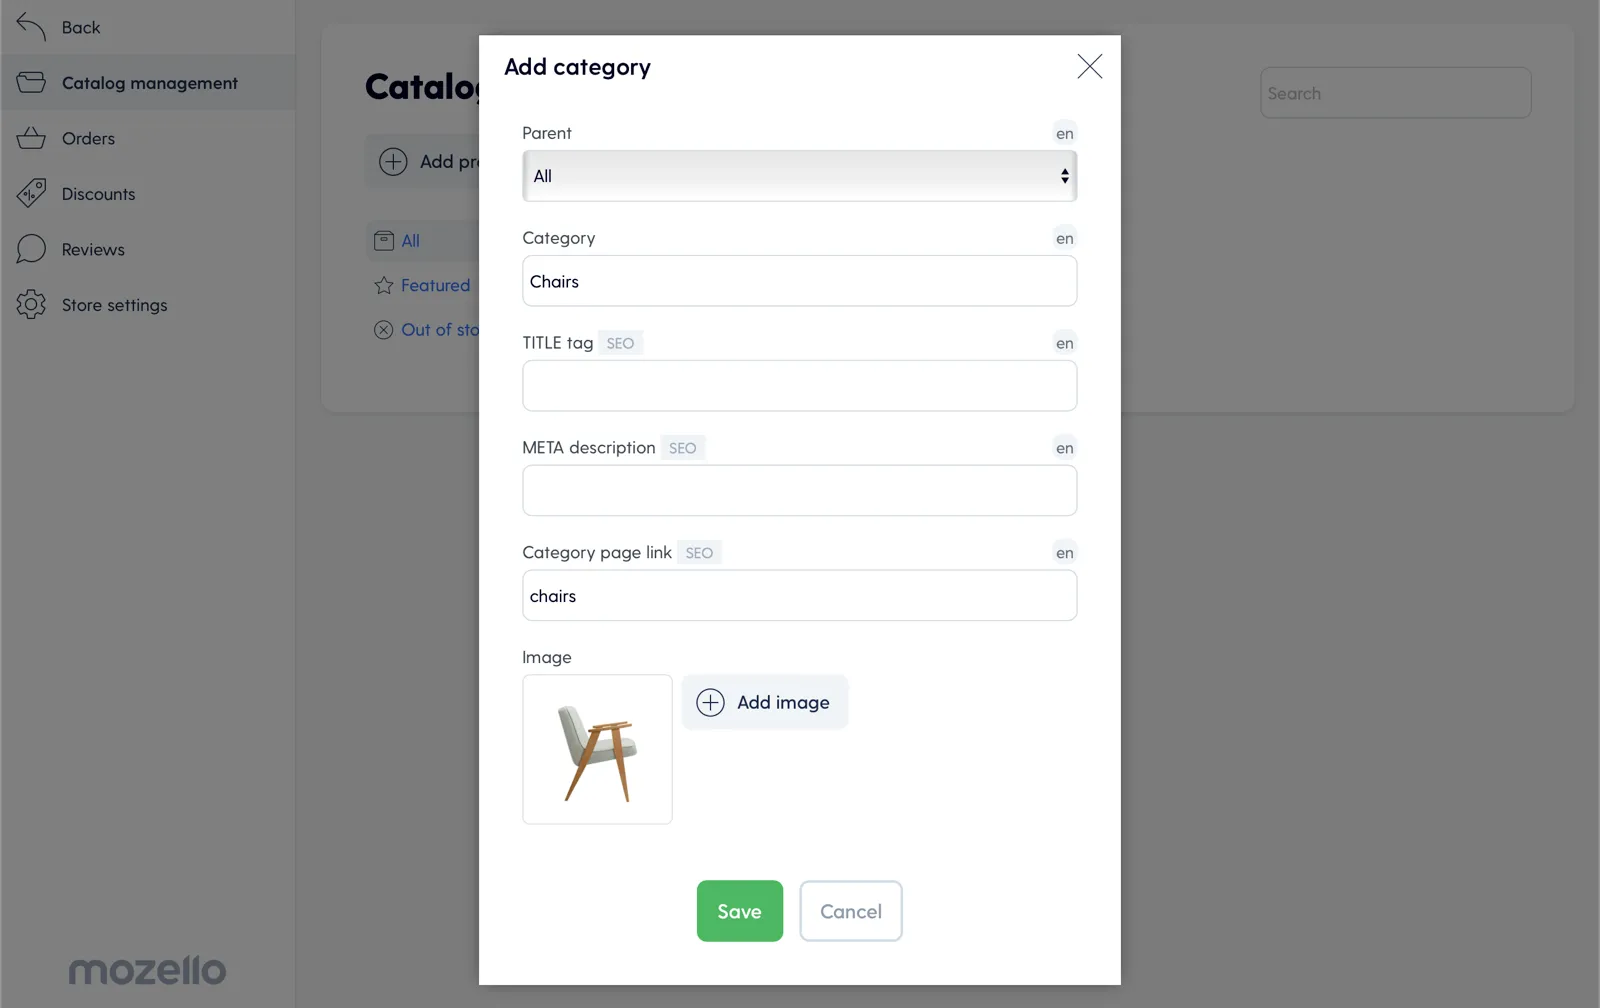
To add a category:
- Click the button Add category
- Enter the name of the category
- Fill the SEO fields (TITLE tag, META description)
- Add the category image
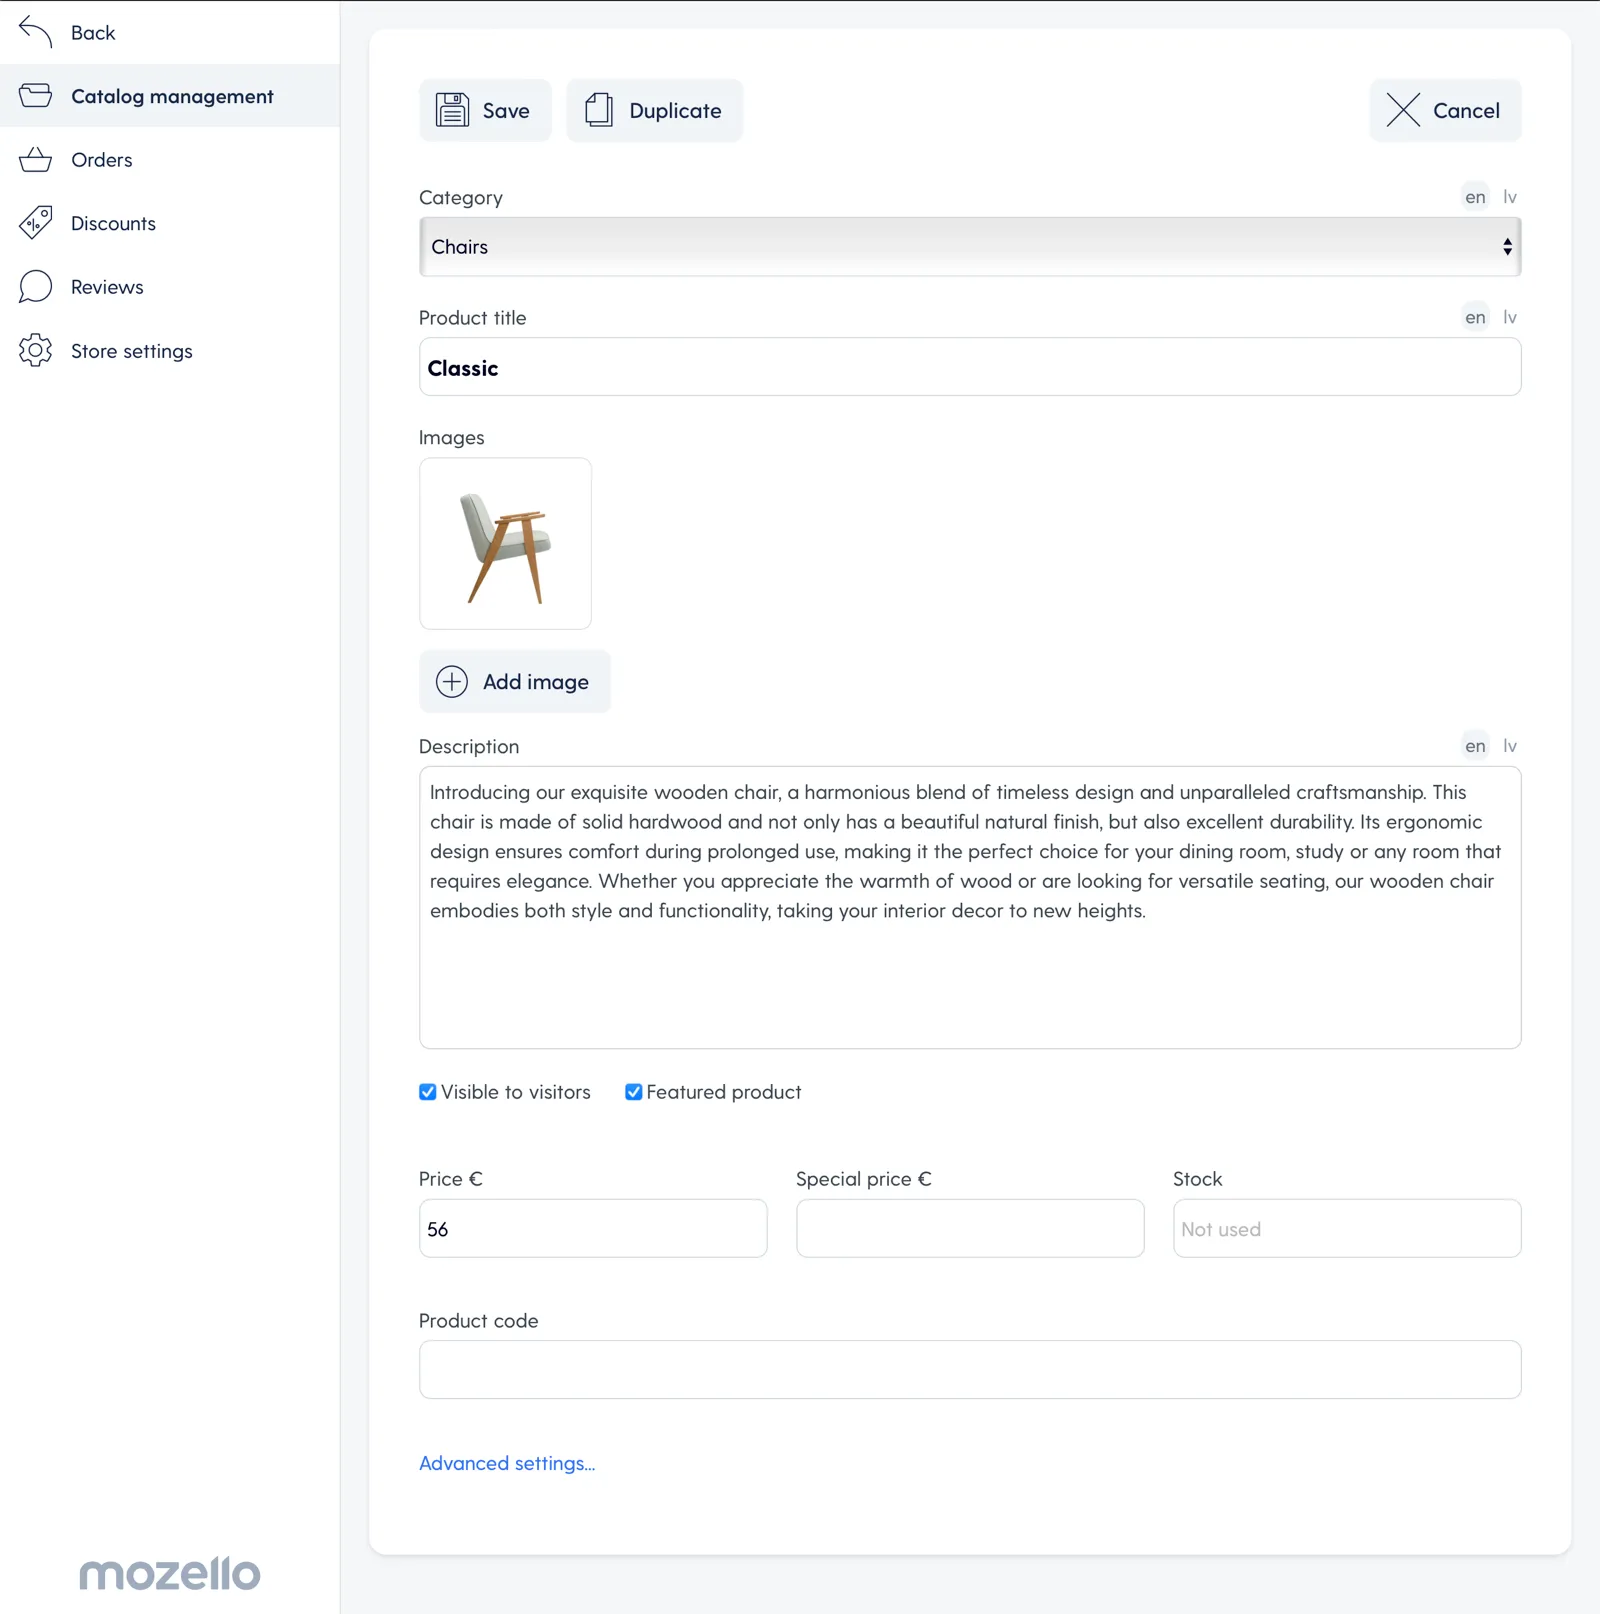
To add a product:
- Click on the Add Product button.
- Choose the category the product belongs to (if it does).
- Add images. It’s important for the product images to be high-quality and professional: this will help you attract and convince your clients.
- Enter the price, special price and stock if necessary.
Once you add the basic details and images, click on the Advanced settings... button. You can:
- Add product variants if you sell different versions of the product, e.g. sizes, colours
- Adjust the product link
- Tick the box if it's a digital product (Mozello let's you sell digital products)
- Enter other parameters
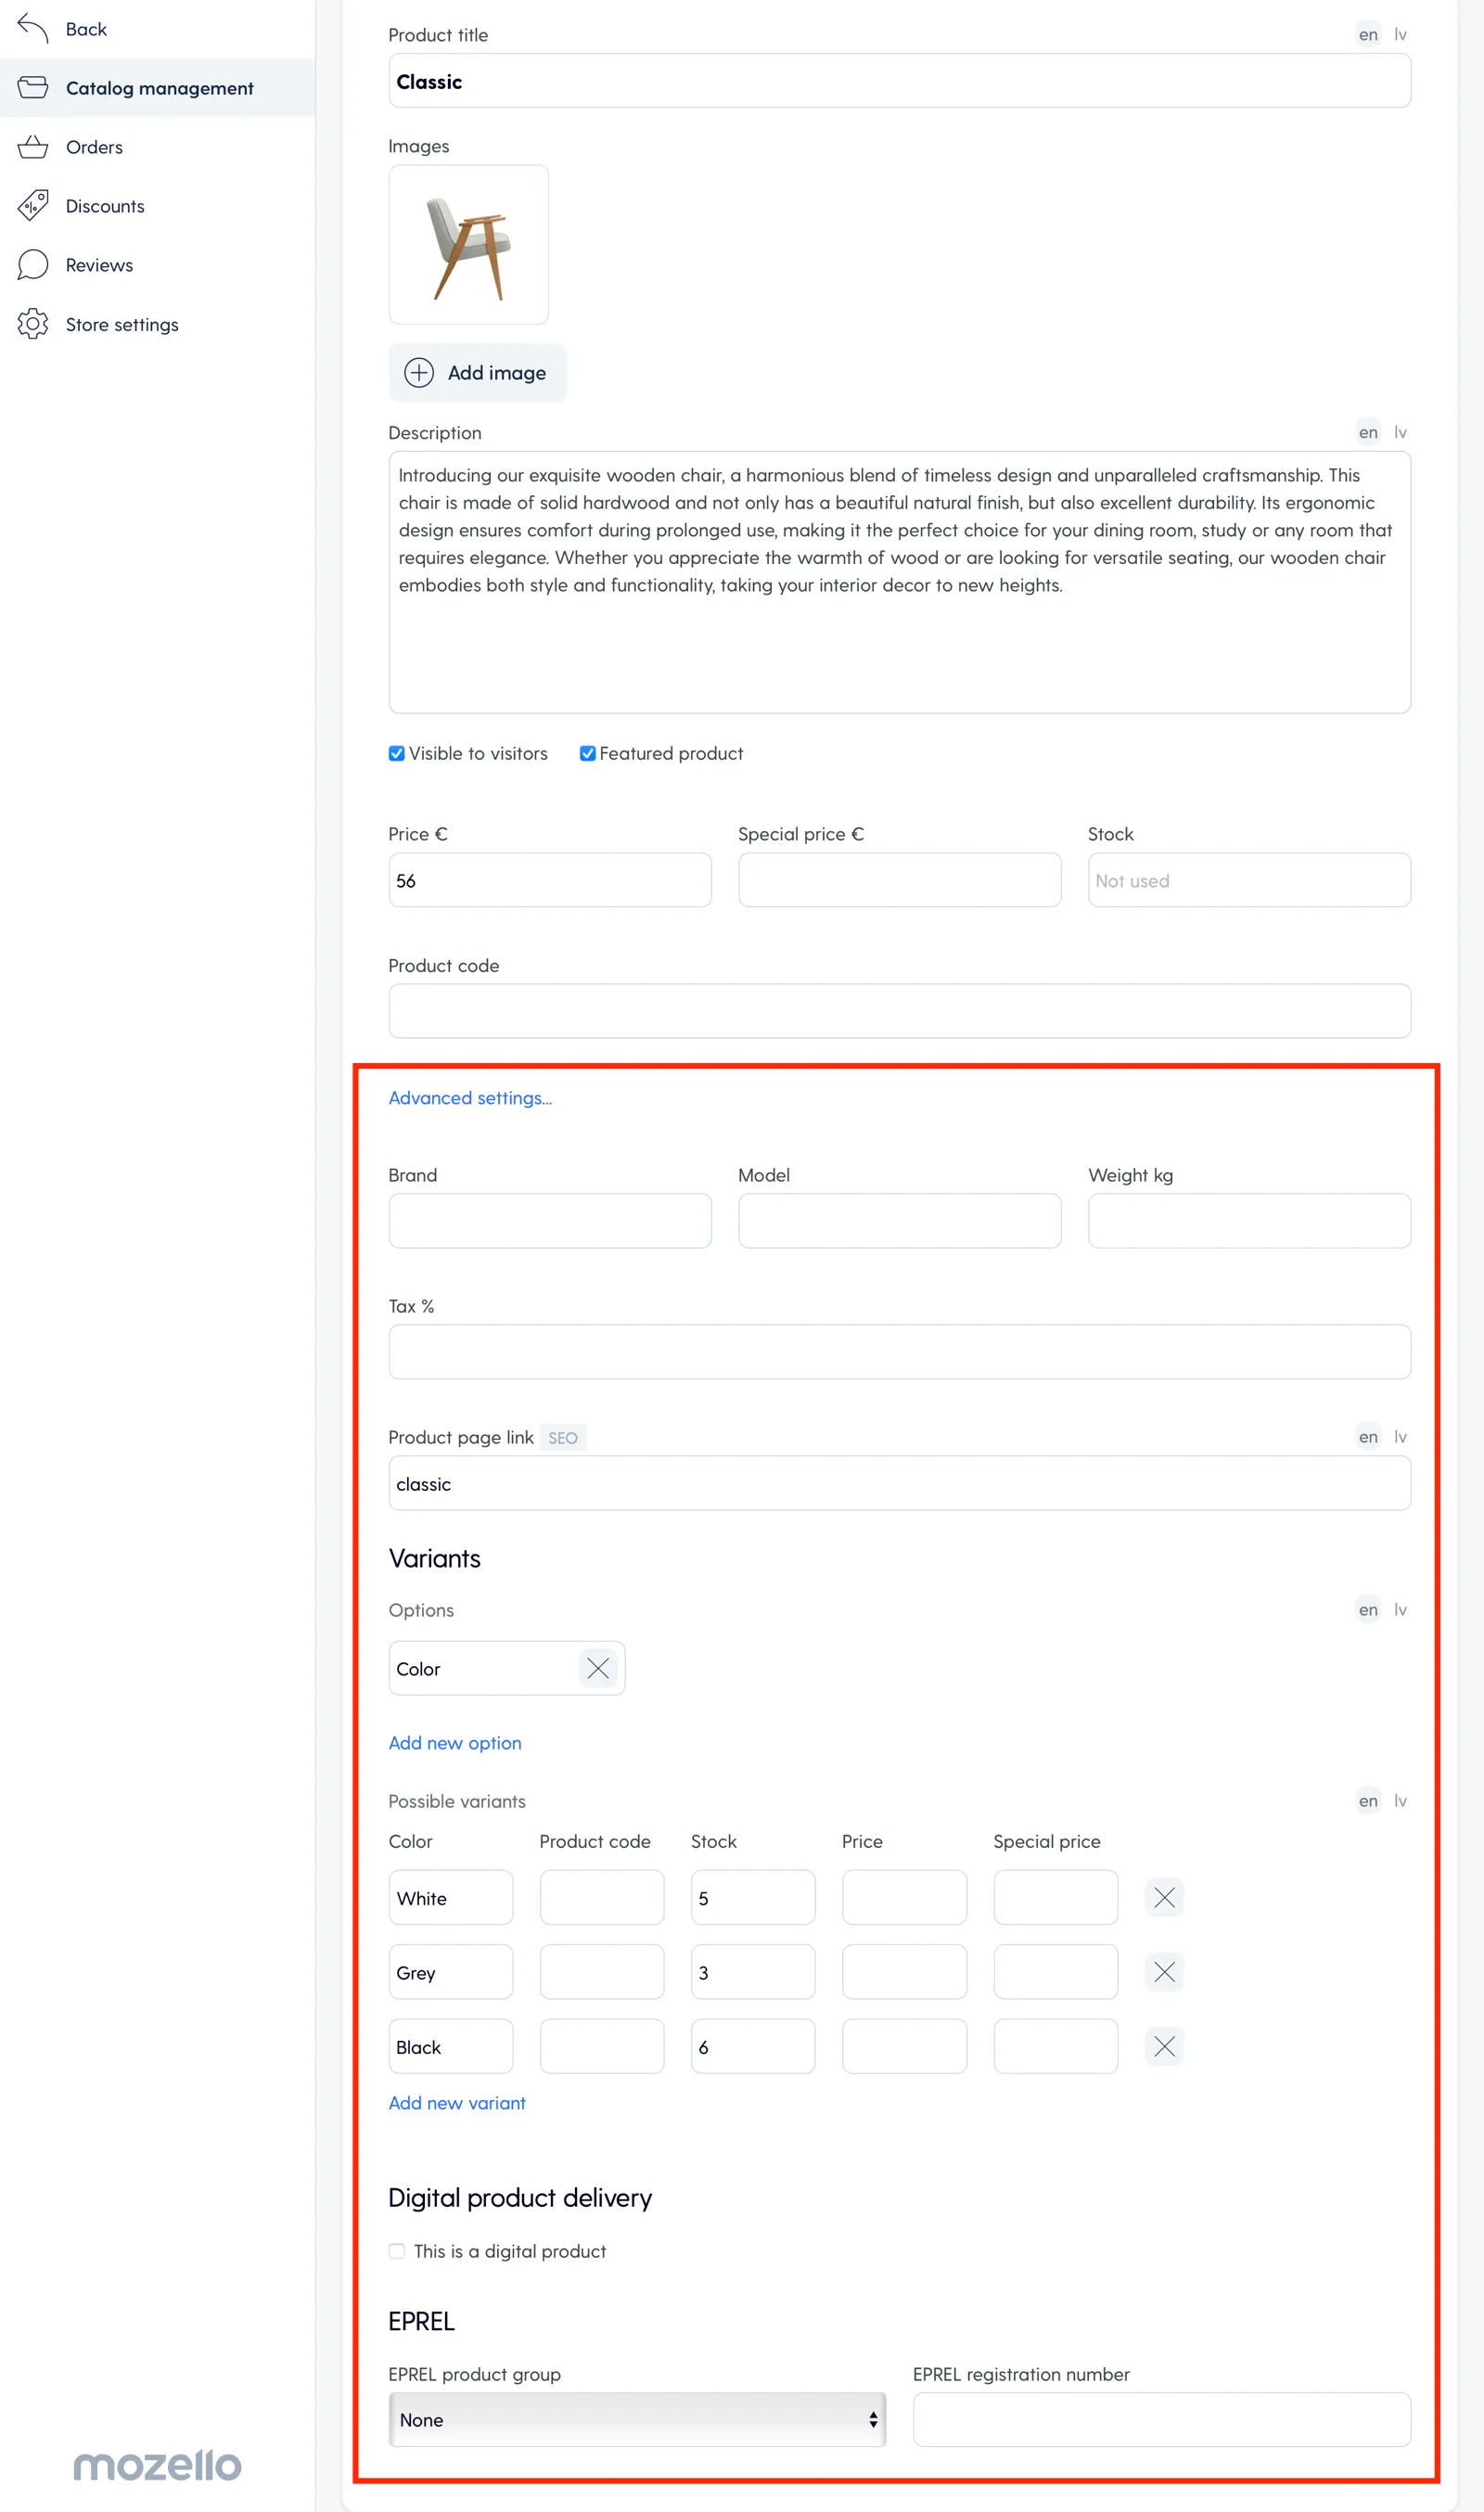
Once you fill in the required fields, click Save to save the product details.
Video: How to manage your online store products.
Video: How to manage product options and variants.
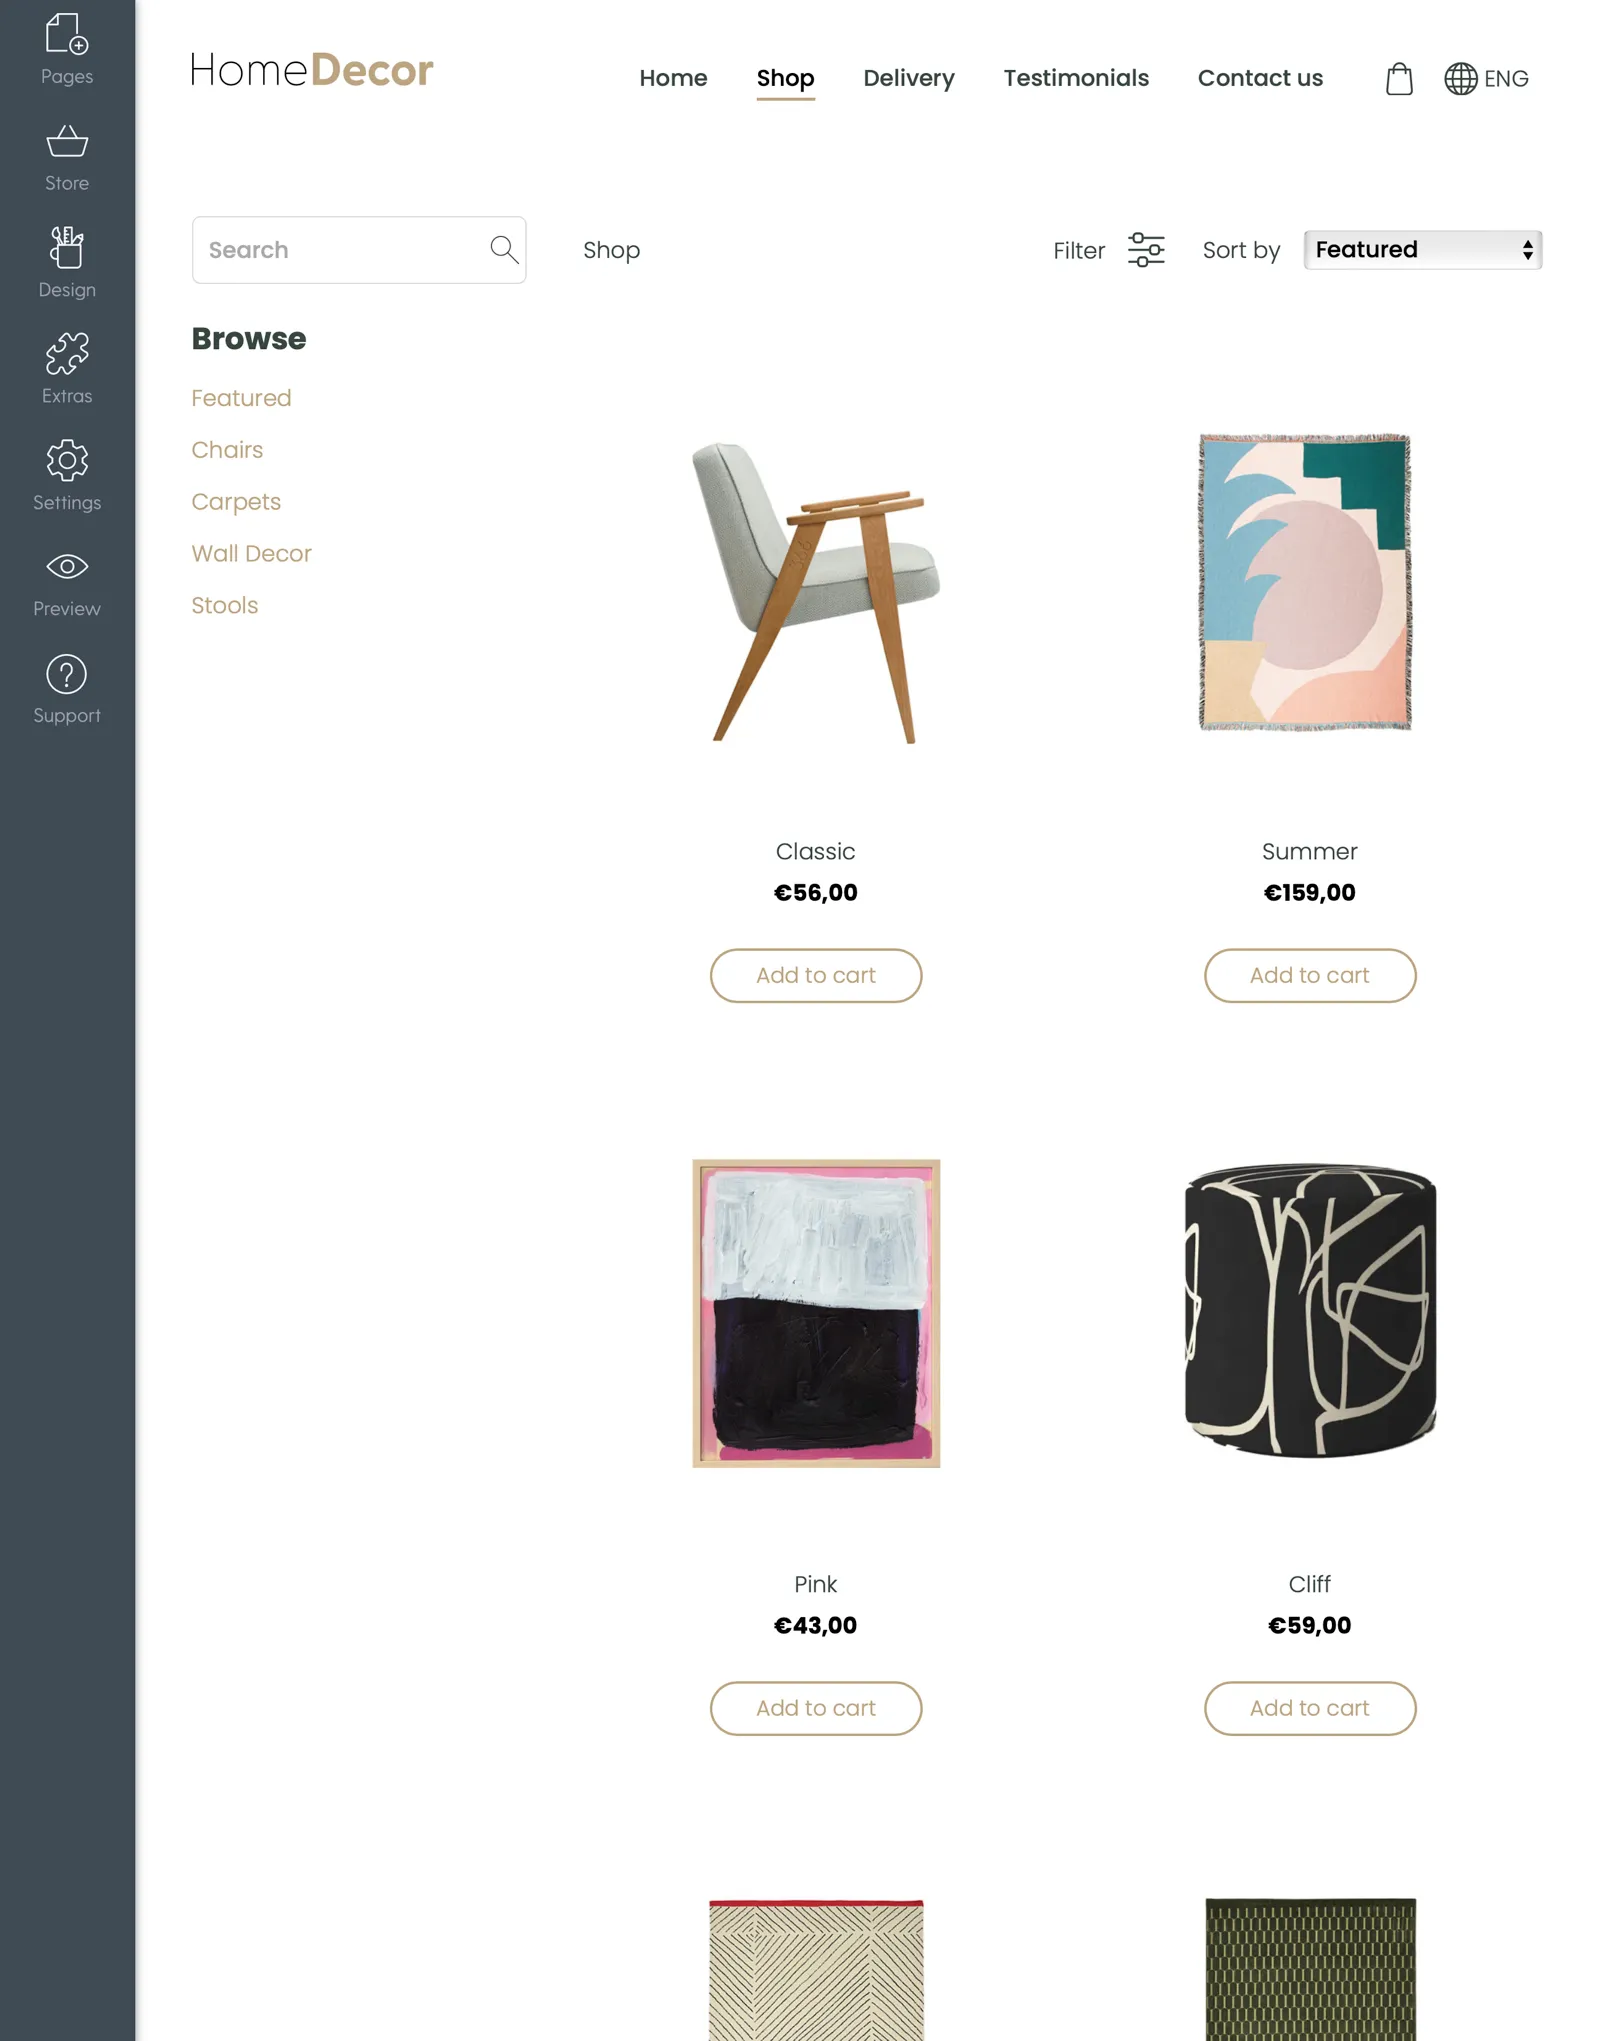
Step 4: Edit the layout of your store
Once you’ve added your products, you can edit the layout of the shop to best showcase your products and their images.
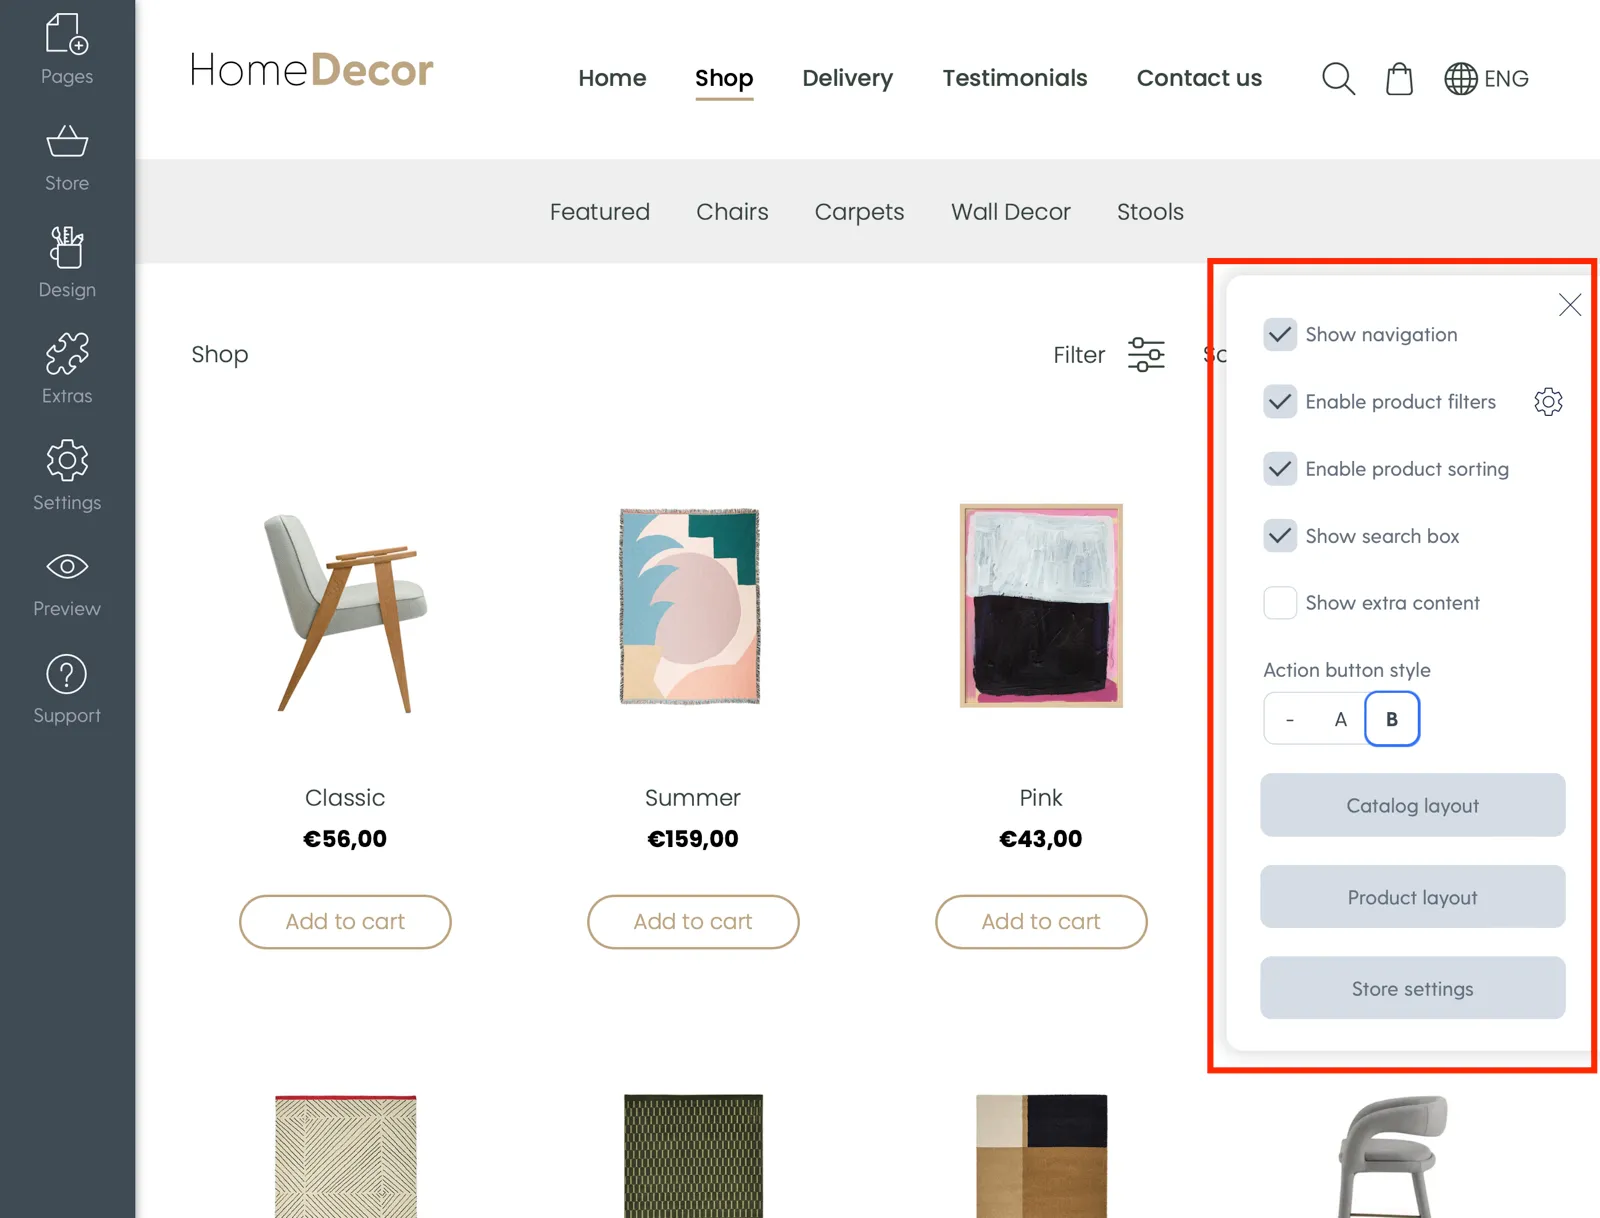
To edit the store view, click on the settings button.
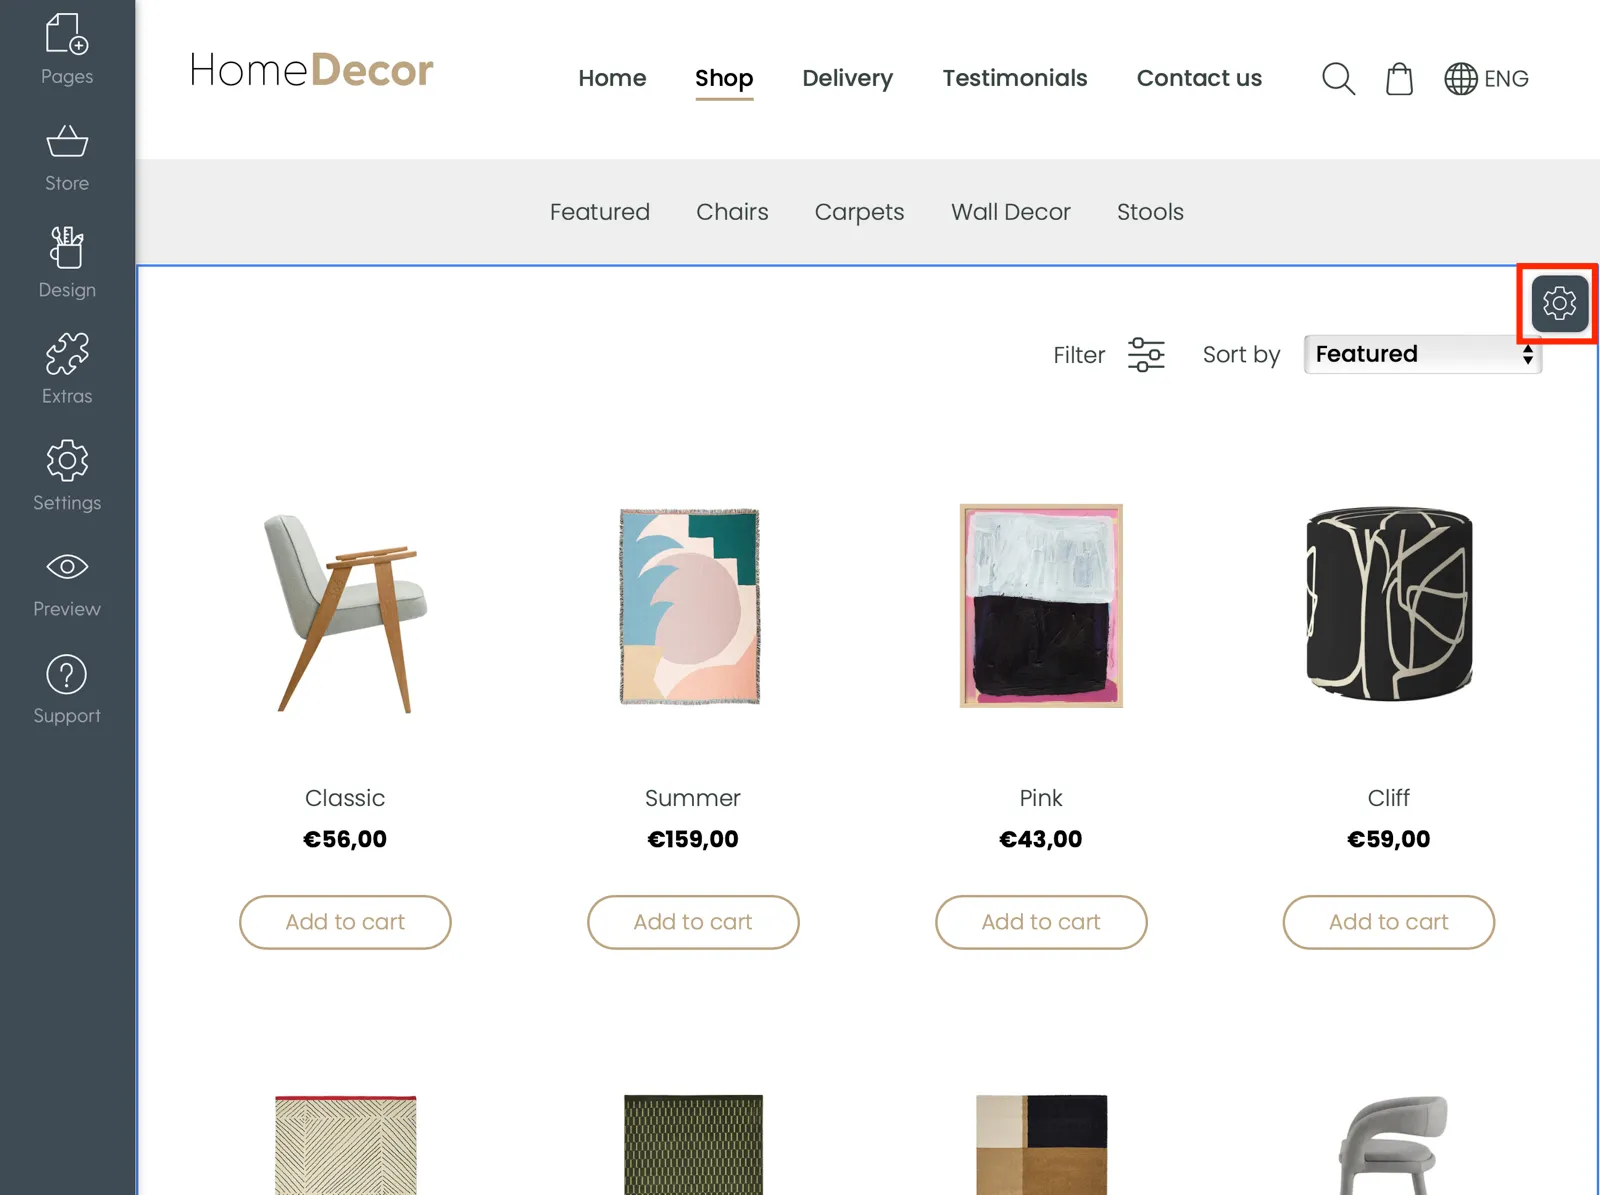
There you can choose many options:
- display the search and additional content field,
- enable breadcrumbs,
- enable product filters and sorting
- change store layout,
- change the product page layout,
- add action buttons that will let customers add products to the cart faster,
- access store settings.
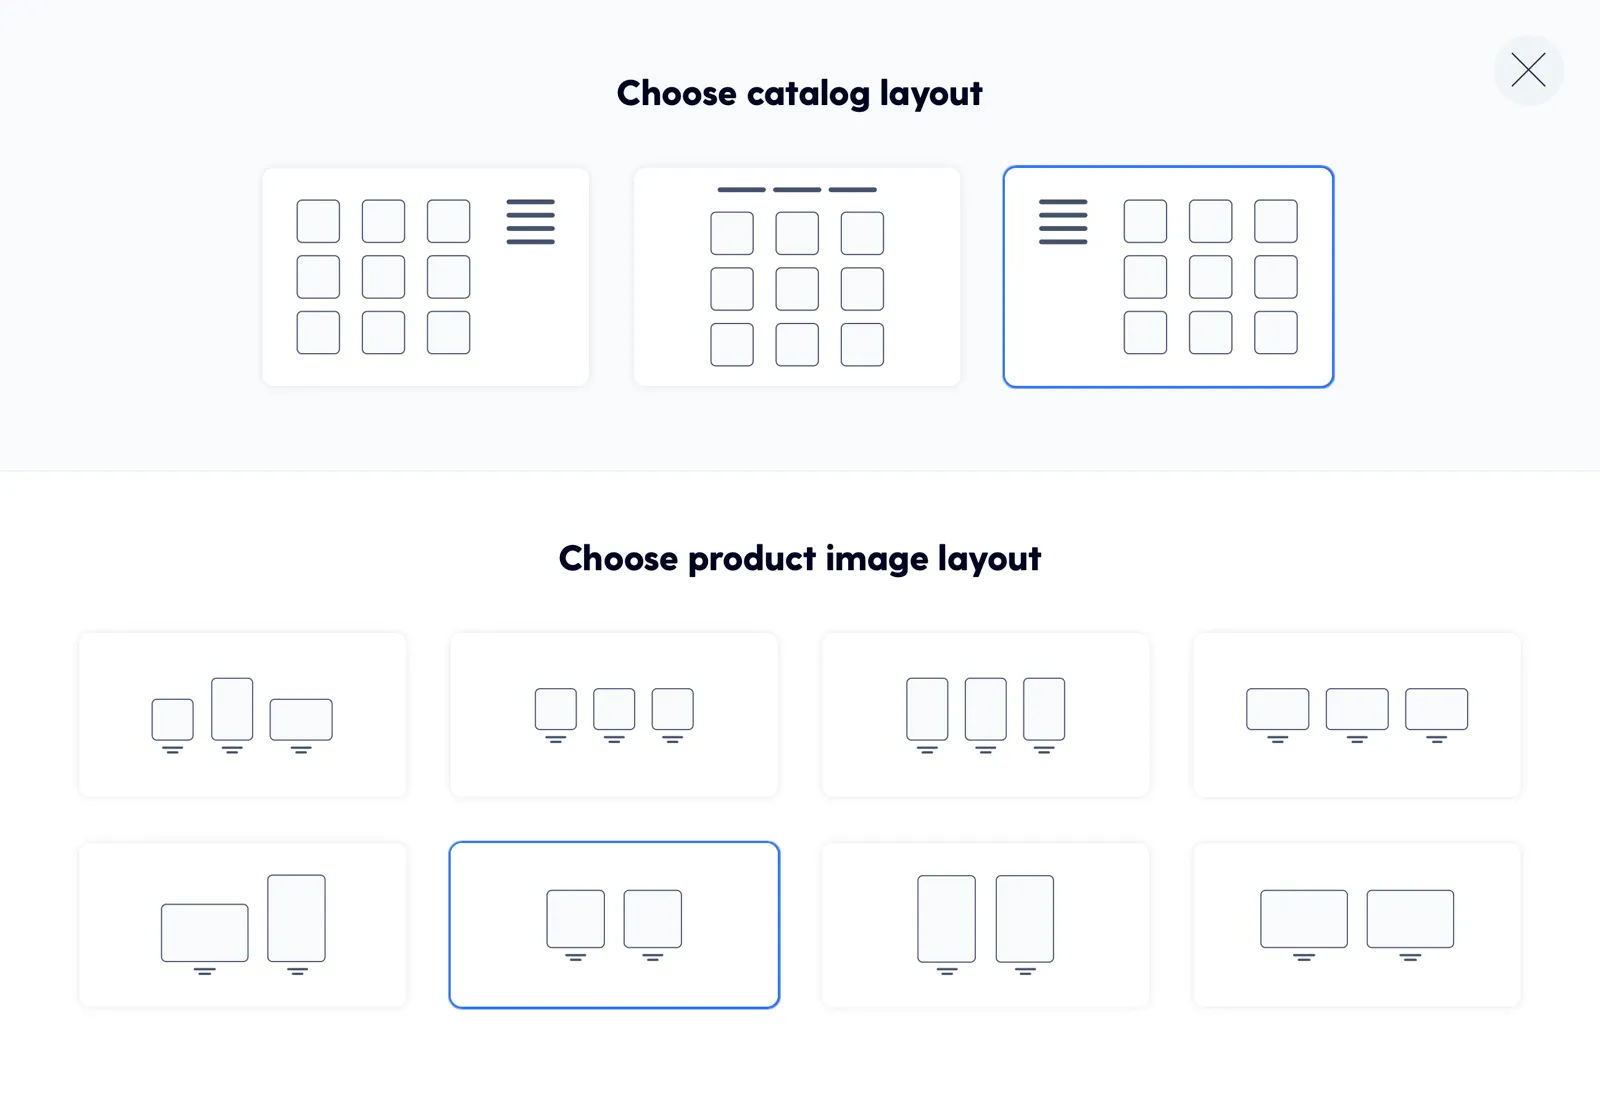
We recommend choosing the layout based on the specific features of your products. For example, if the product is visual, it may be more important to have fewer products per row so that the images appear larger. If you don’t have many categories in your shop, it’s probably better to have the categories at the top.
Video: How to customize your online store layout.
Step 5: Enter the delivery and payment options
Once the products are added, you can add the delivery and payment methods you plan to make available to your clients.
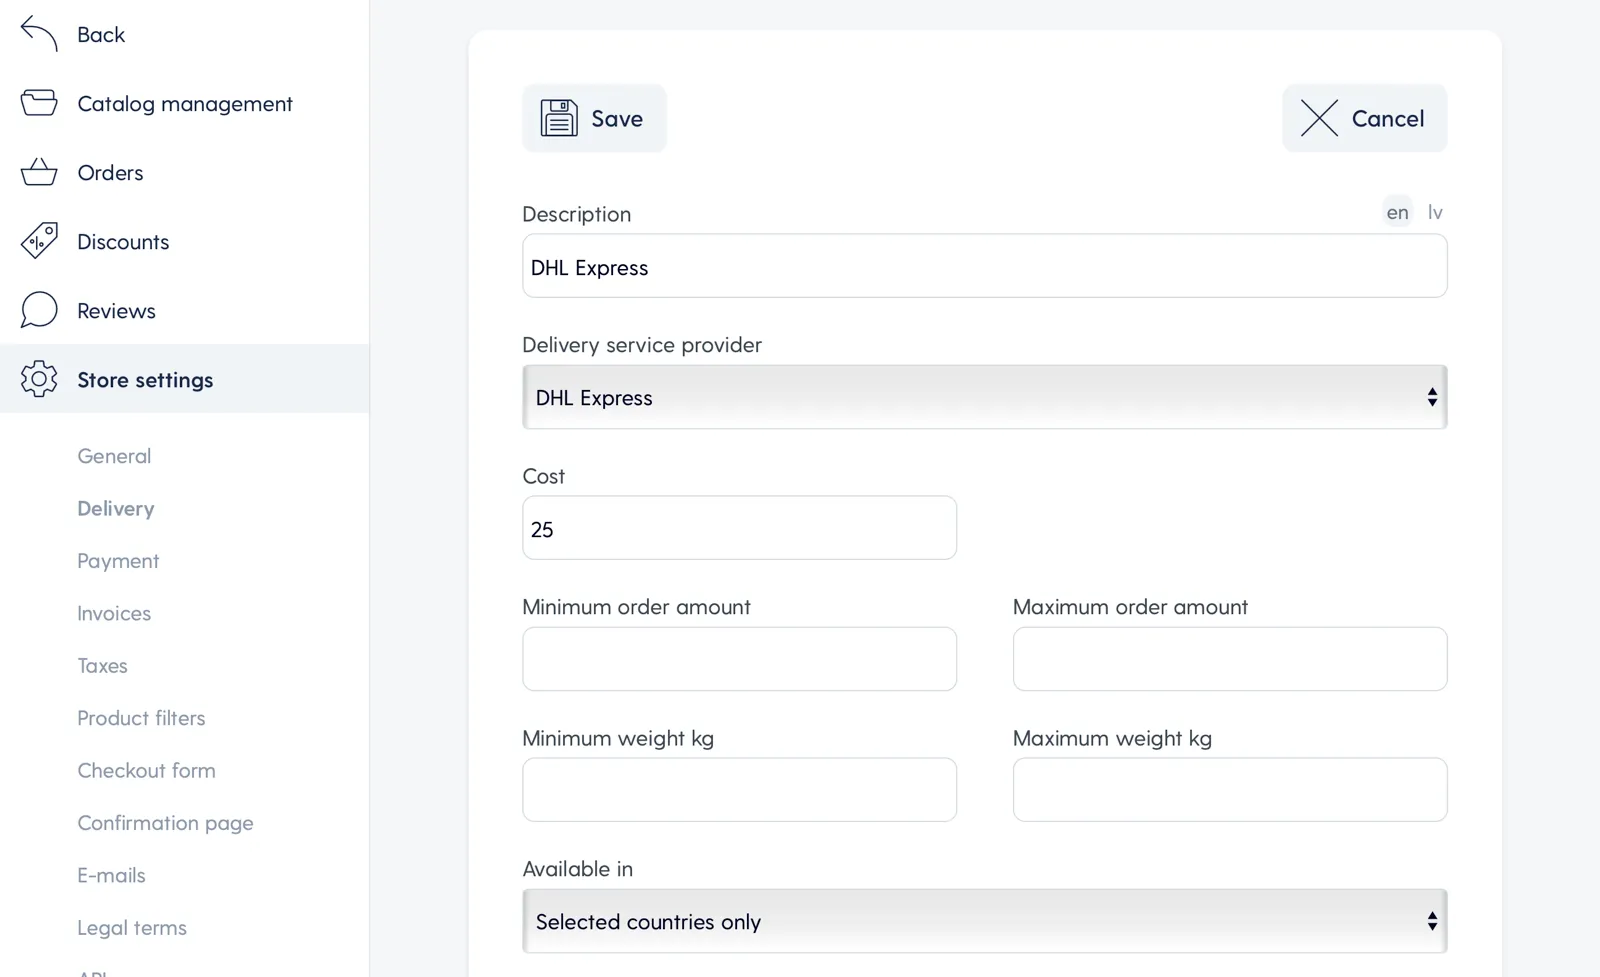
5.1. Adding delivery methods
- To add delivery methods to your online store, go to Store → Store settings → Delivery → Add new delivery method.
- Pick the delivery service provider or create your own
- Enter the delivery name, price and the minimum order amount/minimum weight (if any) at which this type of delivery becomes available.
- If you want to add another delivery method (post, courier, etc.), click the Add new delivery method button again.
- Enter all the parameters and click Save.
- Repeat the above steps to add all the delivery methods you need.
Video: How to add delivery methods.
5.2. Adding payment options
To add payment methods to your online shop, go to Store → Store settings → Payment.
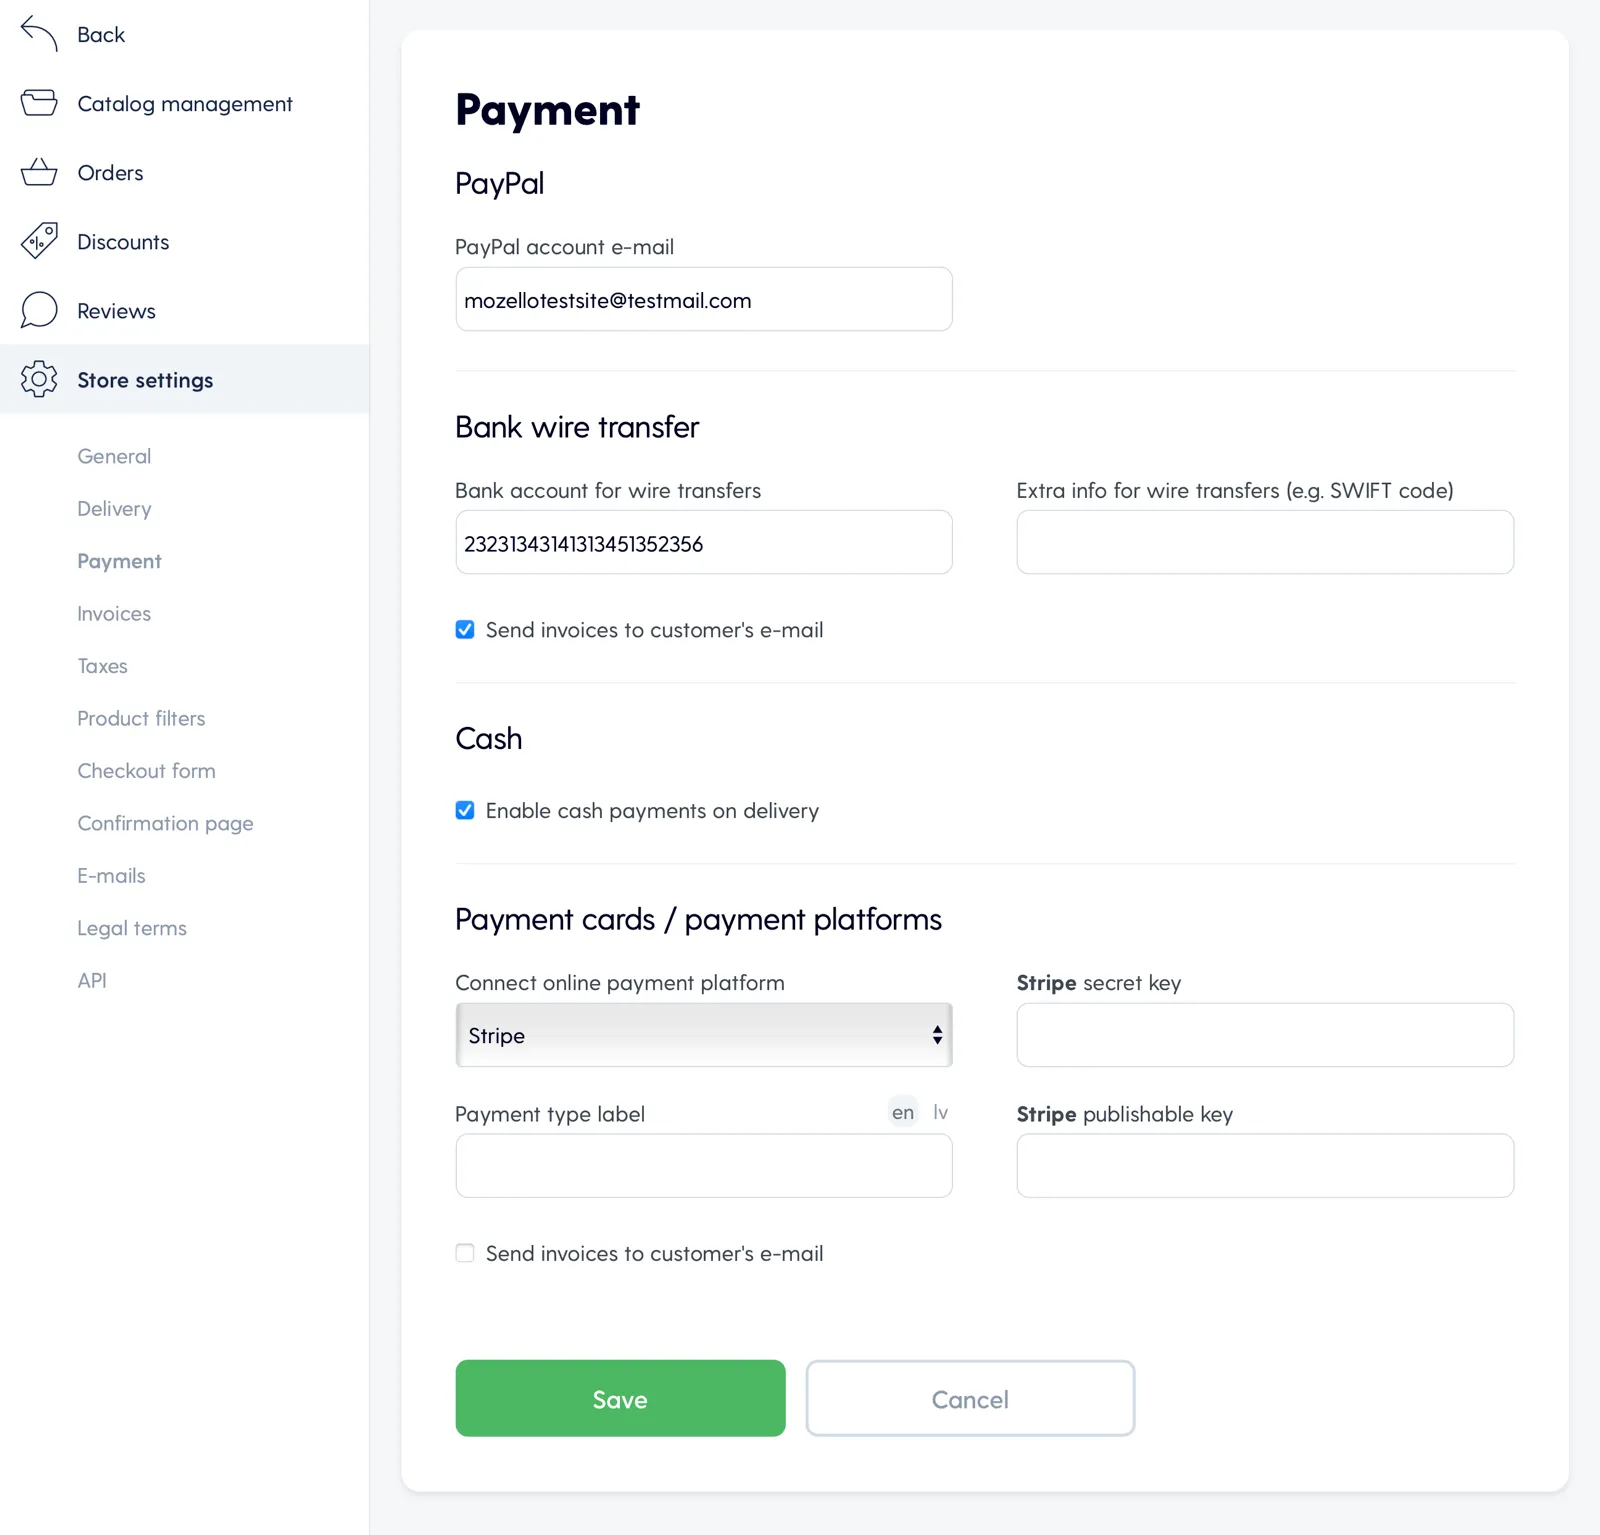
Mozello offers the following payment methods:
- PayPal
To activate it, simply enter your PayPal account e-mail address. - Payments by bank transfer with an invoice
Enter the bank account number that your customers will transfer the money to. You can also enter additional details that the client will see on the invoice, such as ‘Please include the order number in the payment details’. - Cash on delivery
Check this if you want to offer this option. - Payment cards/payment platforms
To add credit/debit card payments, you must first register with one of the many payment processing platforms supported by Mozello. You can see the list here. When you register with a payment processing platform (or sign an agreement with one), you will receive your user authentication details, which you can within Mozello to activate online payments with it.
Video: How to start accepting payments.
Video: How to start accepting payment cards.
Step 6: Additional information and contacts page
It is important to make sure that your customers can easily find all the relevant information and answers to questions they may have about you or your products and services.
You can post additional information in the sidebar or by adding a new page, such as a contacts page, to make it easier for your customers to get in touch you.
Key information that must be included in your e-commerce site:
- Delivery and general terms and conditions of your shop.
- Contacts page with company registration details, bank details, and contact details
- Testimonials
- Frequently asked questions is also a good idea.
6.1. Delivery and general terms and conditions of your shop
Create a section that answers these questions:
- What are the delivery options?
- How long does it take on average for goods to be delivered?
- What is the return policy and warranty?
- Answers to the frequently asked questions about your products
Benefits of setting up an e-commerce site with Mozello: A page with terms and conditions is generated automatically, and you can edit it to suit your needs.
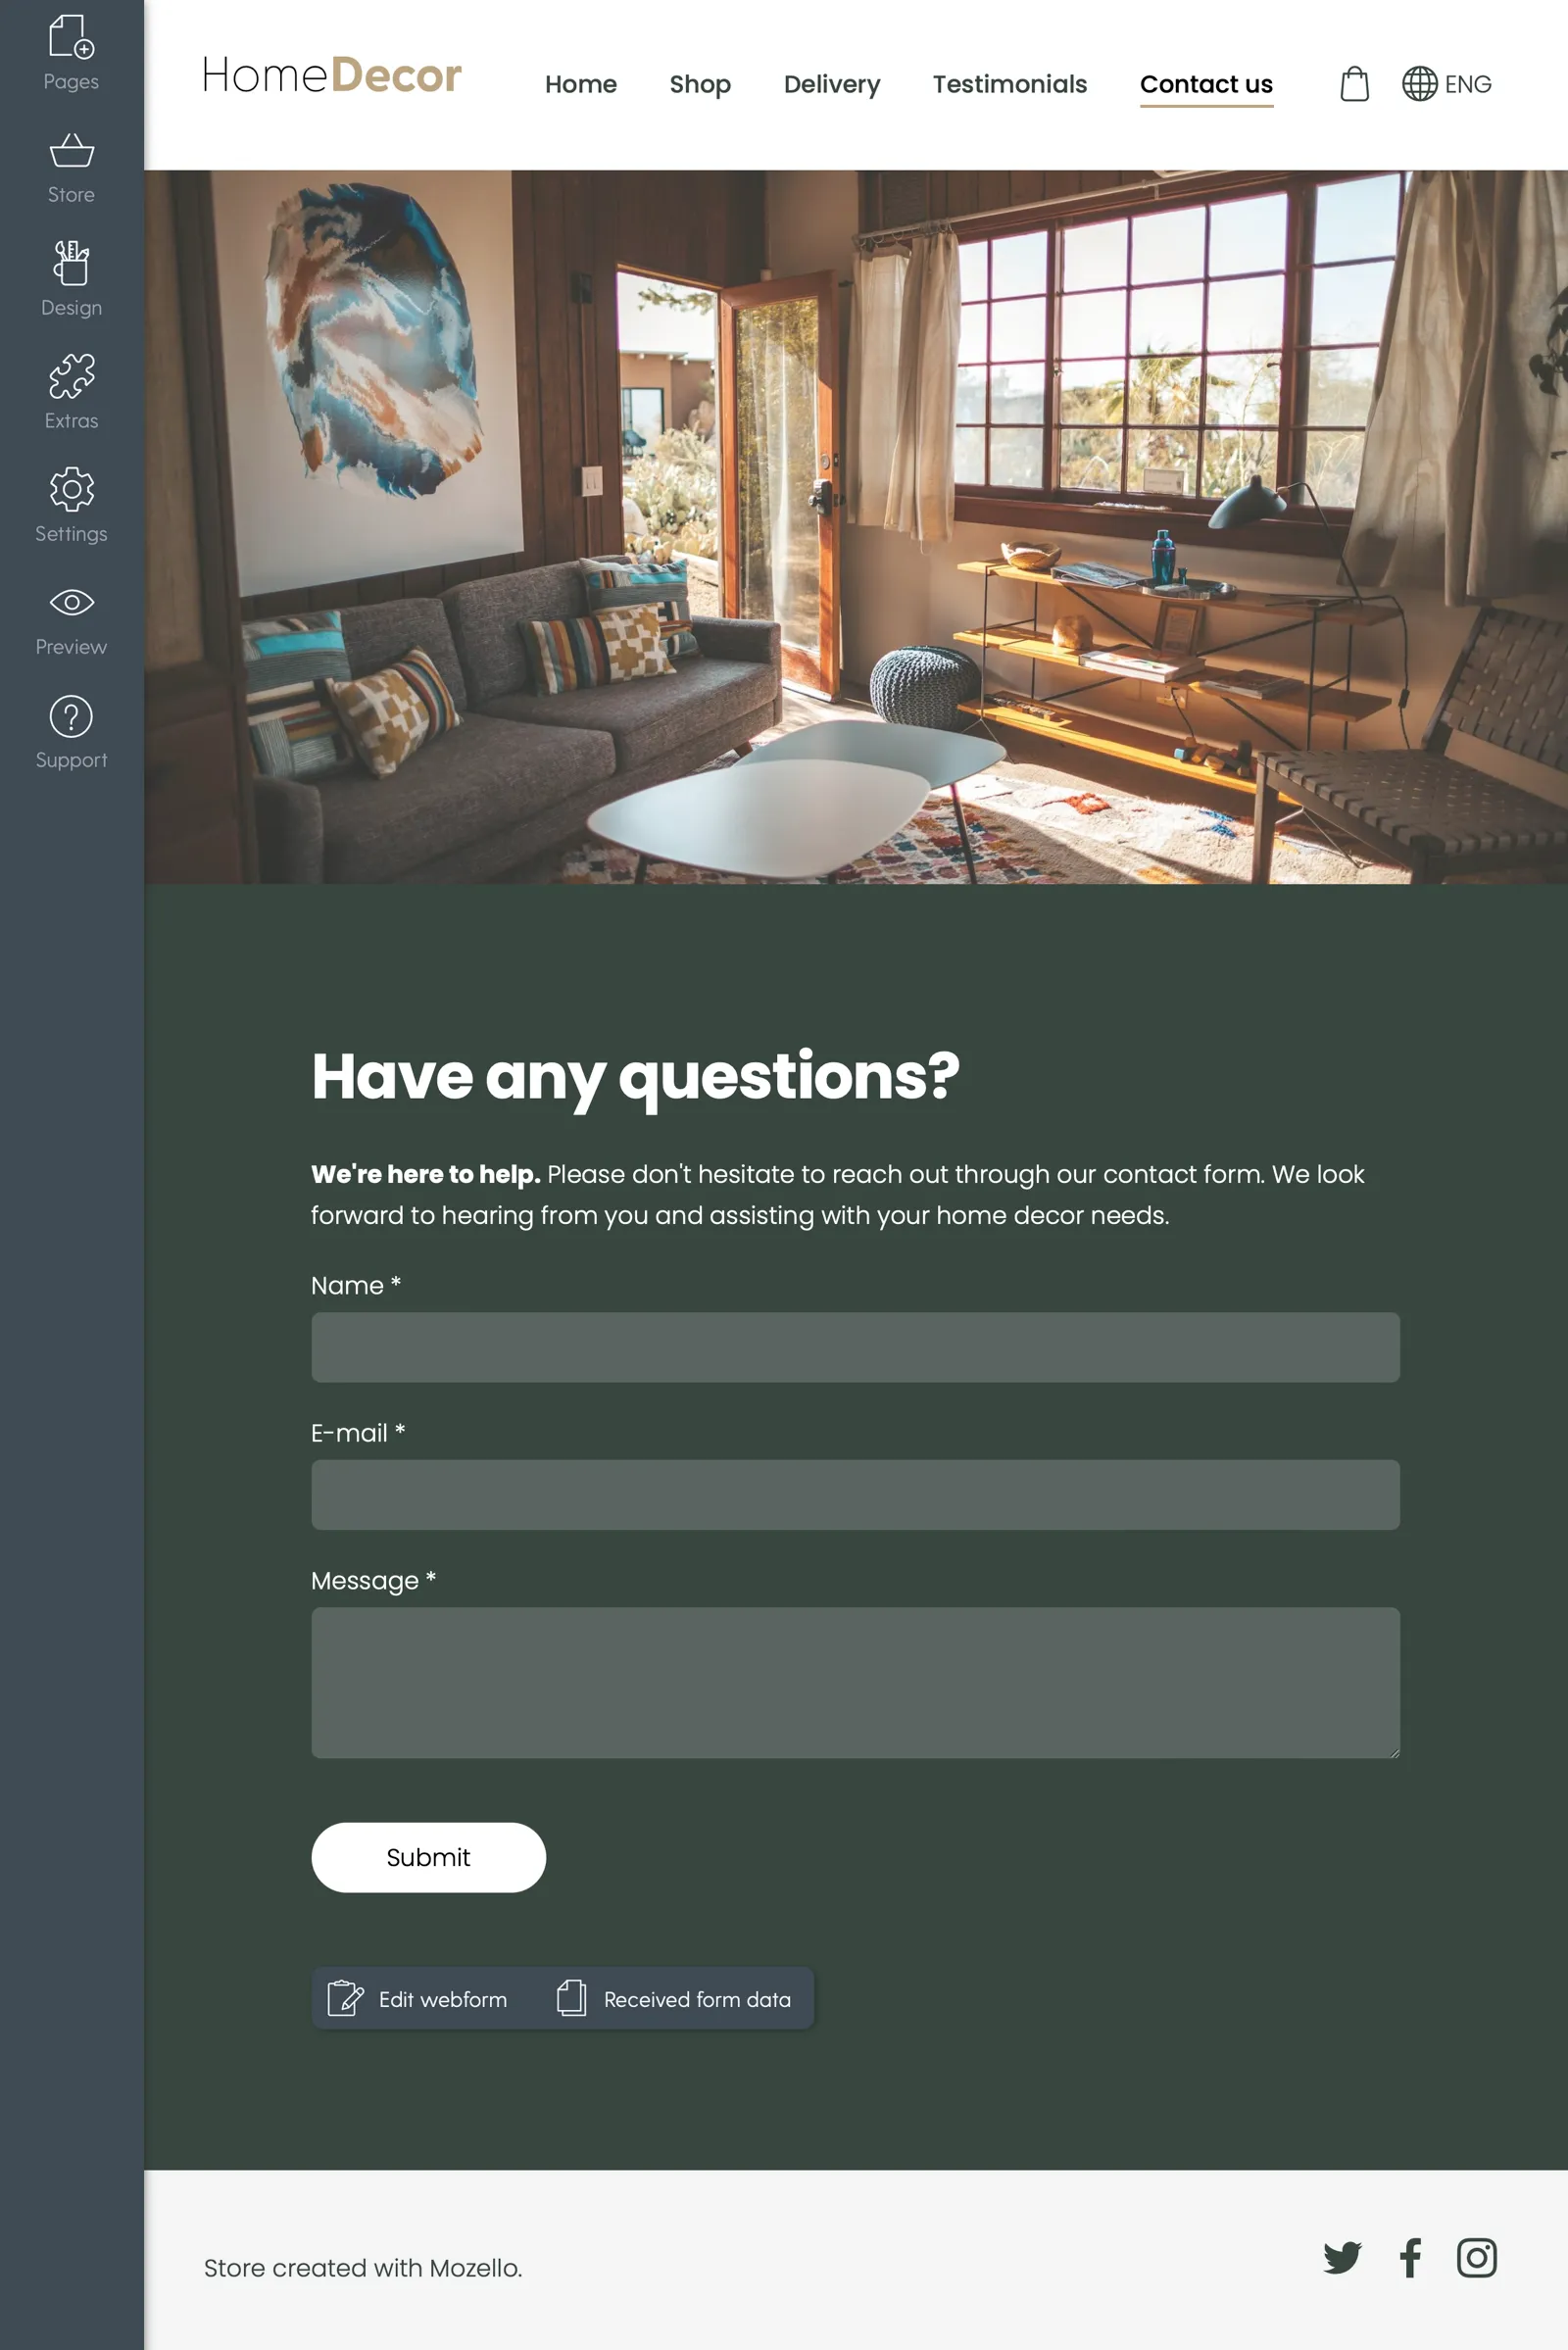
6.2. Contacts page
There will always be customers who want to get in touch with you and ask a question. This is a great opportunity to demonstrate customer service and even make a sale.
Go to the pre-generated Contacts page and add contact details, working hours, and other important information. Here you can:
- Adapt the contact form to your needs
- Enter your phone number, e-mail, physical address
- Insert a map with your office or shop location
- Create additional content fields if necessary
6.3. Reviews / Testimonials
These days more than ever, customers will look for feedback about products or services before buying them. So if you have some testimonials about your products and have posted them on your online store, they can be of great value.
You can publish reviews in two ways:
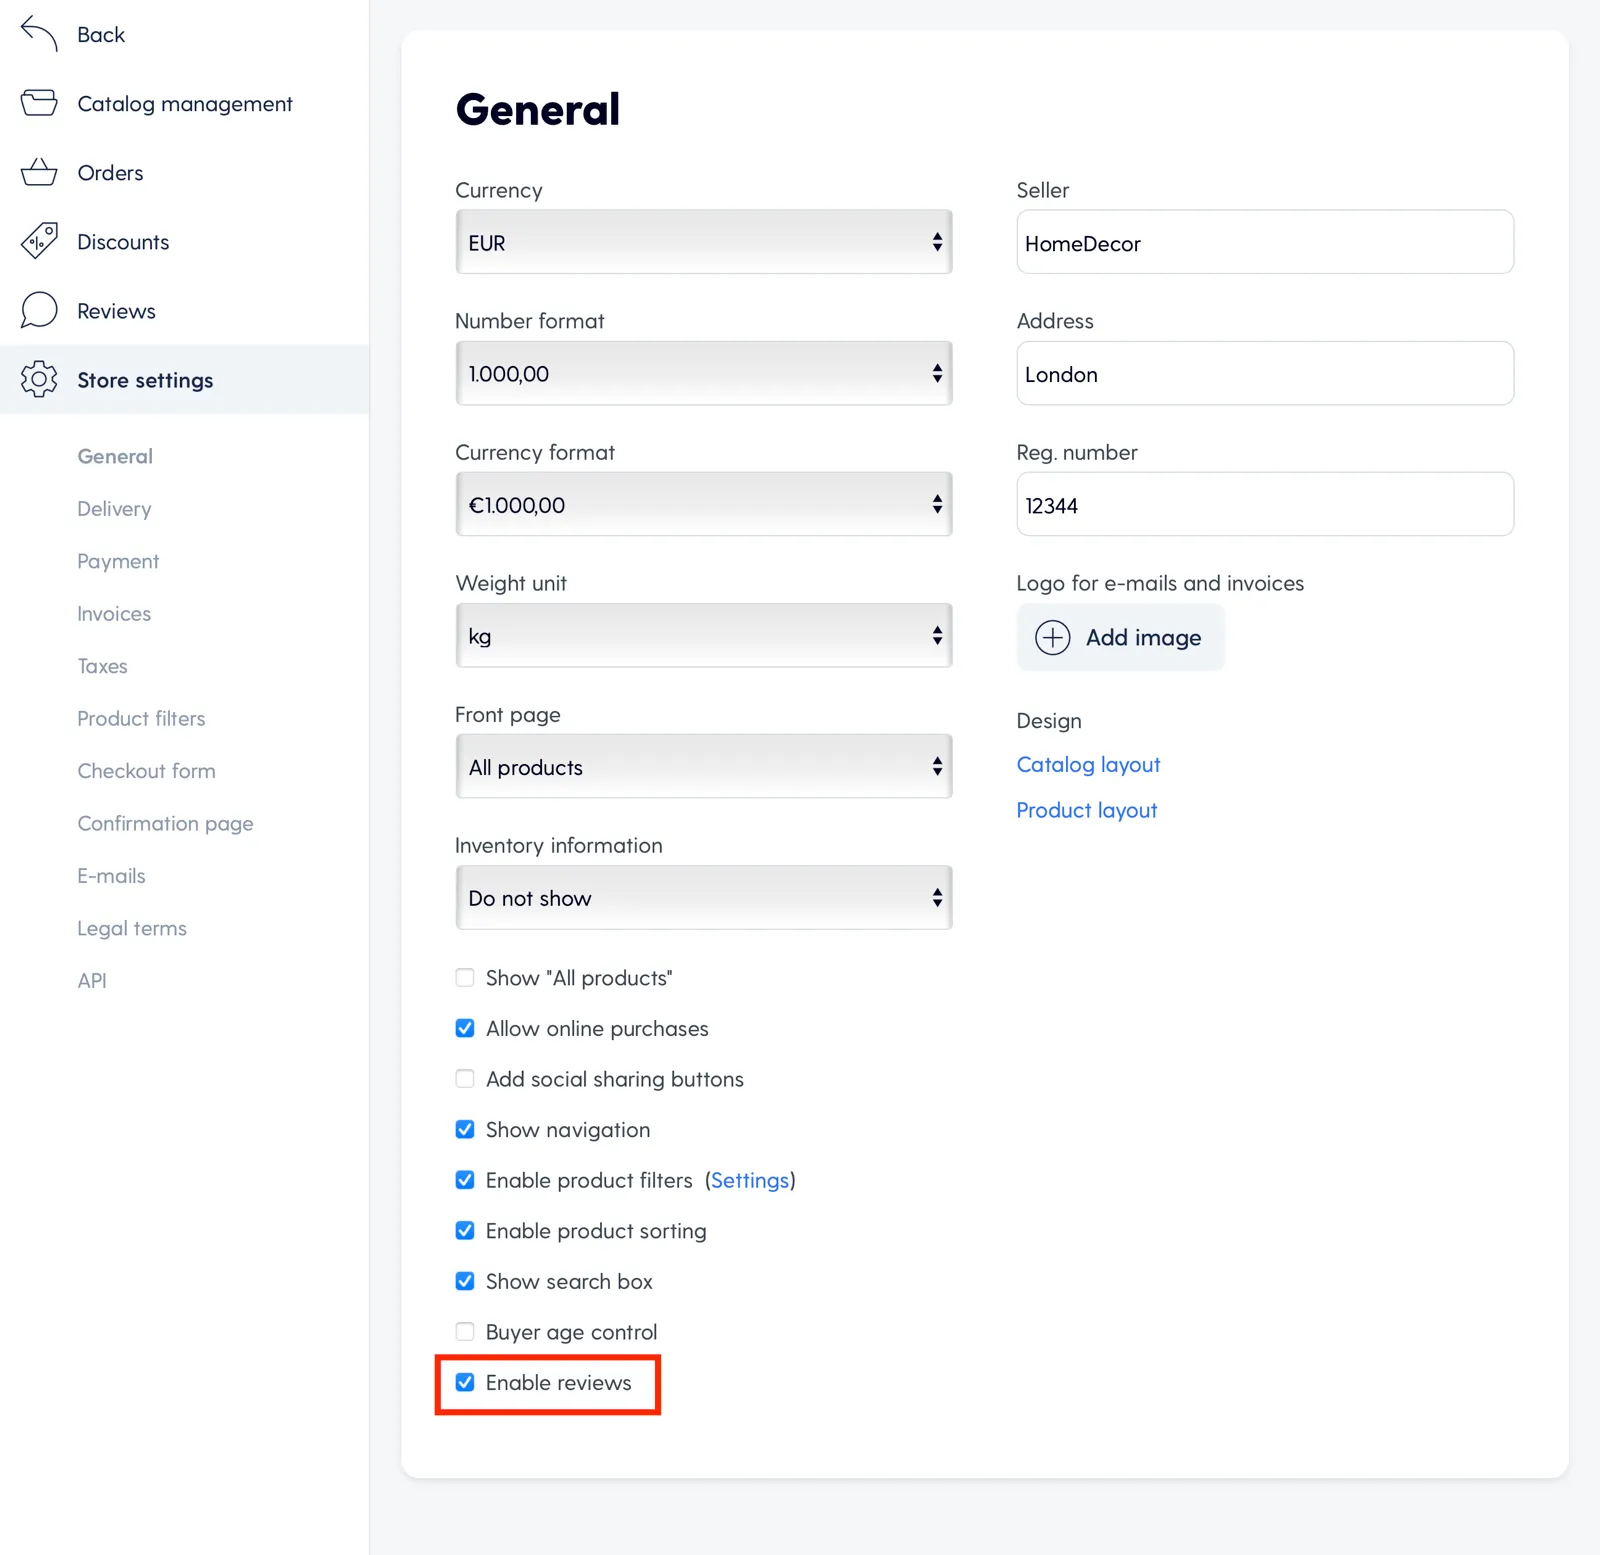
6.3.1. Automated product reviews
Enable product review notification e-mail that will be sent to your customers a specified period after they have made a purchase (the days count can be adjusted).
To enable Reviews go to Store → Store settings → General and tick the checkbox Enable reviews.
When that is done, go to E-mails section and select the review invitation delay.
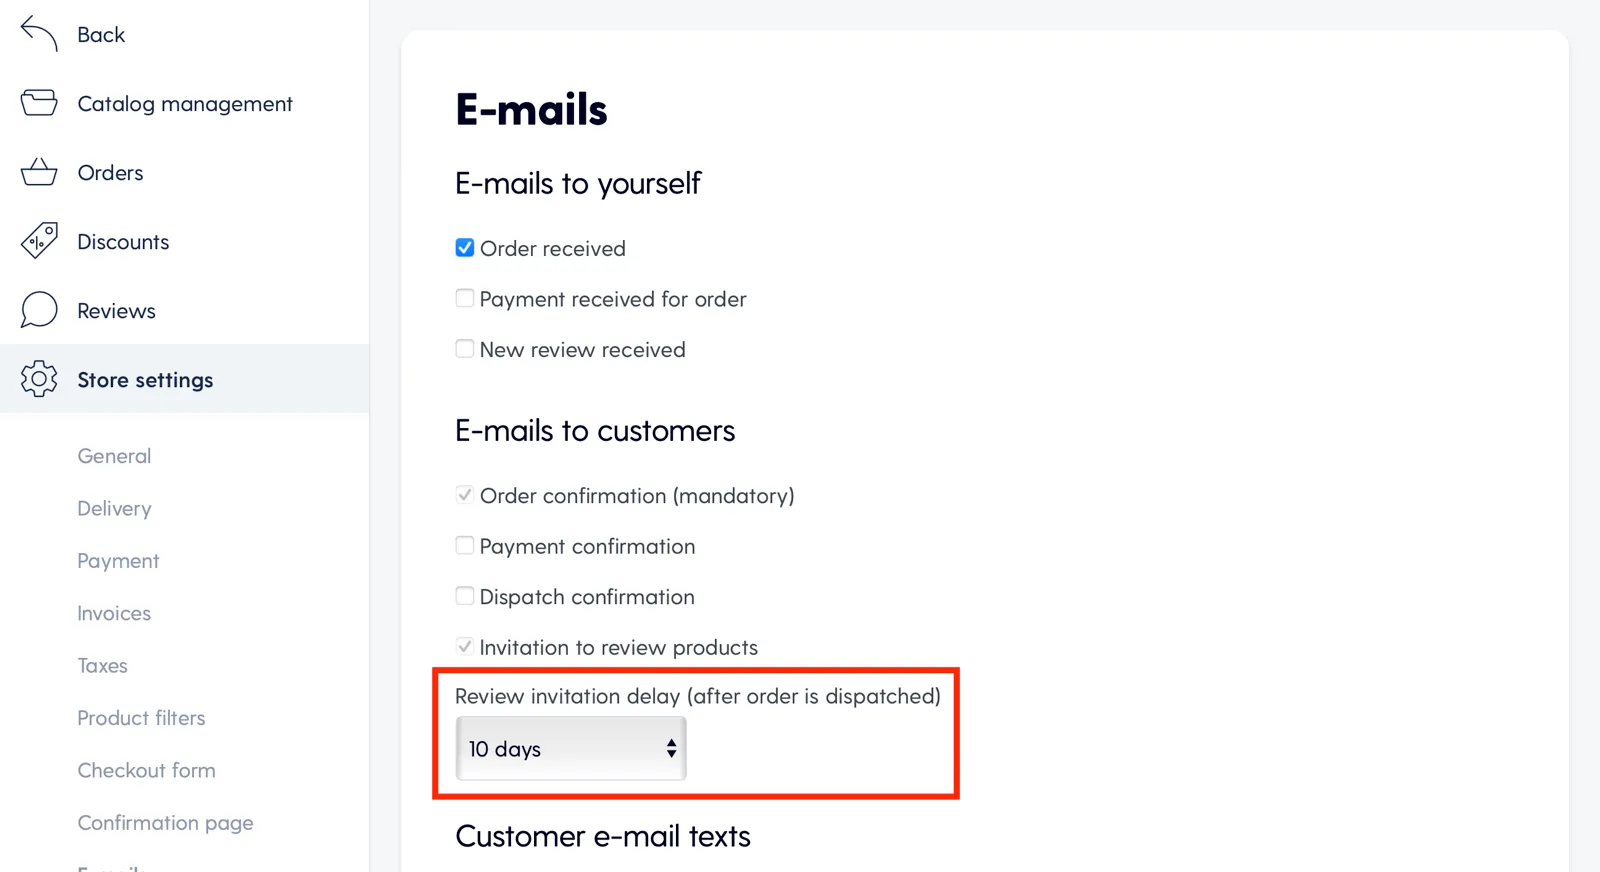
Important note: The invitation e-mail will be sent only when the product status will be set to “Dispatched”, which is a manual process that can be done in the order section.
Once you receive product reviews they will be accessible in Reviews section. You can either approve or reject them. Once approved the review will be visible in the product page. You will get notifications about new reviews in your e-mail.
6.3.2. Create a separate page dedicated to customer testimonials
You can create separate page dedicated to customer testimonials. Testimonials can be in the form of text, videos, or images.
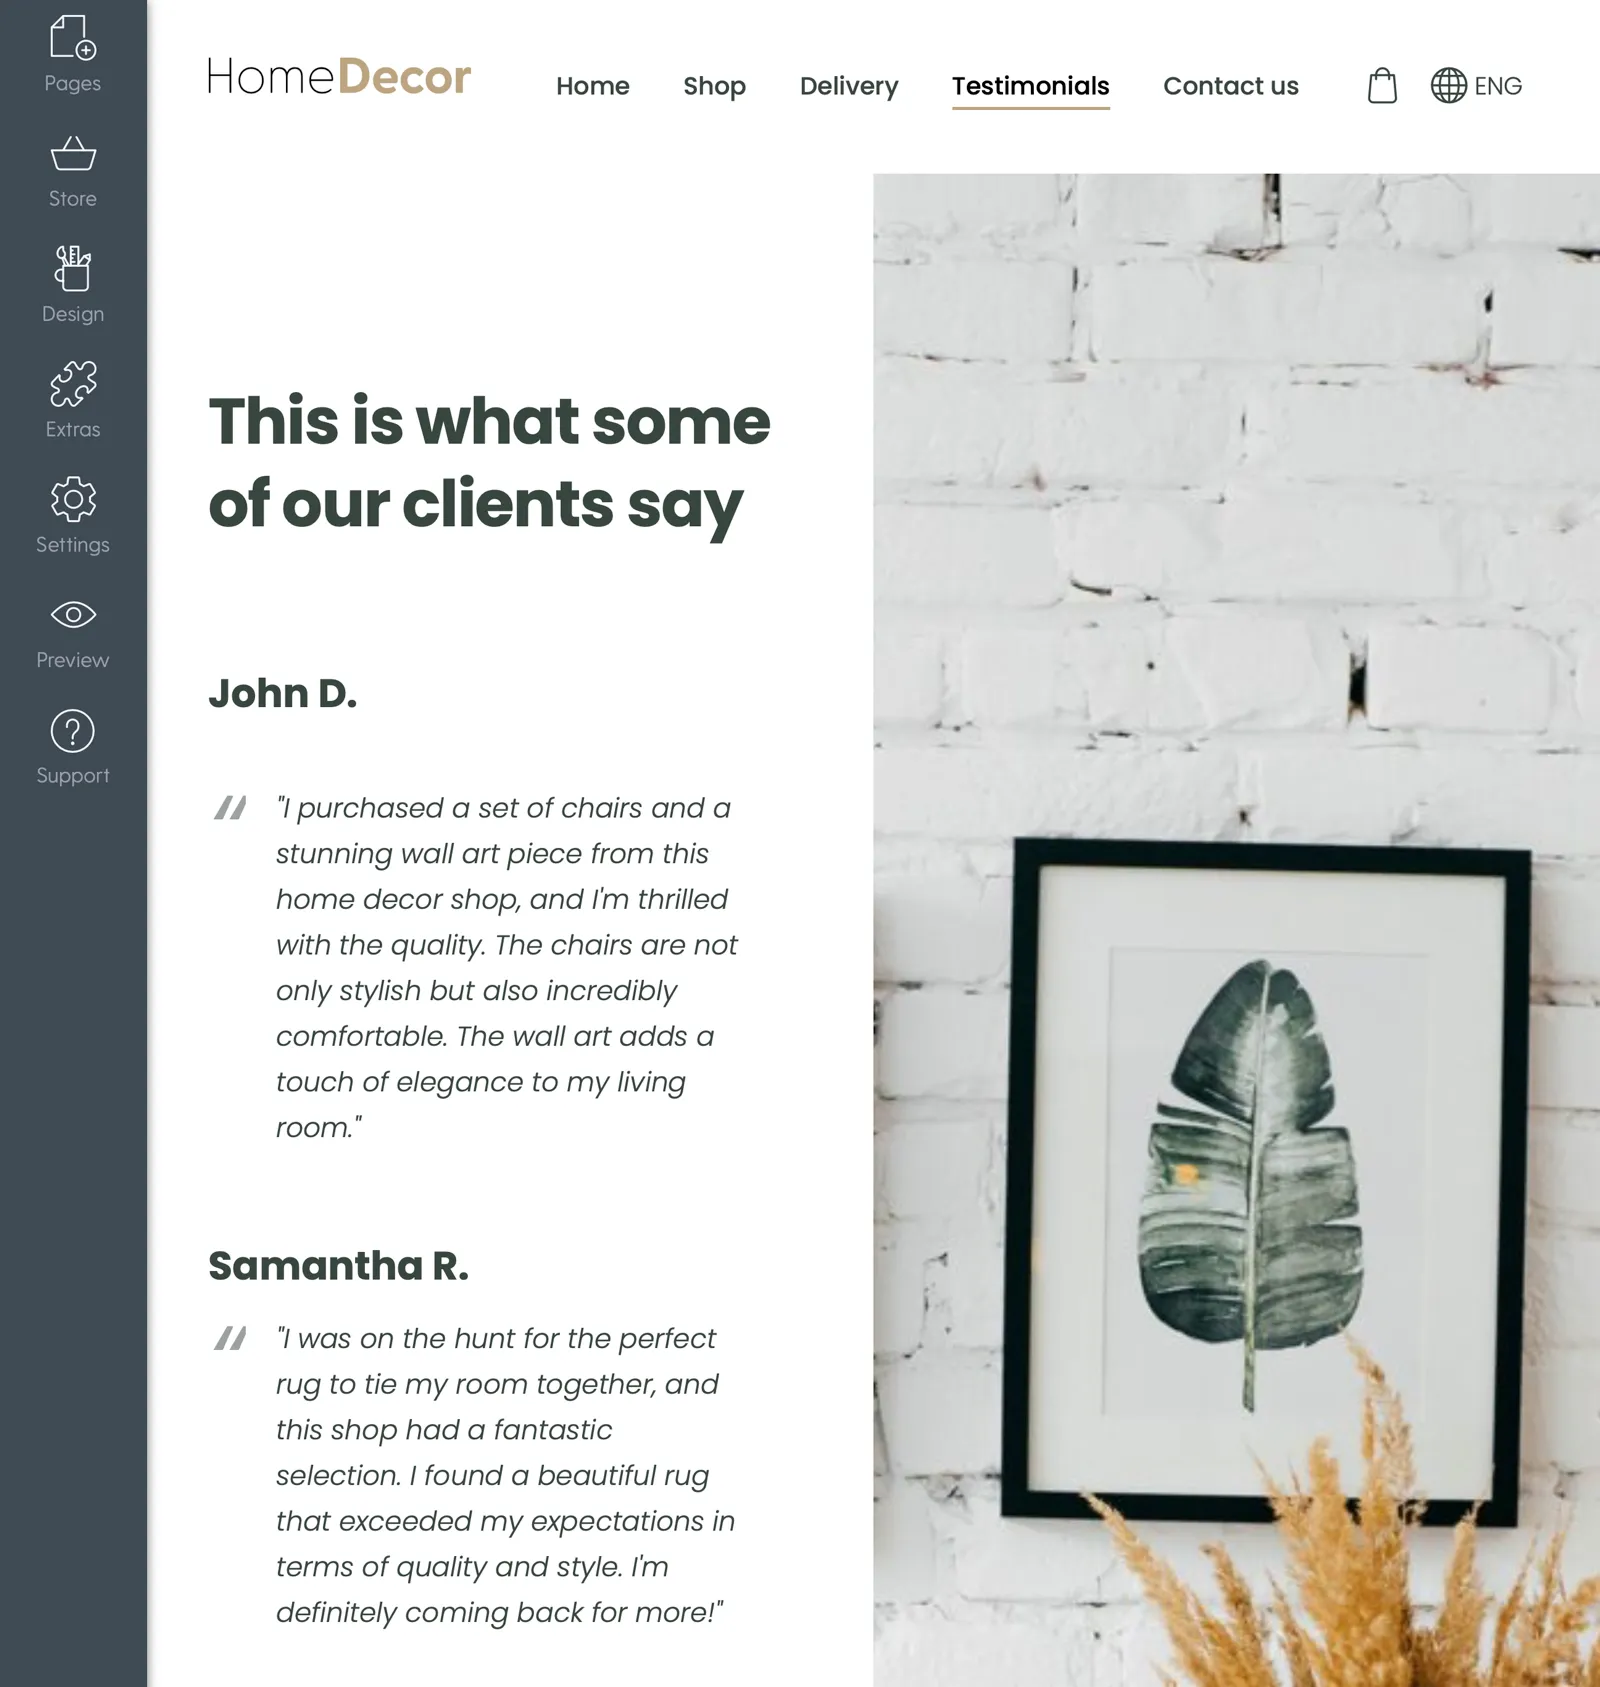
Reviews under products or a testimonials page will give a boost to the credibility of your product and help improve your sales.
Step 7: Other useful features for your online store
When you build your online store with Mozello, you can take advantage of many other Mozello features that help you customise your store and improve its efficiency.
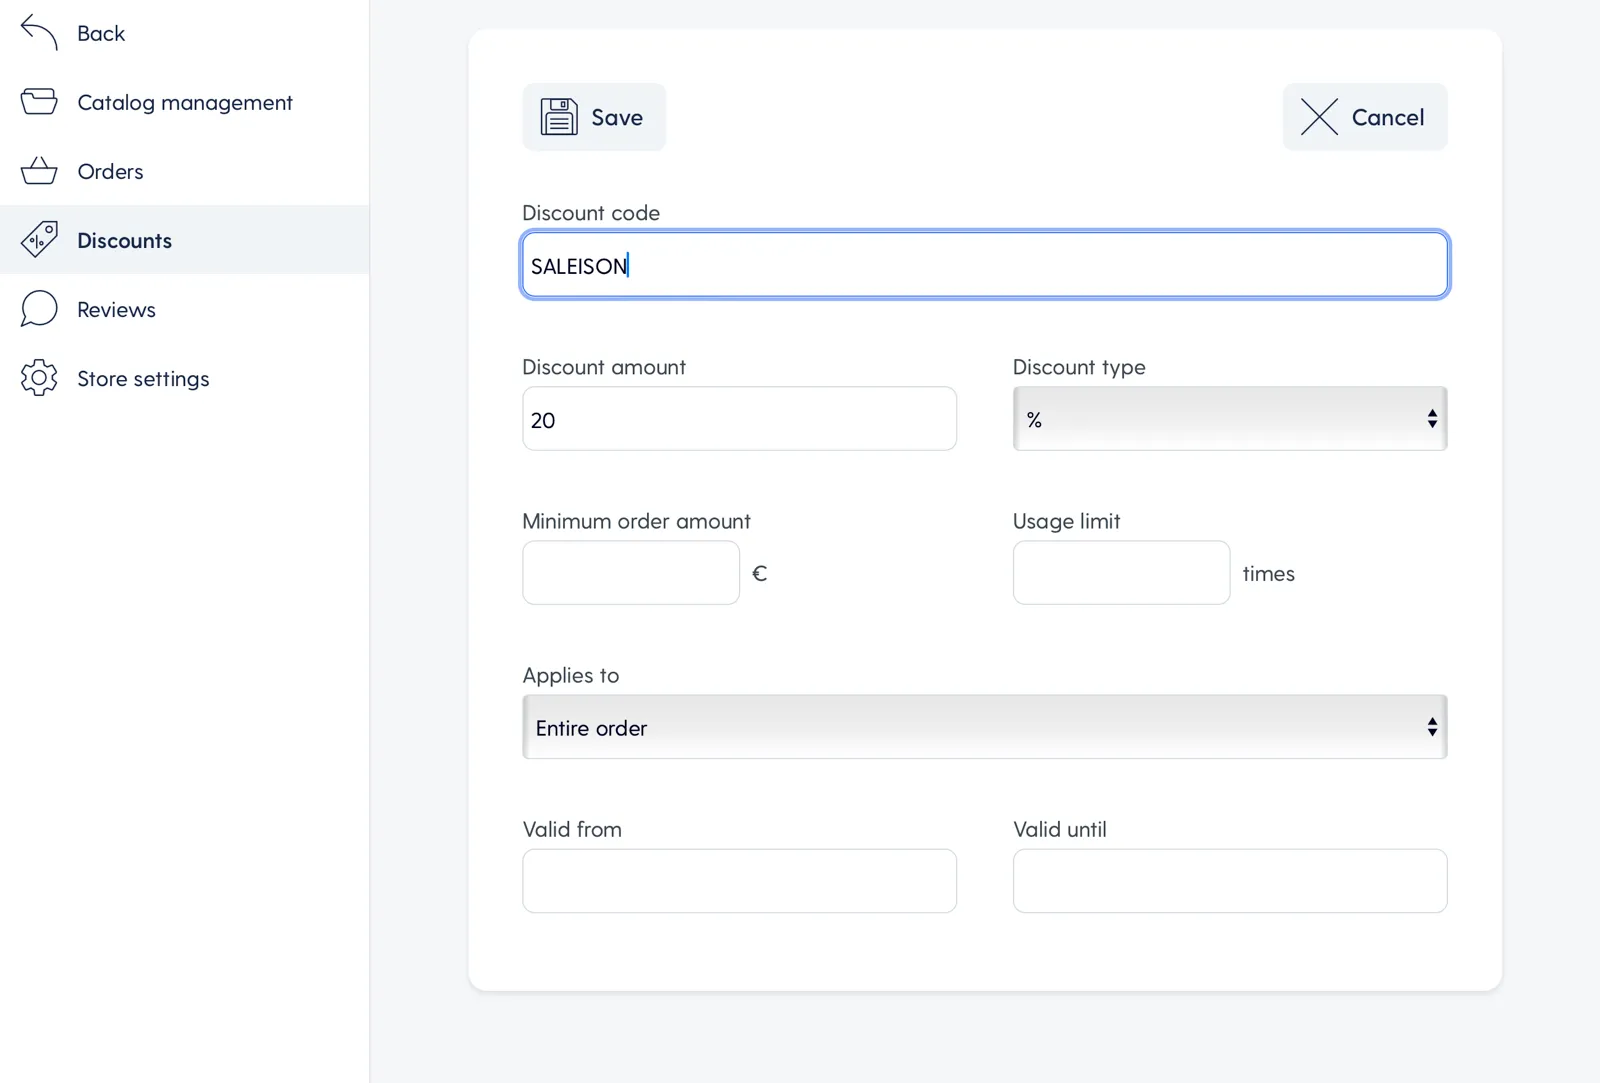
7.1. Create discount codes
With Mozello, you can create different types of discount codes that can be sent to clients or used in promotions.
See: Store → Discounts
Video: How to create a discount voucher.
7.2. Customise the e-mail messages your clients receive
You can customise and expand the text your clients receive after placing an order.
See: Store → Store settings → E-mails
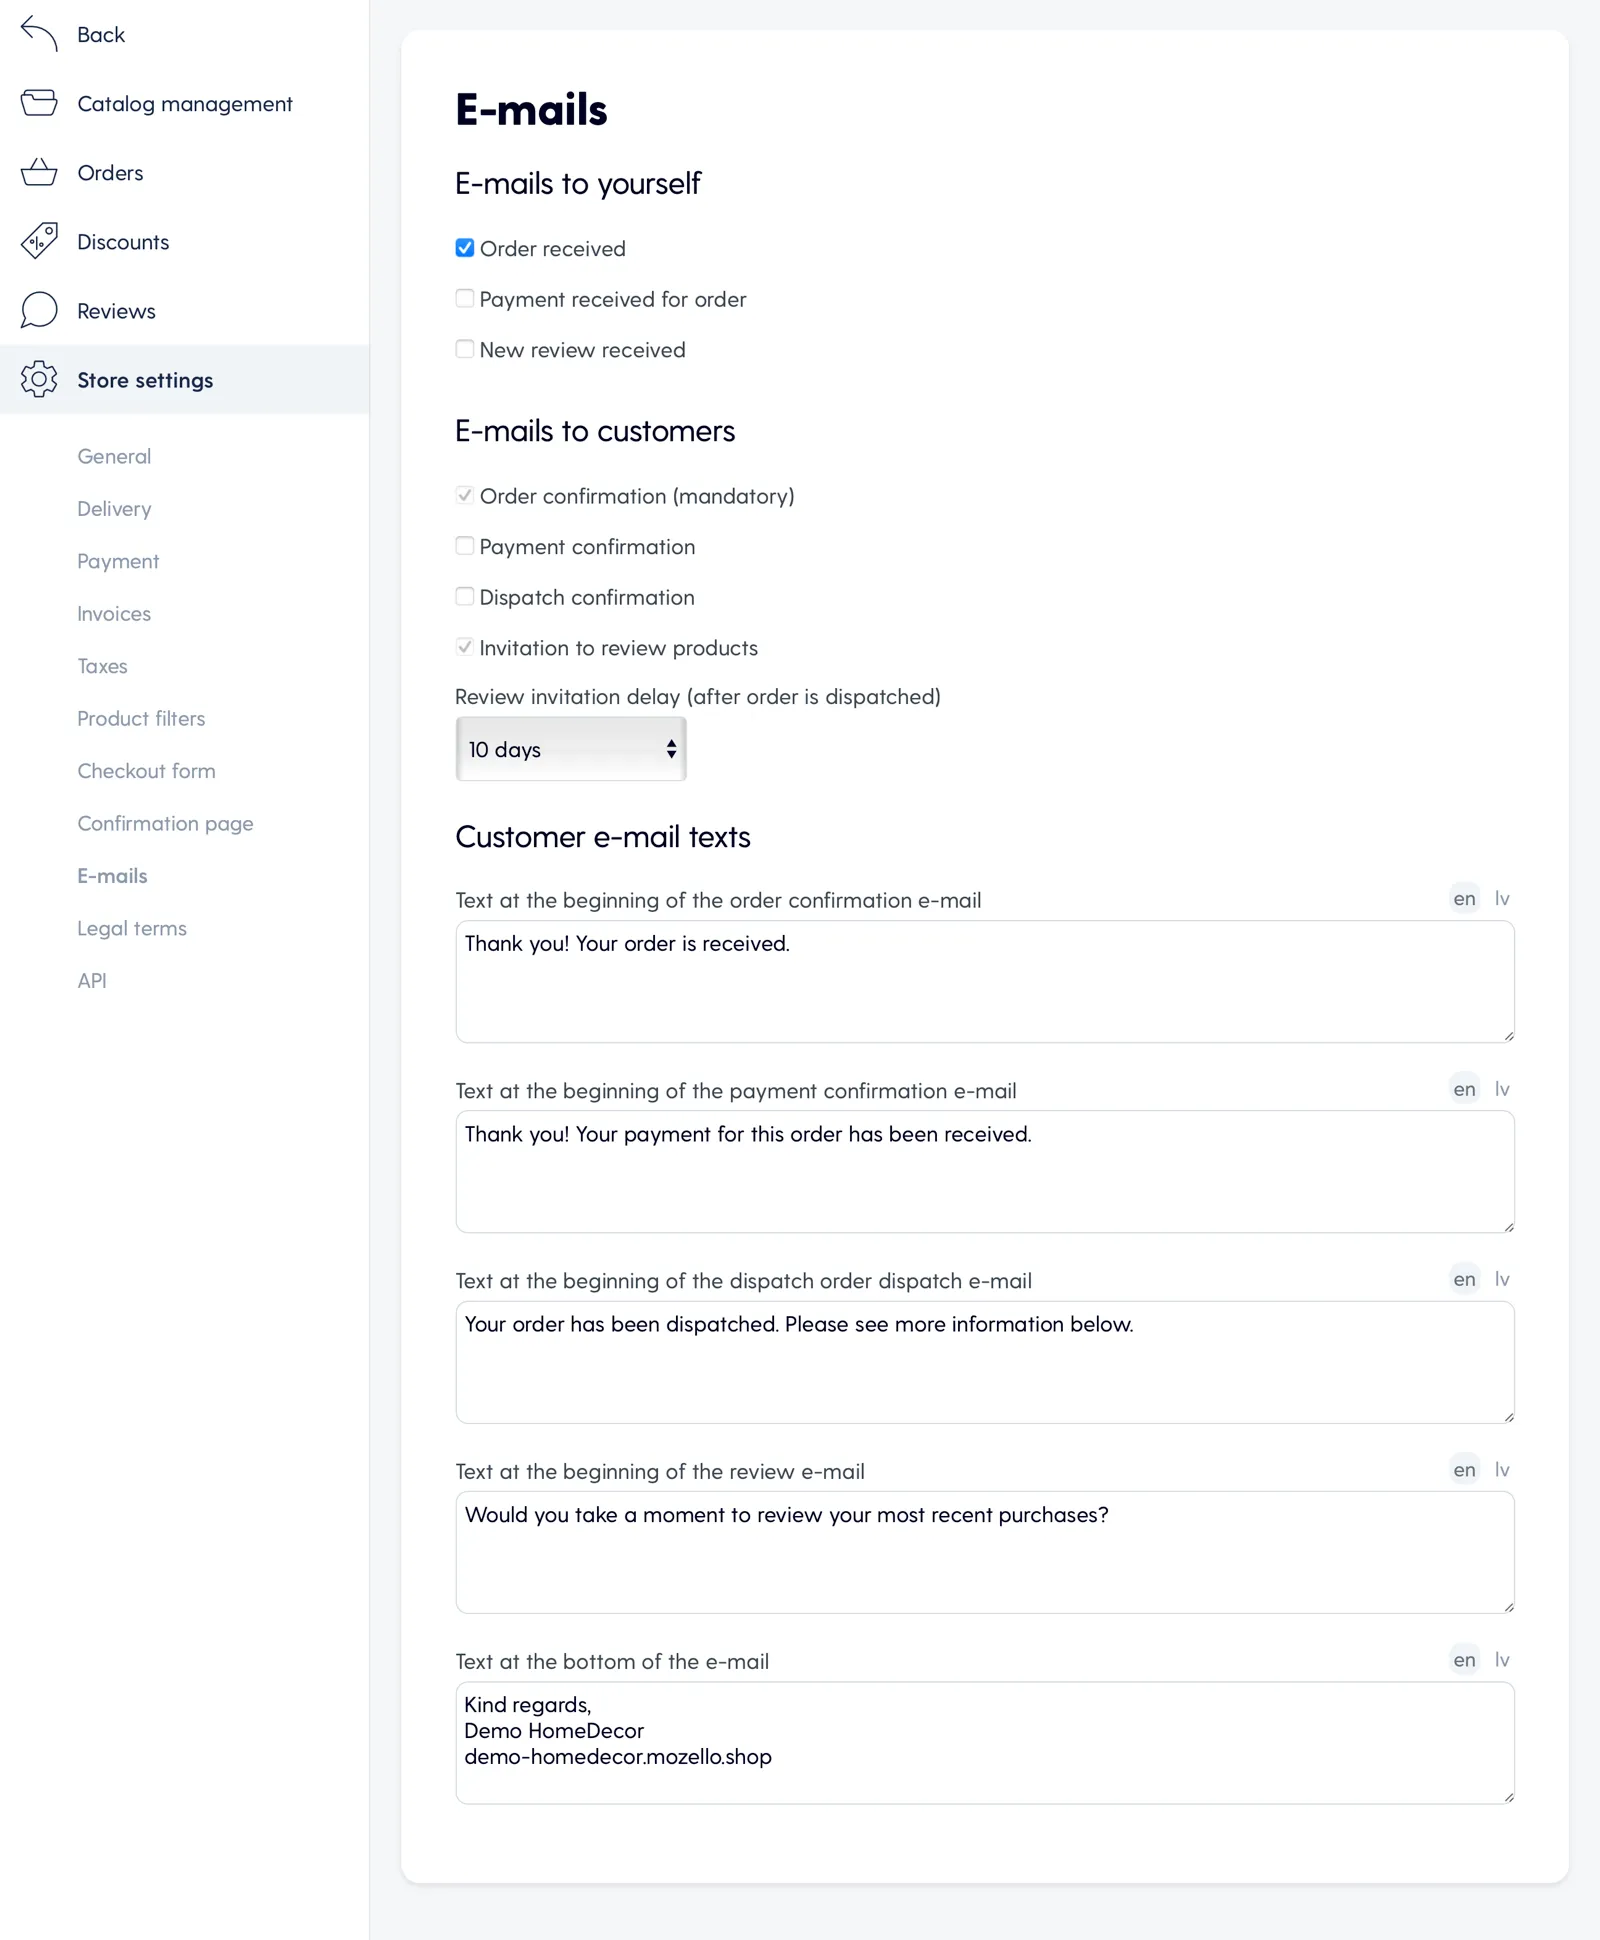
You can enable and edit:
- Order confirmation e-mail (mandatory)
- Payment confirmation e-mail
- Dispatch confirmation e-mail
- Invitation to review products e-mail
Video: How to customize the text of your invoicing e-mail.
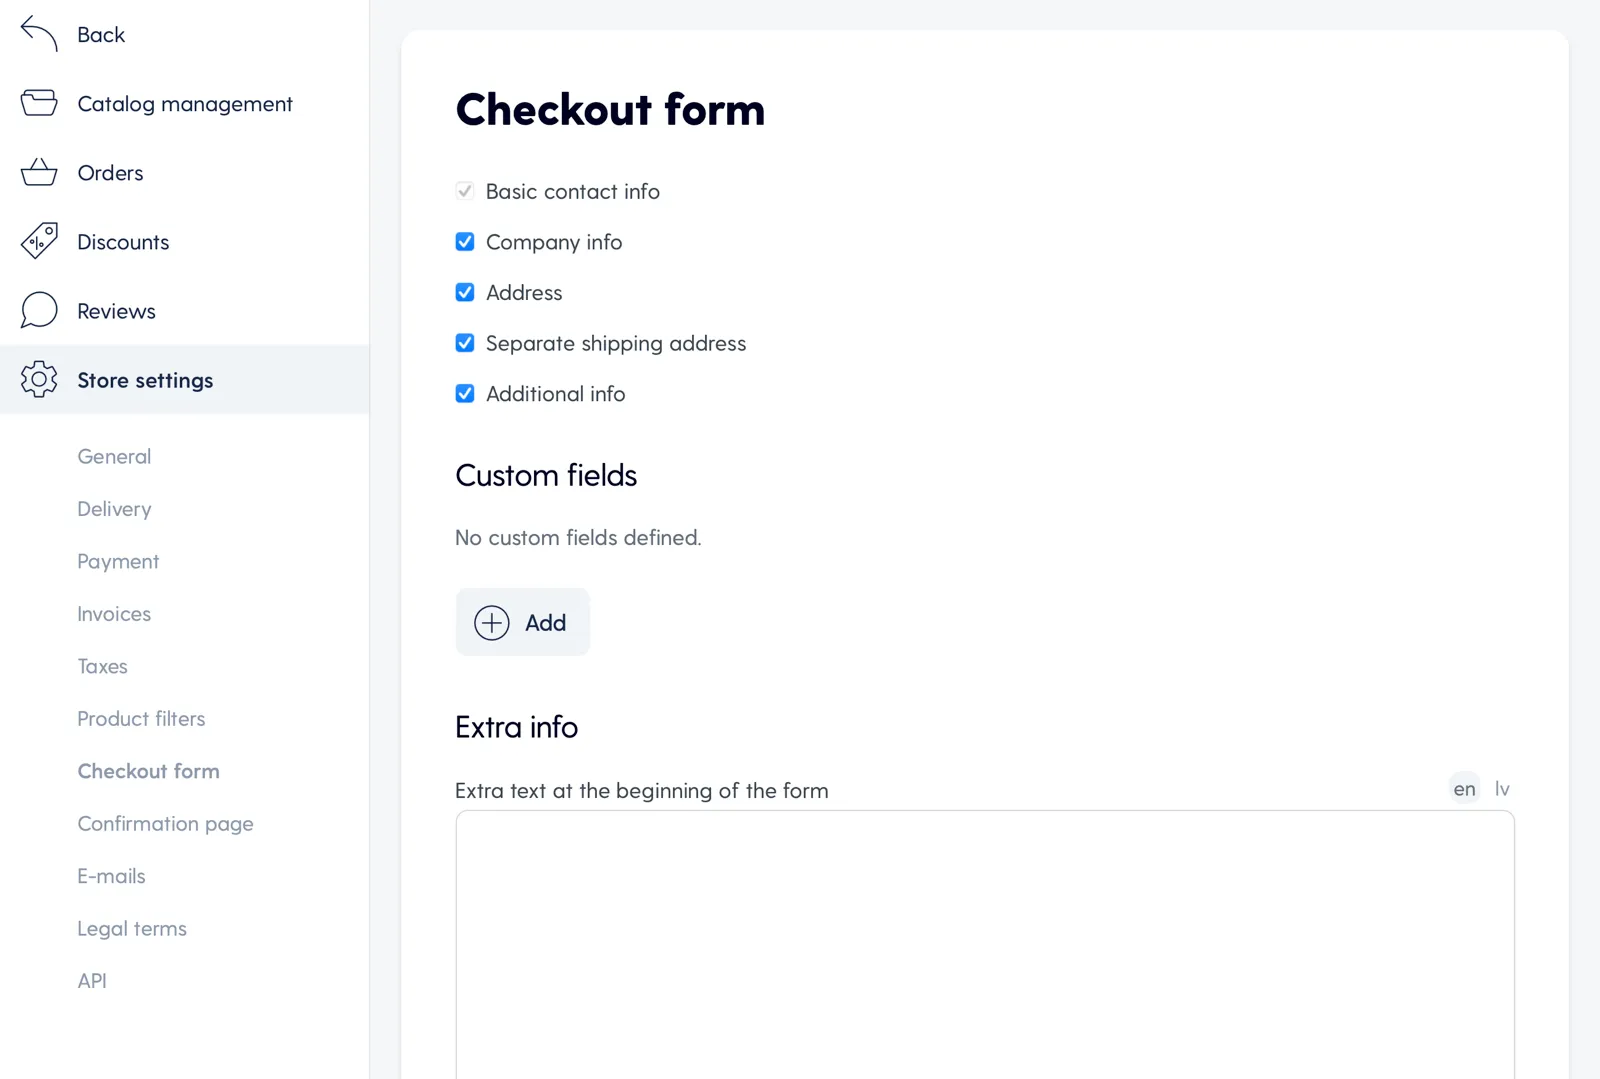
7.3. Customise the order form
If necessary, you can change the information you get from the customer. You can create additional fields in the order form or remove an existing field if you don’t need that particular bit of information.
By optimising your order form, you can make the whole buying process easier for both you and your customer: make it as simple as possible to get all the relevant details at once.
See: Store → Store settings → Checkout form
Step 9: Publish your online store
Once you have gone through the main steps, click on the green Publish button in the main toolbar. Your store is now active and can be visited.
It is very important to check the functionality of the store before announcing its opening publicly. Take the following steps to avoid mistakes and omissions:
- Look through all the pages of your e-commerce site and check all the information you have entered
- Make a few test purchases
- Make adjustments where necessary
For more about e-commerce and boosting your business results, visit our blog at mozello.com/blog, where you can find a wealth of information that can help you grow your business online.
For starters, check out these articles:
- 7 tried, tested and true tactics to make your first online sale
- 6 tips to get your online store visitors trust you
- 5 tips for improving your e-commerce performance
If you have any questions or need help, feel free to reach out to Mozello Customer Service.