
How to set up an online shop with Mozello in 5 easy steps

Today we'll show you how to open an online shop with Mozello in five easy steps.
Look:
E-commerce is booming and increasingly more people choose online shopping over in-store purchases. In 2018, retail e-commerce sales worldwide reached 2 trillion Euro and are estimated to grow to 4.25 trillion by 2021. That's the money you could be making if you had your own online shop!
Long gone are the times when opening an online shop took months and tons of money. Today, all you need is a user-friendly e-commerce platform, a desire to sell things online and a few hours of your time.
In fact, it took us less than two hours to put together and launch this test Phone Case Store. In this article, we'll show you exactly how we did that - step by step.
Buckle up and let's get started!
Step 1: Sign up to Mozello
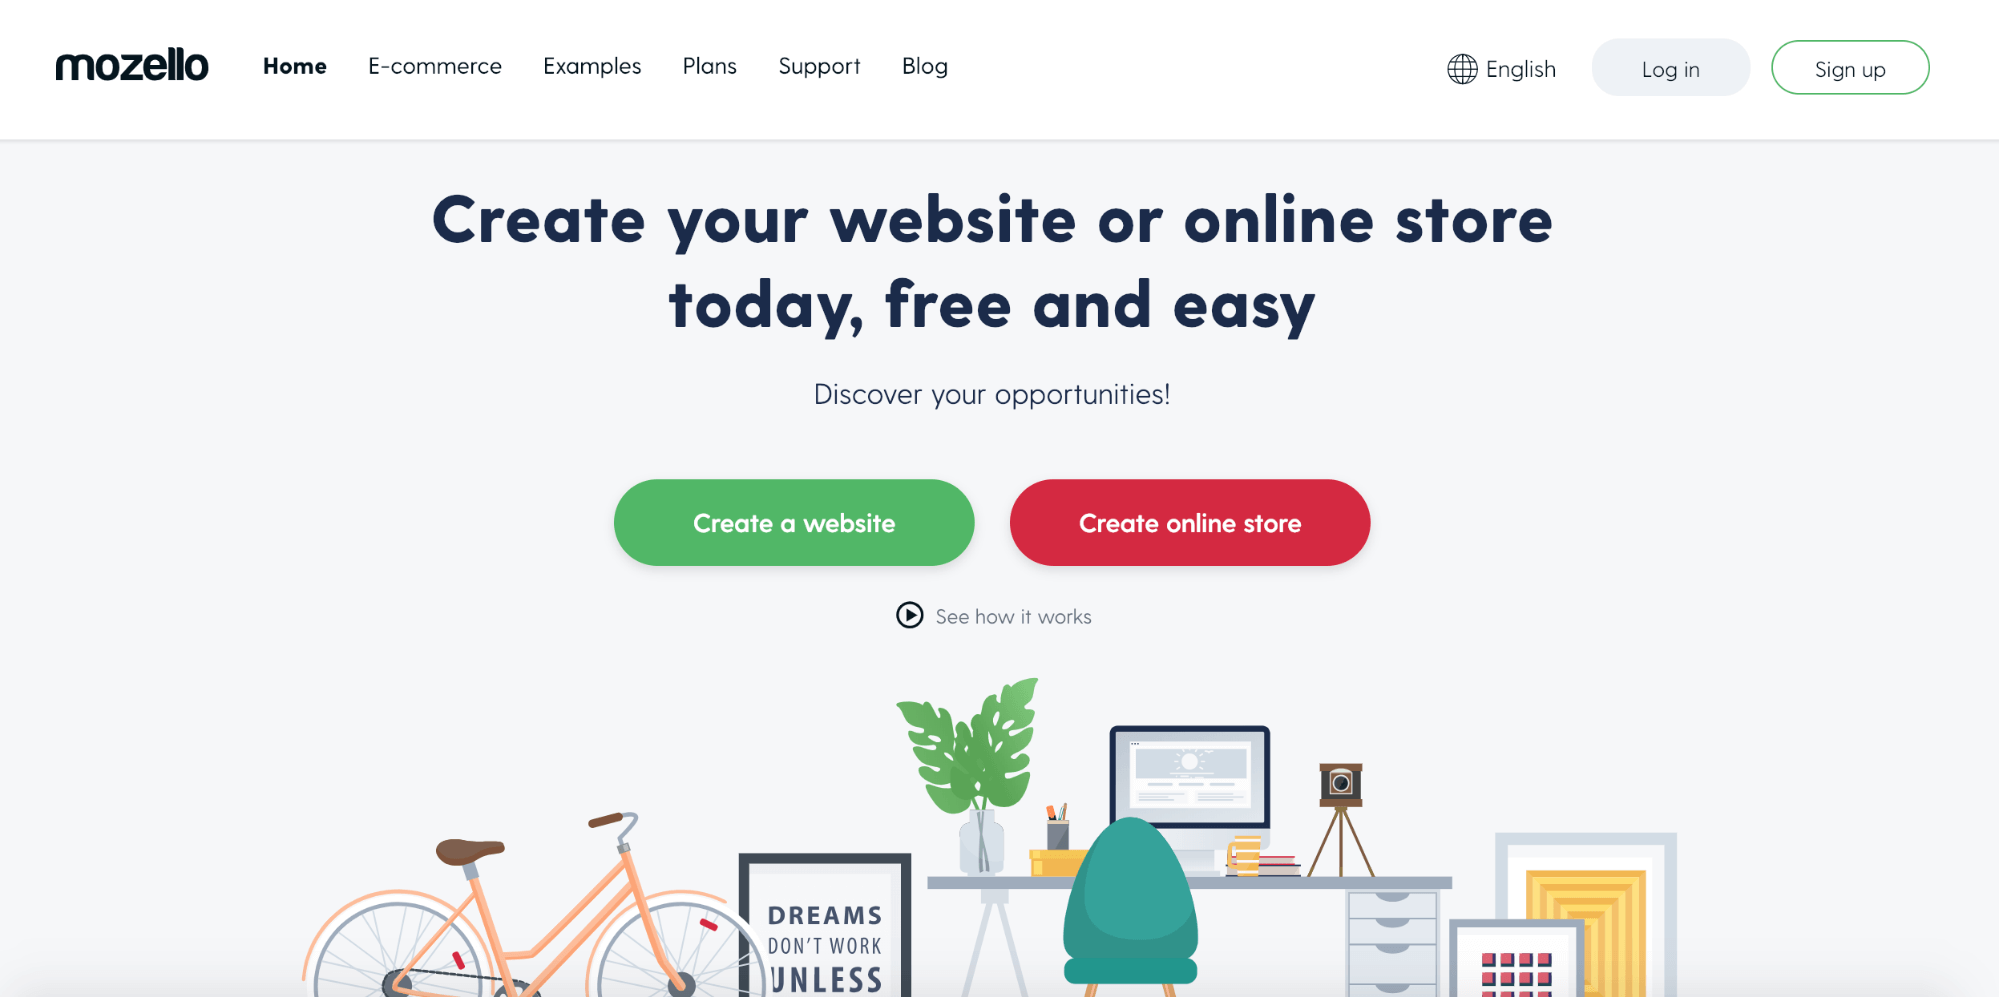
Go to Mozello.com and click on ''Create online store''.
Then, type in your email address, choose your password and click ''Create my website''.
On the next step, choose your website title or brand name, a.k.a. the name of your shop. For search engine optimization (SEO) purposes - to make it easier for your customers to find your shop on Google - it's recommended that your store's name include a keyword related to products you sell.
For example, if you sell phone cases, you should include the keyword ''phone case'' in your website title.
When you've chosen your brand name, click ''Done''.
Sign up completed!
Step 2: Design your website
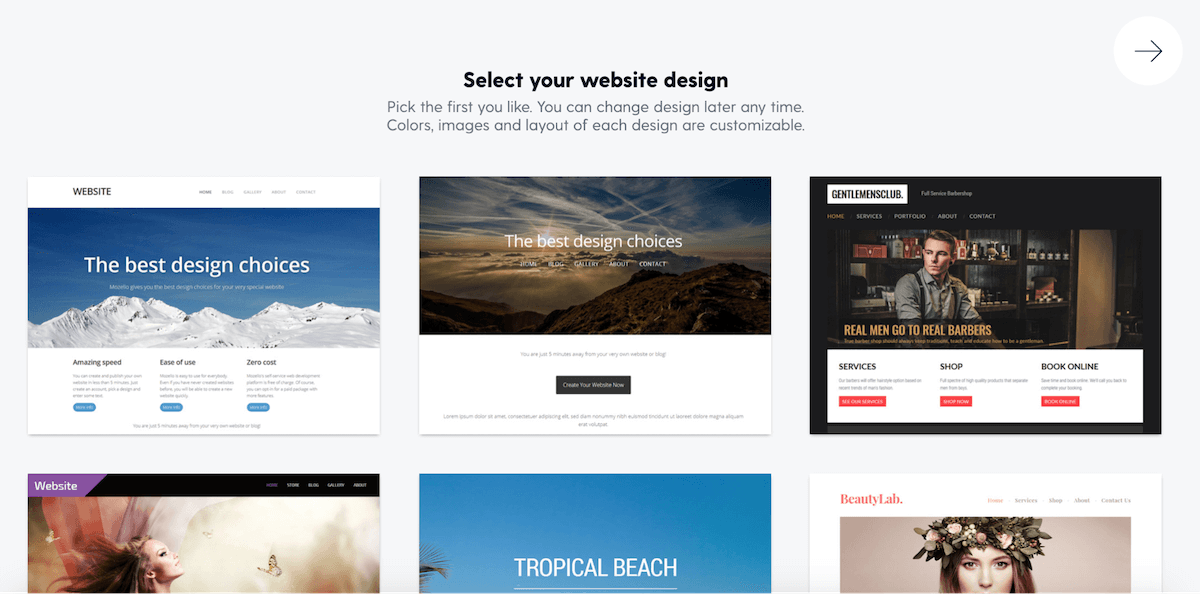
The next step after signing up is to choose your store's design.
Mozello offers 48 pre-designed, mobile-optimized website layouts with many options to customize them to fit your needs. Scroll through the designs and select yours. What's great - if you later change your mind, you can change your store's design at any time without losing the content you already created.
When you've chosen the layout, you can customize it as you like. Here are four things to start with:
1: Upload your logo.
Logo, in a way, is the face of the company. It shows your brand's identity, distinguishes you from the competitors and increases brand recognition.
What makes a great logo?
It's simple, memorable and relevant. And, atop of all that, it includes a glyph or visual, as the human brain processes images 60,000 times faster than words.
Now, if you're up for designing the store's logo yourself, here are 10 tips to make it a good one. Alternatively, you can create your logo with tools like Logomaster.ai or hire a freelance designer through Fiverr or 99designs.
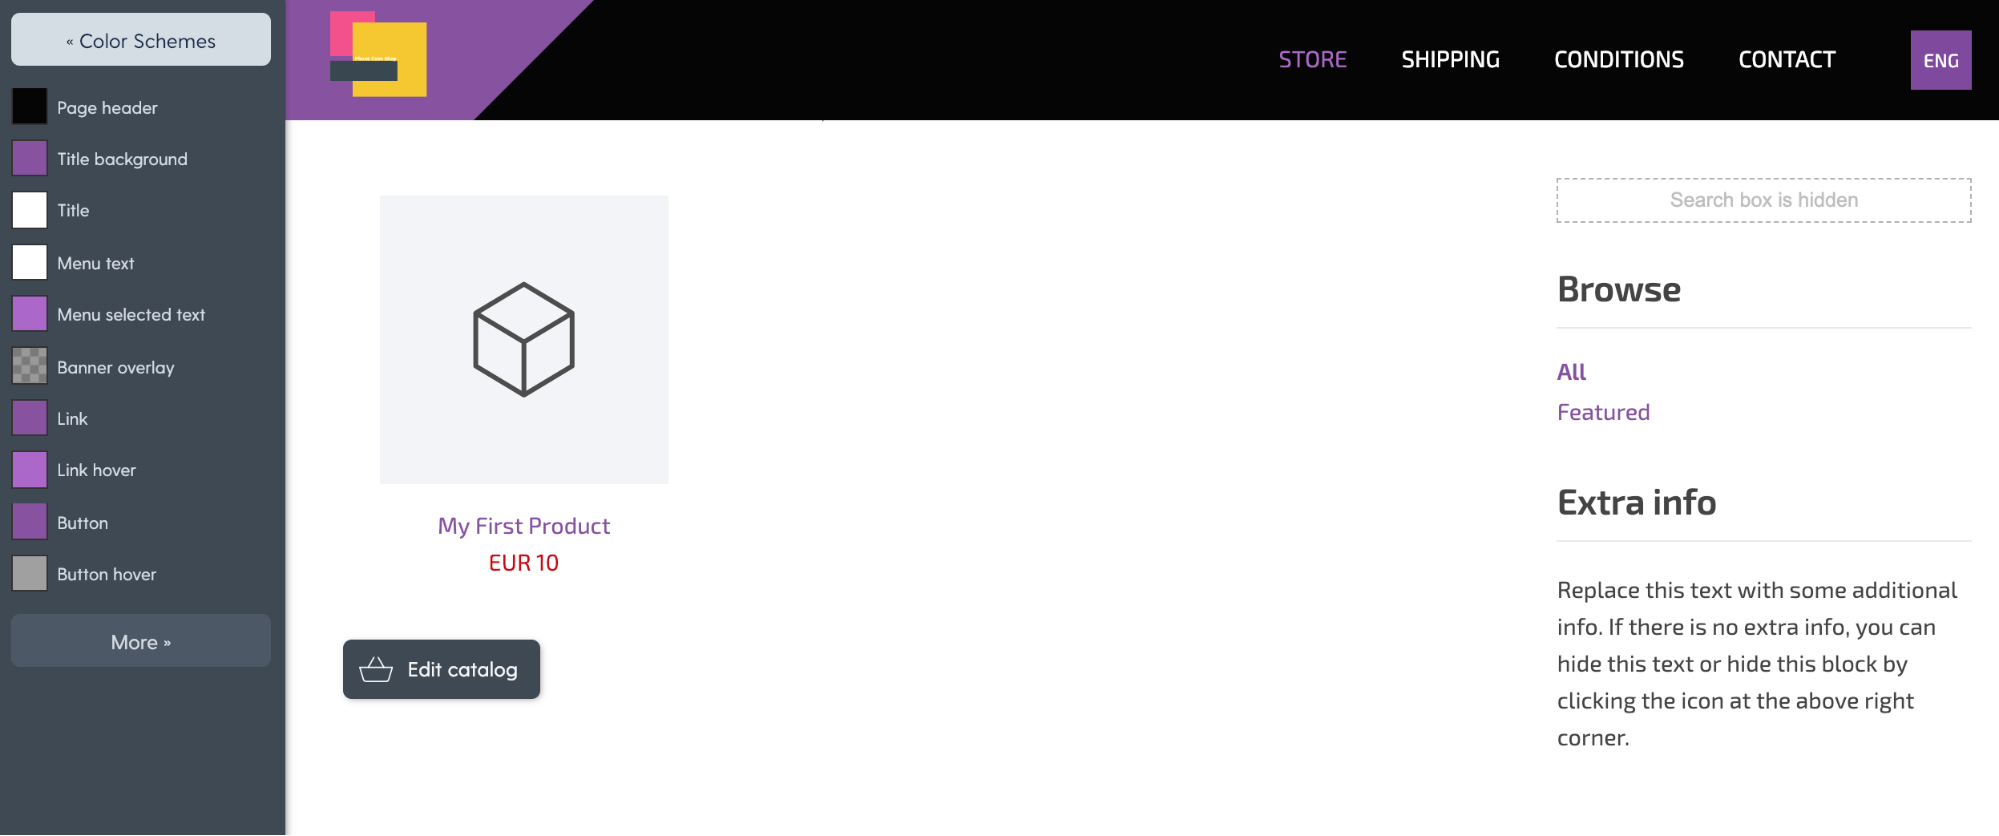
2: Change colors.
To do that, go to Design → Change Colors and set your color scheme.
While the proposed website layouts already have existing color palettes, it's recommended that you adjust them and use your own. That will help your brand stand out and be more memorable. In fact, studies show that color increases brand recognition by up to 80%, so make sure the colors you use are different from other shops selling similar products.
3: Choose your font.
To do that, go to Design → Change Font Scheme. Depending on the product you sell, you can choose font combinations that are more serious or more playful.
Whatever font combinations you choose, make sure it fits your overall website feel. For example, if your website is all minimalist and black-and-white, a handwritten font may not fit in.
Learn more about web design best practices in this article!
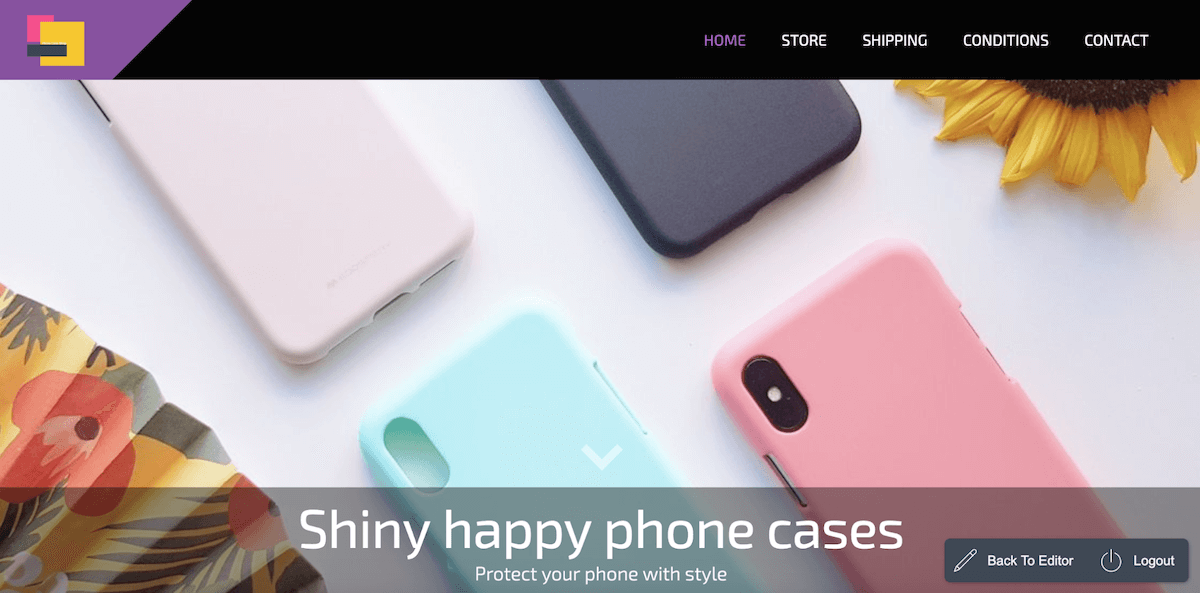
4: Create your home page.
The home page is the front page of your website. Its goal is to showcase and quickly communicate your product's value to the store's visitors. In other words, the front page of your website must instantly answer the questions:
- WHAT you sell
- HOW your company or the product you sell can help the customer
To create your home page, go to Pages → Add new and choose Front page or special page. Type in the page's title and address (eg. Home) and click Save.
Next, choose the page's layout:
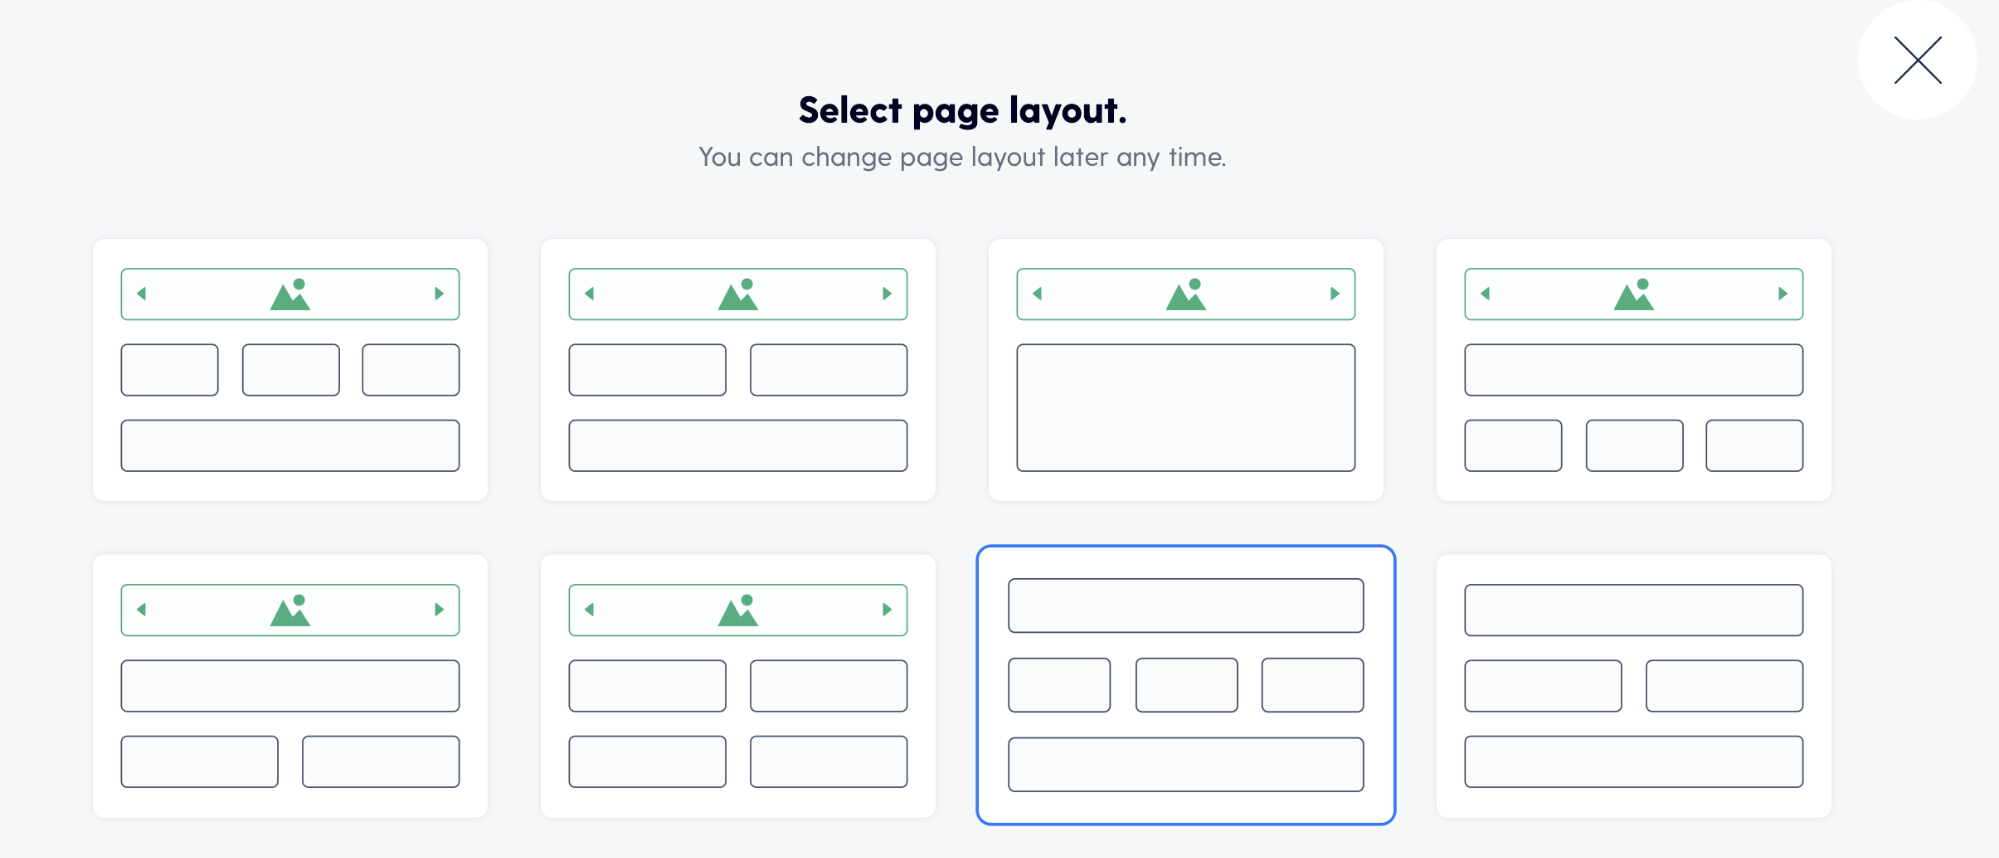
Note:
Pay attention that the rectangle highlighted in green is your banner image.
When you've selected your front page layout, customize it by:
- uploading your header image (when choosing it, ask yourself if the image communicates to your visitor WHAT your company is and does!)
- adding a call-to-action button
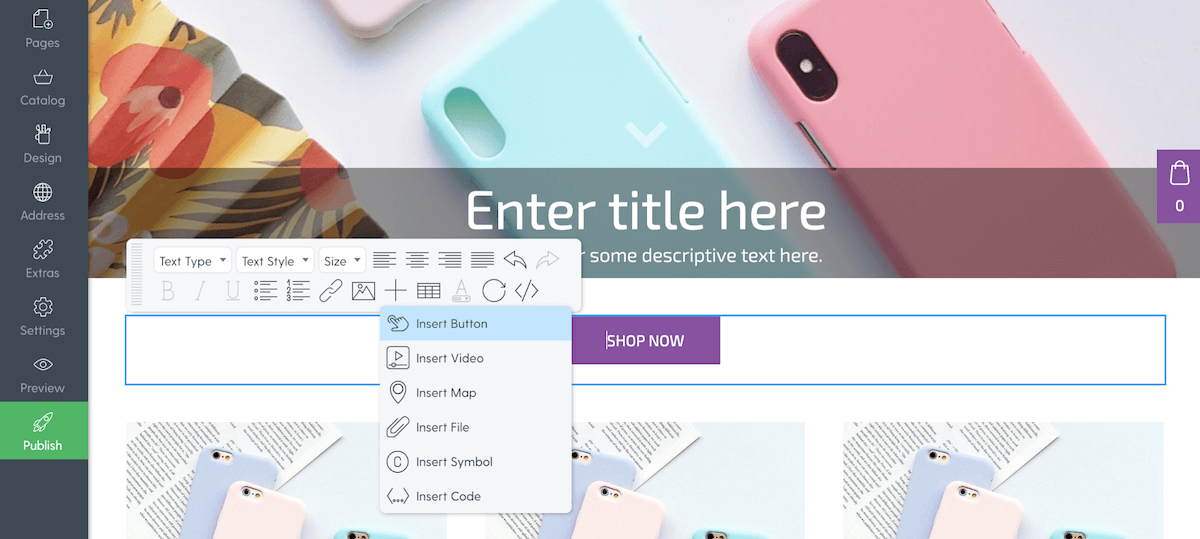
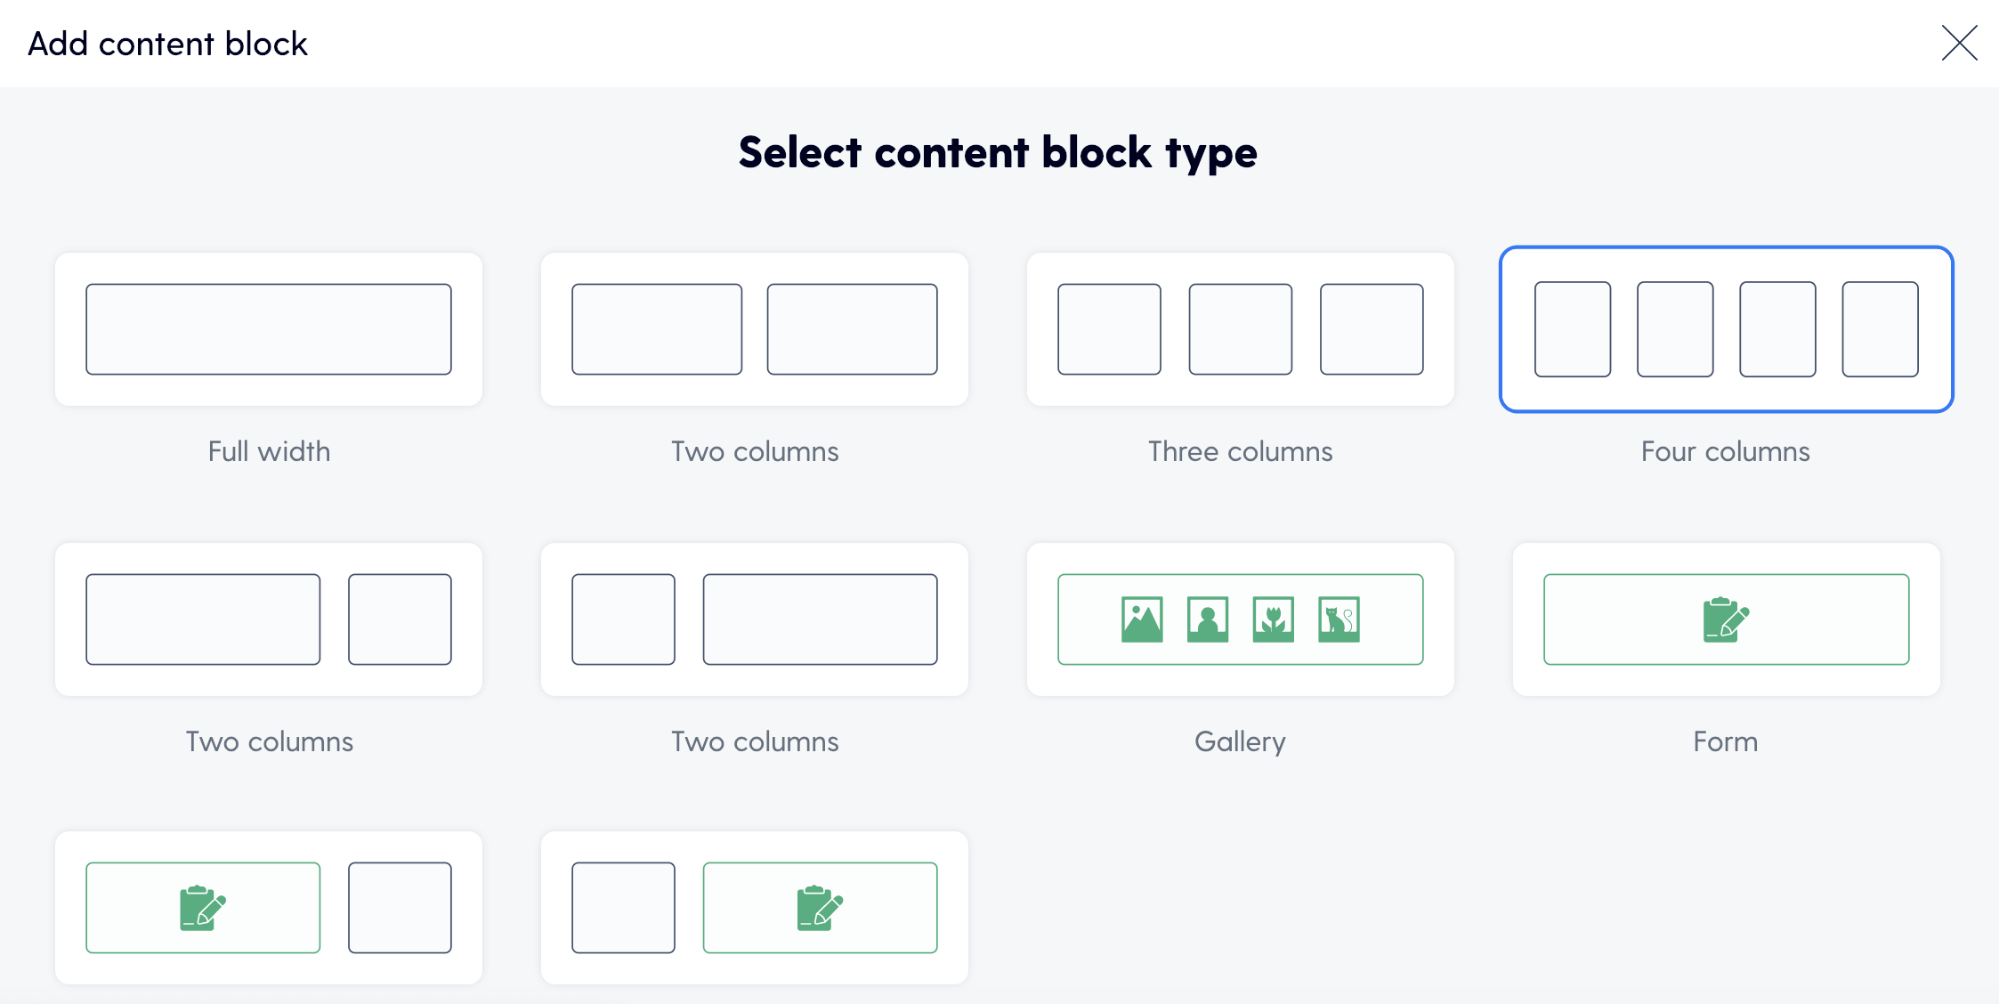
- customizing content blocks, eg., add images, videos, call-to-action buttons, etc. (to do that, click into the content block that you want to customize)
- adding or removing content blocks, eg. additional text, product gallery, sign-up form, etc. (to do that, click ''Edit layout'', then ''+'' sign to add a new block)
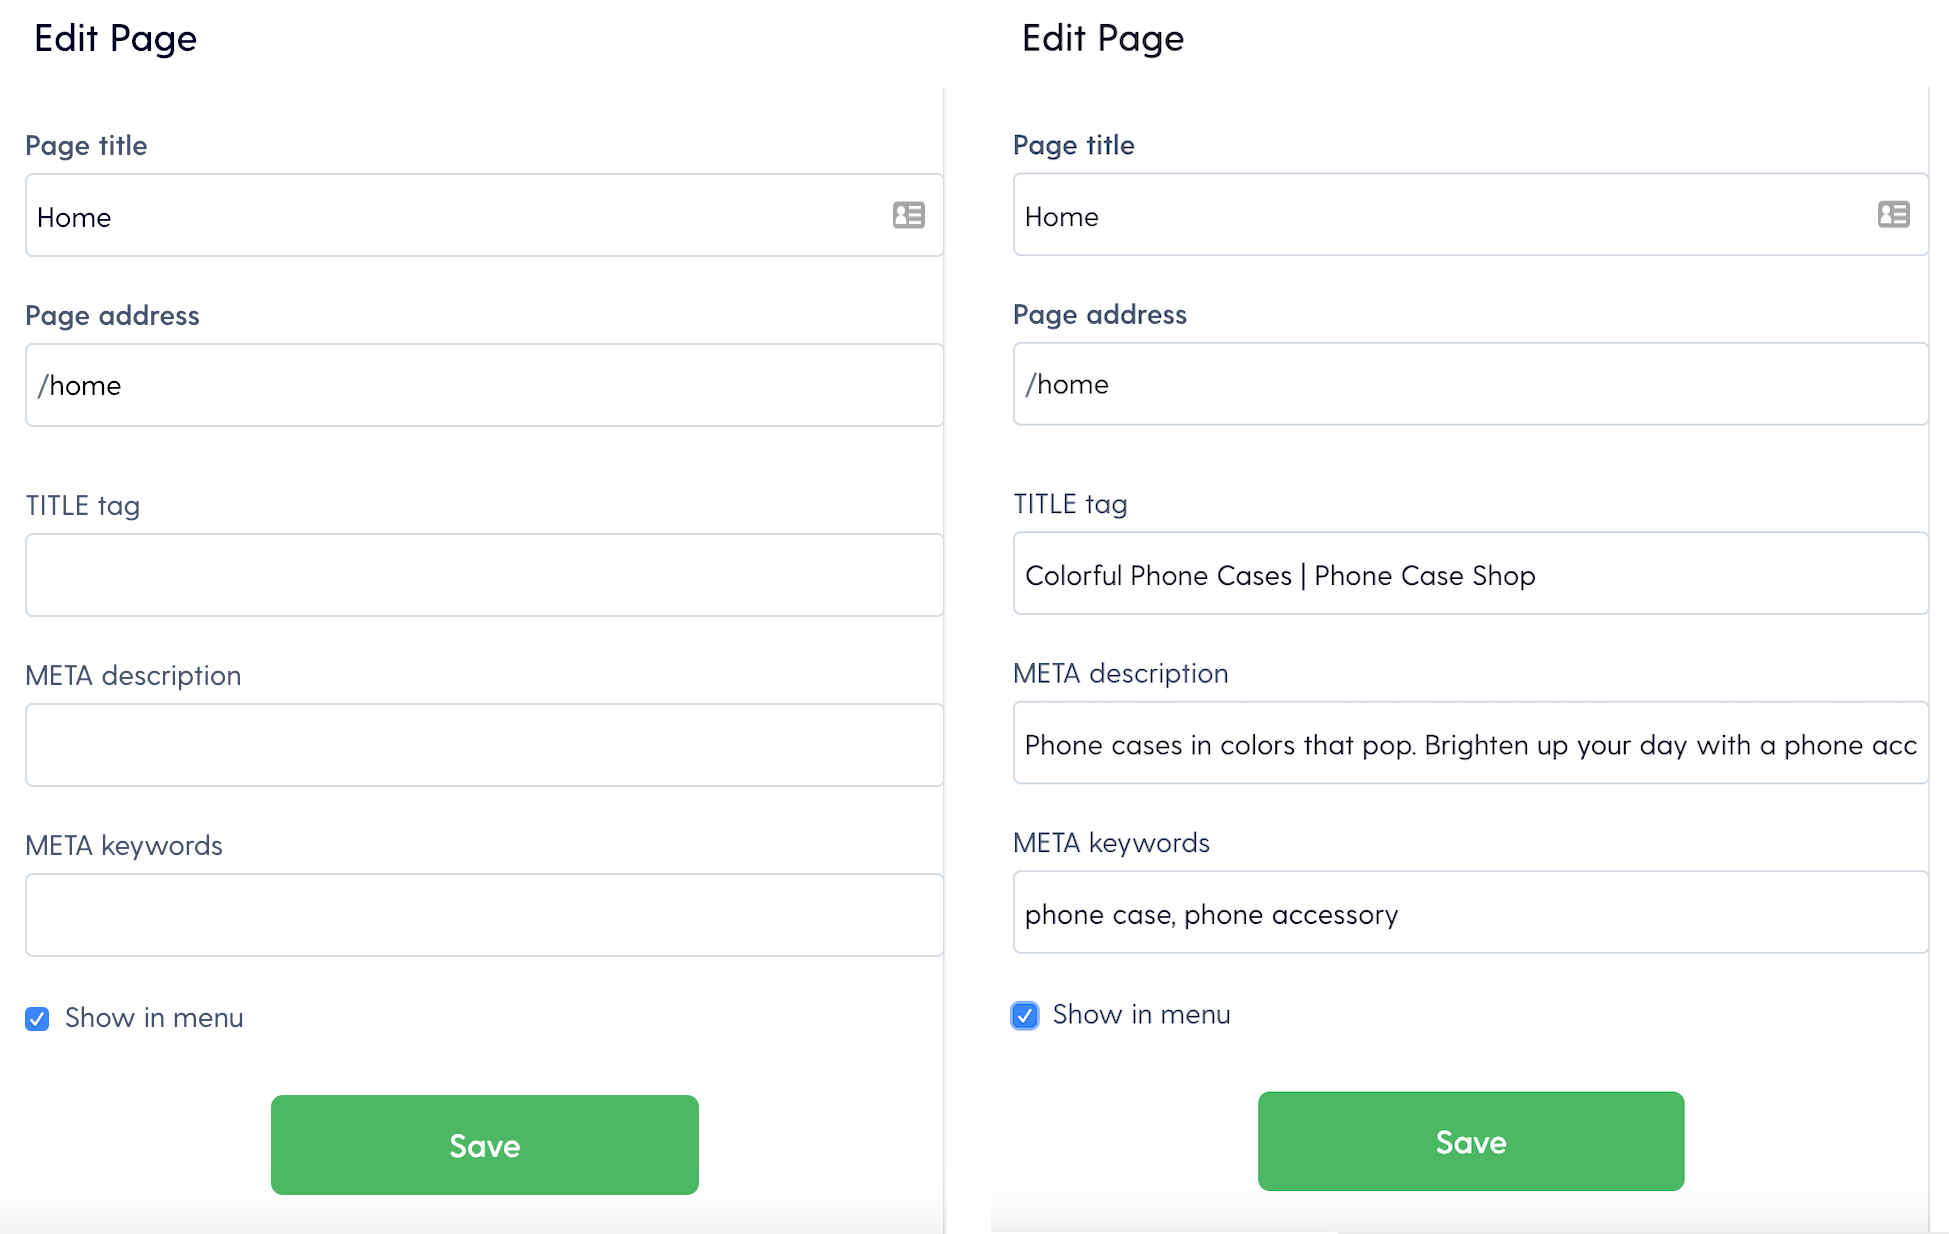
To make your website Google-friendly and easy to find on search engines, do the basic search engine optimization (SEO) on your pages by adding keyword-optimized page titles, meta descriptions, and meta keywords.
Go to Pages → choose the page you want to optimize → click Advances Settings. Make sure your titles and meta tags include business-specific keywords. That is, if you sell phone cases, use this keyword in your descriptions.
In short:
- The title tag has to say what people will find on the page when clicking on the search query from Google. In our case, those are ''colorful phone cases''.
- The meta description complements the title tag and encourages people to click. This is where you should highlight the benefits of your product and answer why people should visit your shop.
- Meta keywords are for Google - by adding them, you make it easier for search engines to understand what your website offers.
Finally, change the copy. To do that, just click into the text bar and start typing.
What to write?
Tell visitors what you sell and why they should buy it from you. Write descriptive and catchy headlines, highlight your product's best features and selling points, and make sure your calls-to-action are clear and people understand what will happen when they click on them.
Pro tip:
A truly good website copy focuses on benefits, not plain features. Remember that people more often buy with emotions, which is why we say ''protect your phone with style'' (sells the benefit), instead of ''this phone case is made of high-quality silicone'' (sells the feature).
If you need help with your website copy, read this article on how to write effective website copy.
Main page design completed!
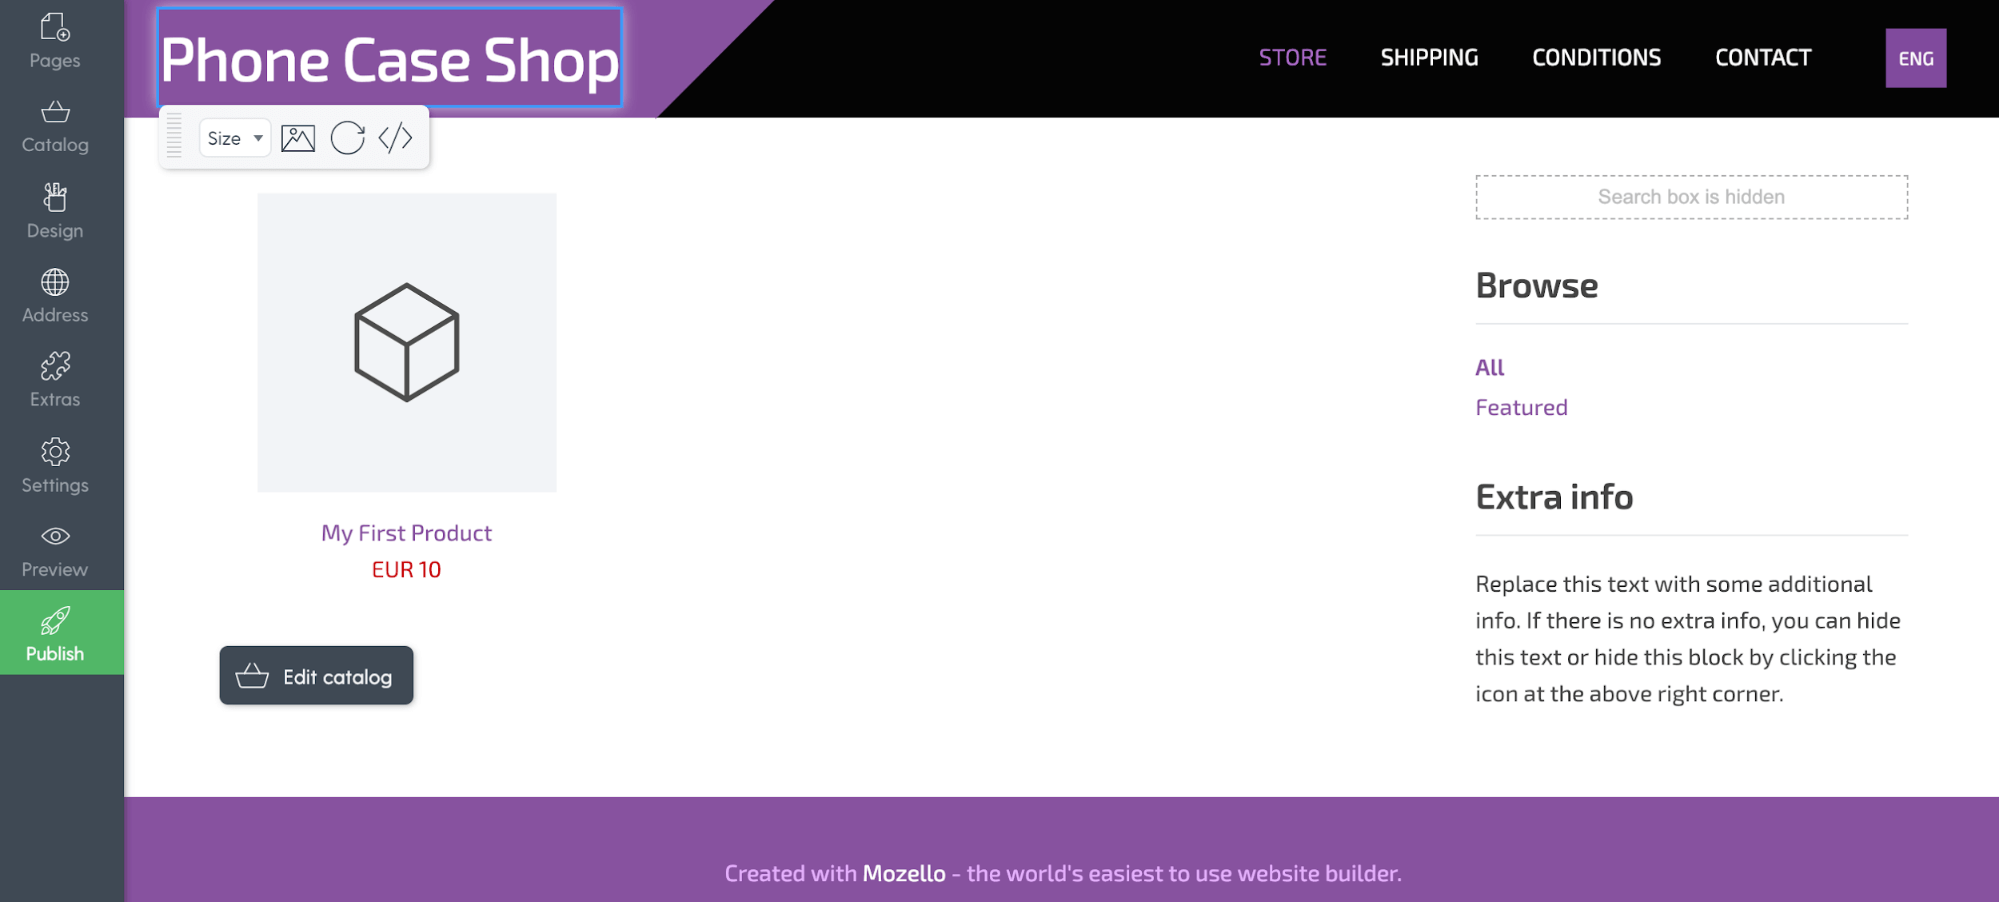
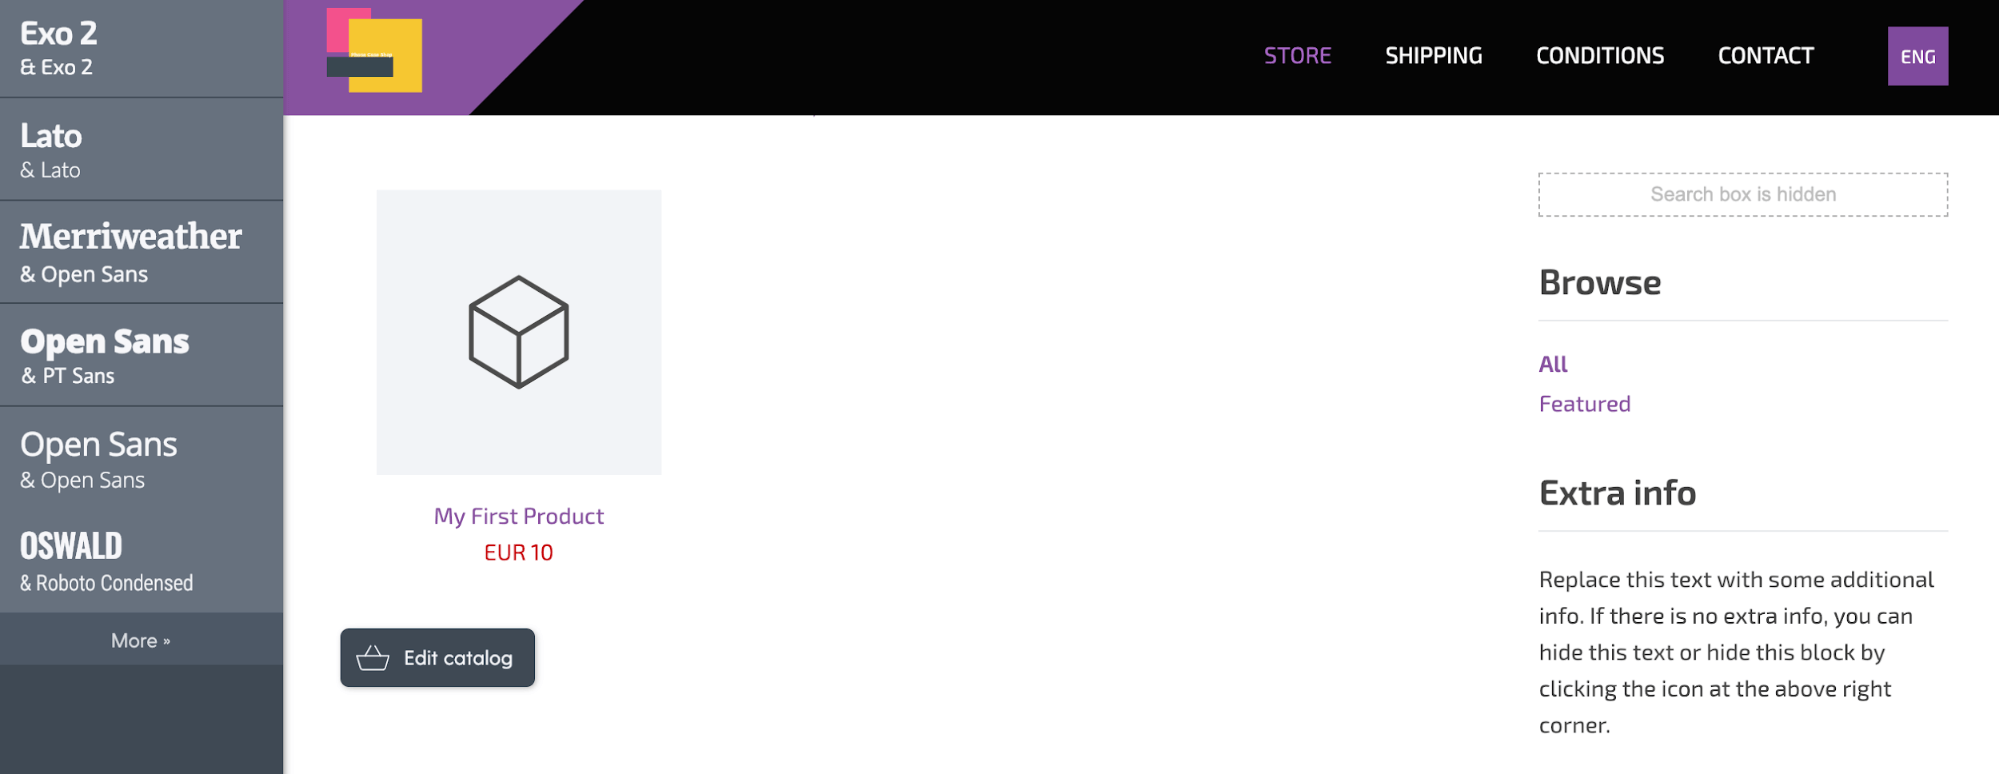
Step 3: Add products to your shop.
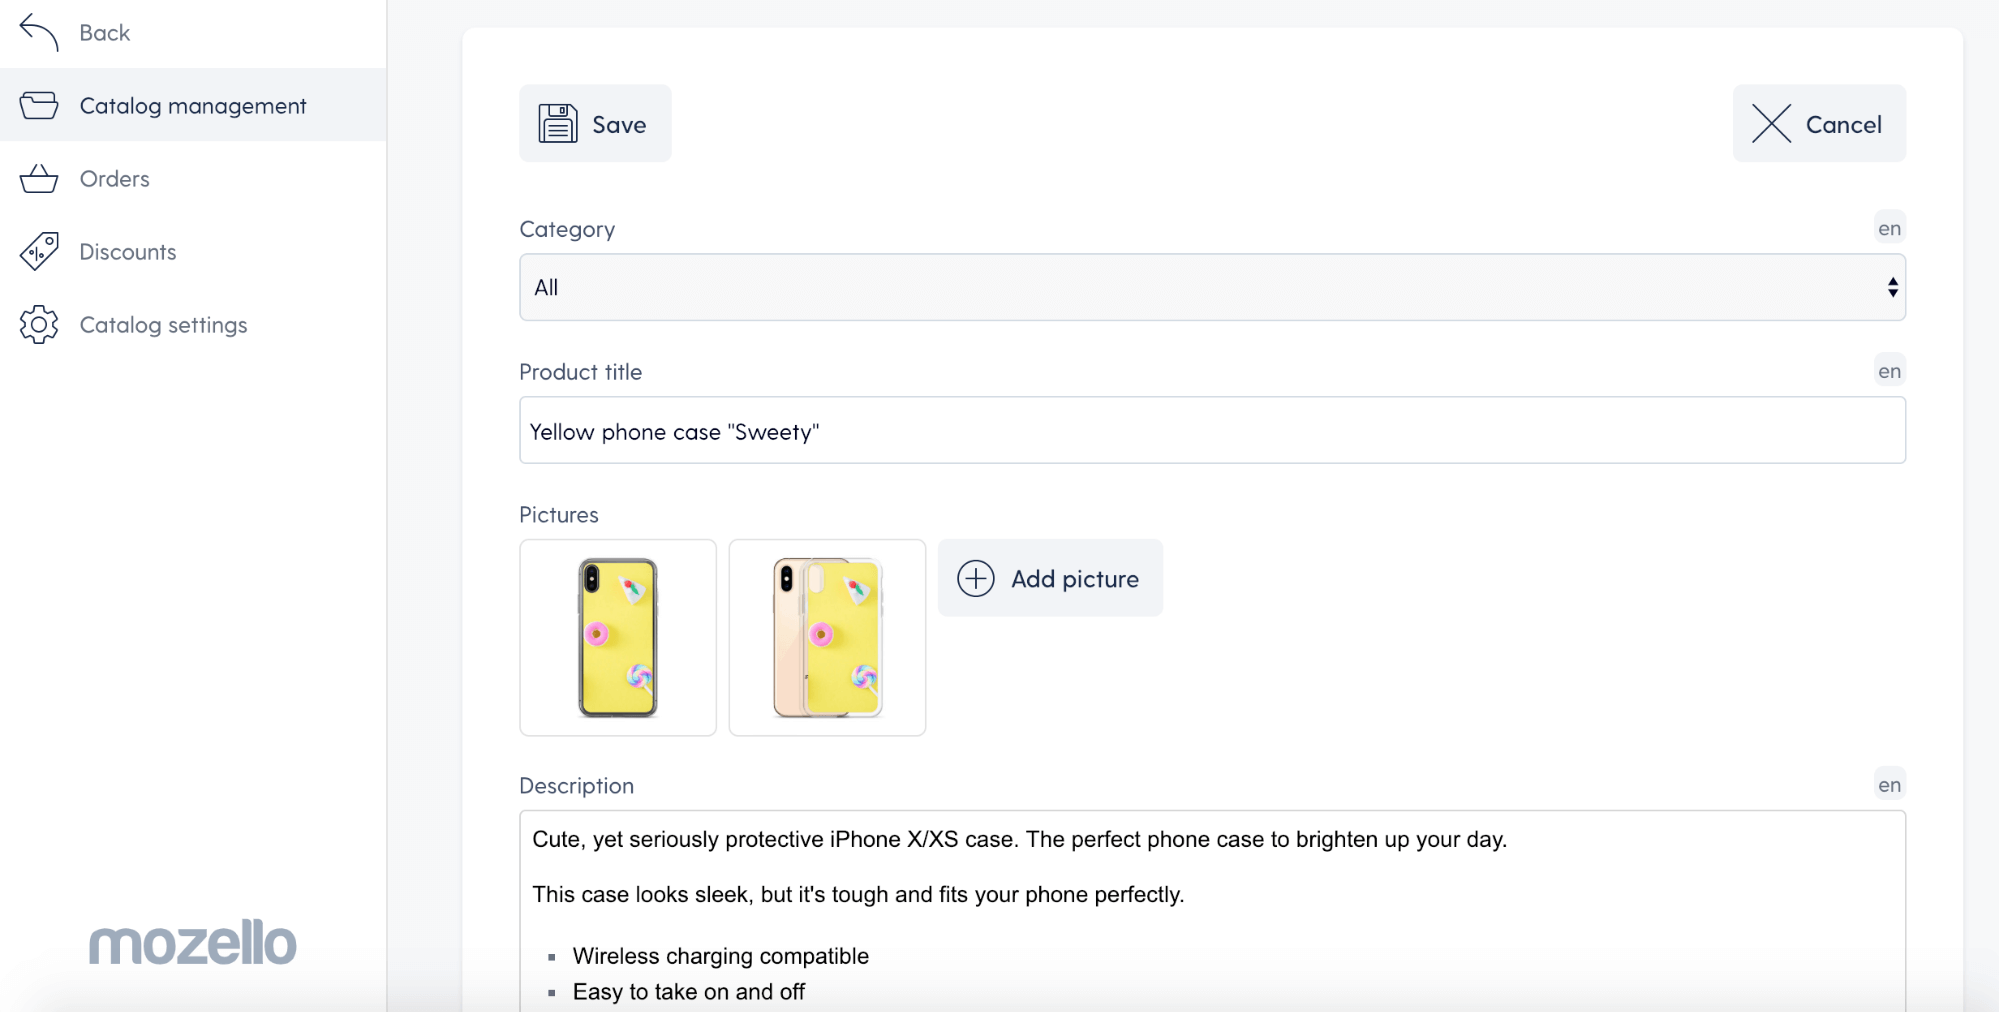
Now, let's add products to your shop. Go to Catalog → Add product.
There, write your product title and add product description. Again, if you need help with writing product descriptions that sell and rank high on Google, check out this article here.
Next, add images.
The more product images from different angles you'll add, the better your chances are to sell the product. However, not just any images will do - make sure your product photos look professional and high quality.
The good news is that you don't need to hire a photographer to make professional-looking product photos - follow this guide and make them yourself at home!
When the copy and images are in place, scroll down and click ''Advanced settings'' to show the price or add product variations (eg., if you sell the same product in different colors, add all available colors there).
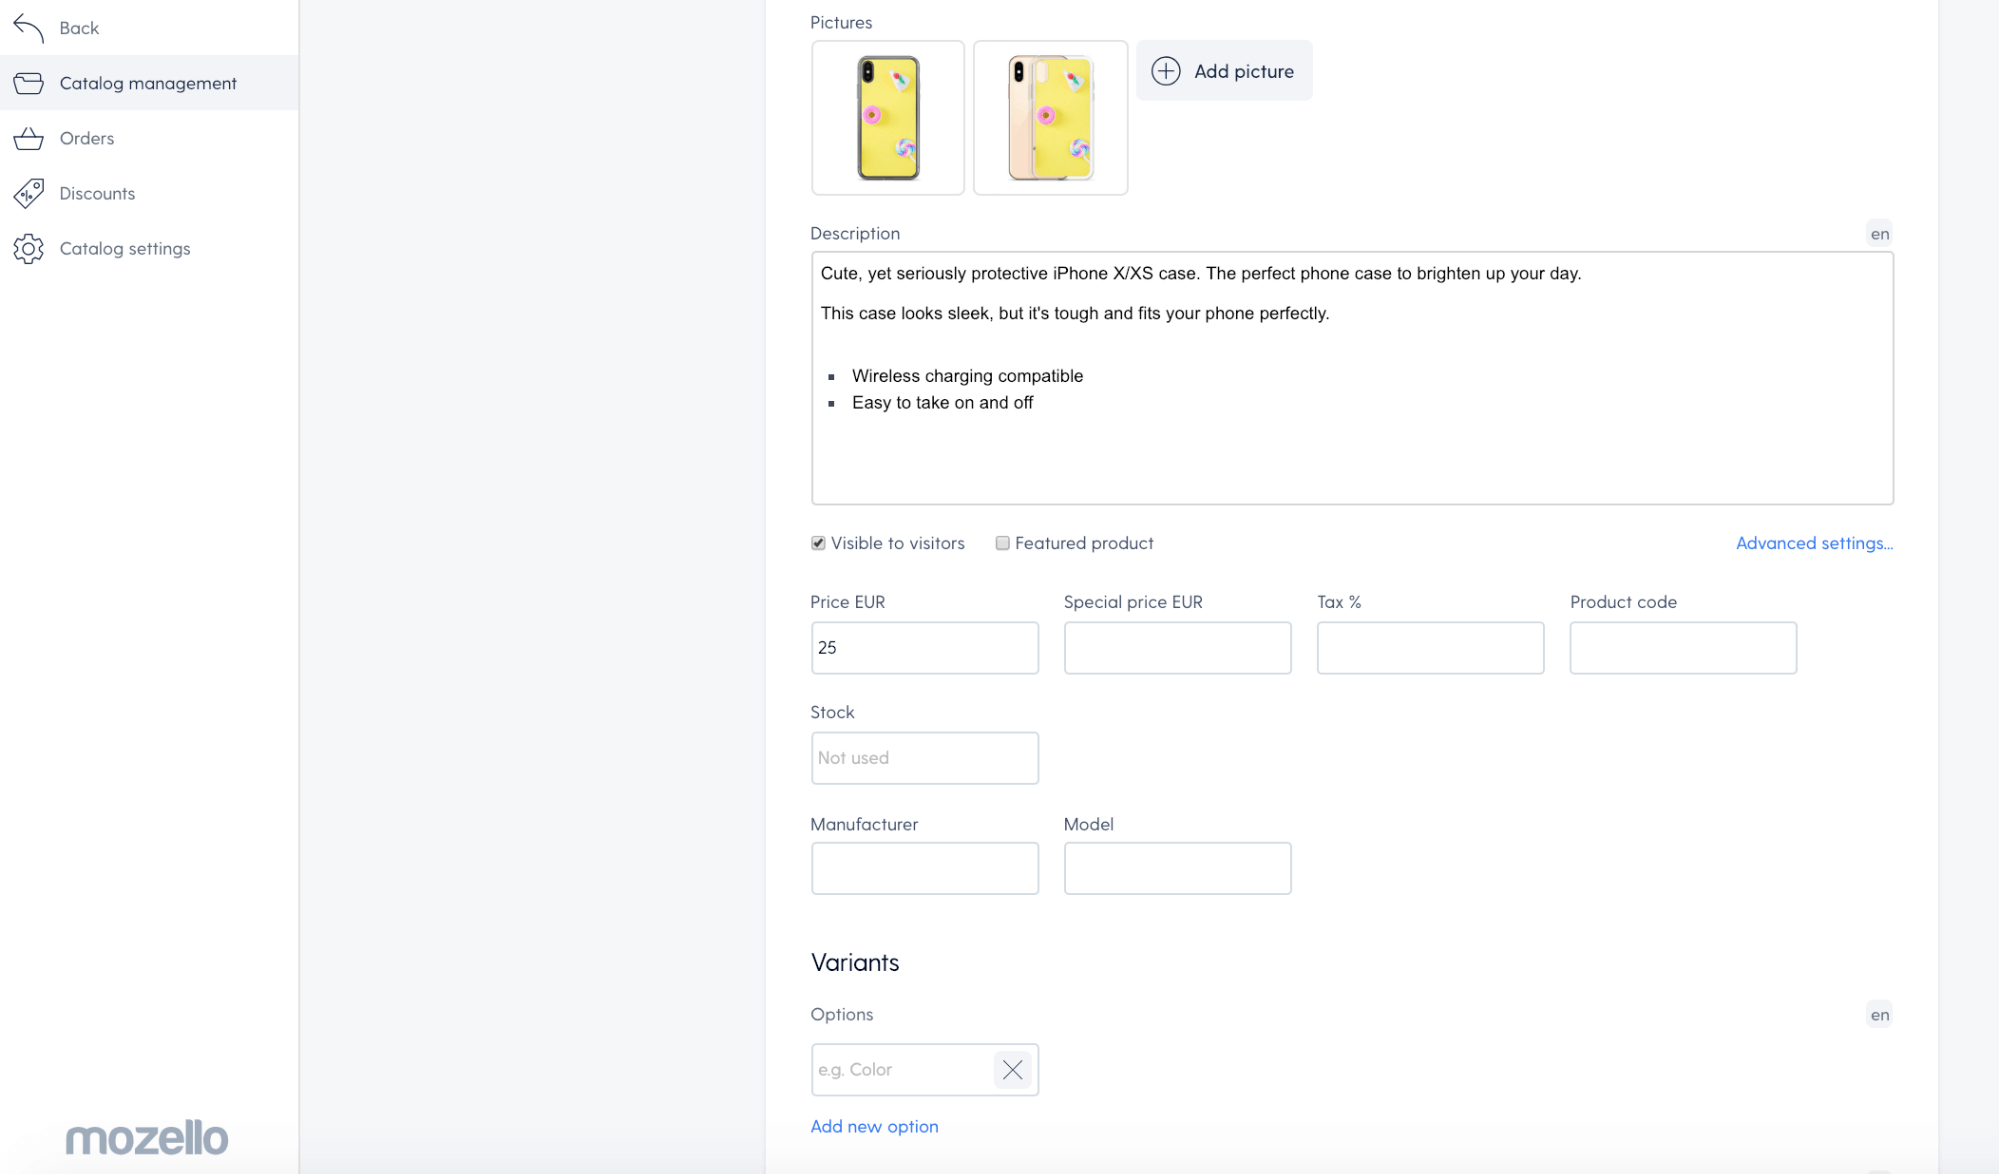
Click ''Save'' and your product is added.
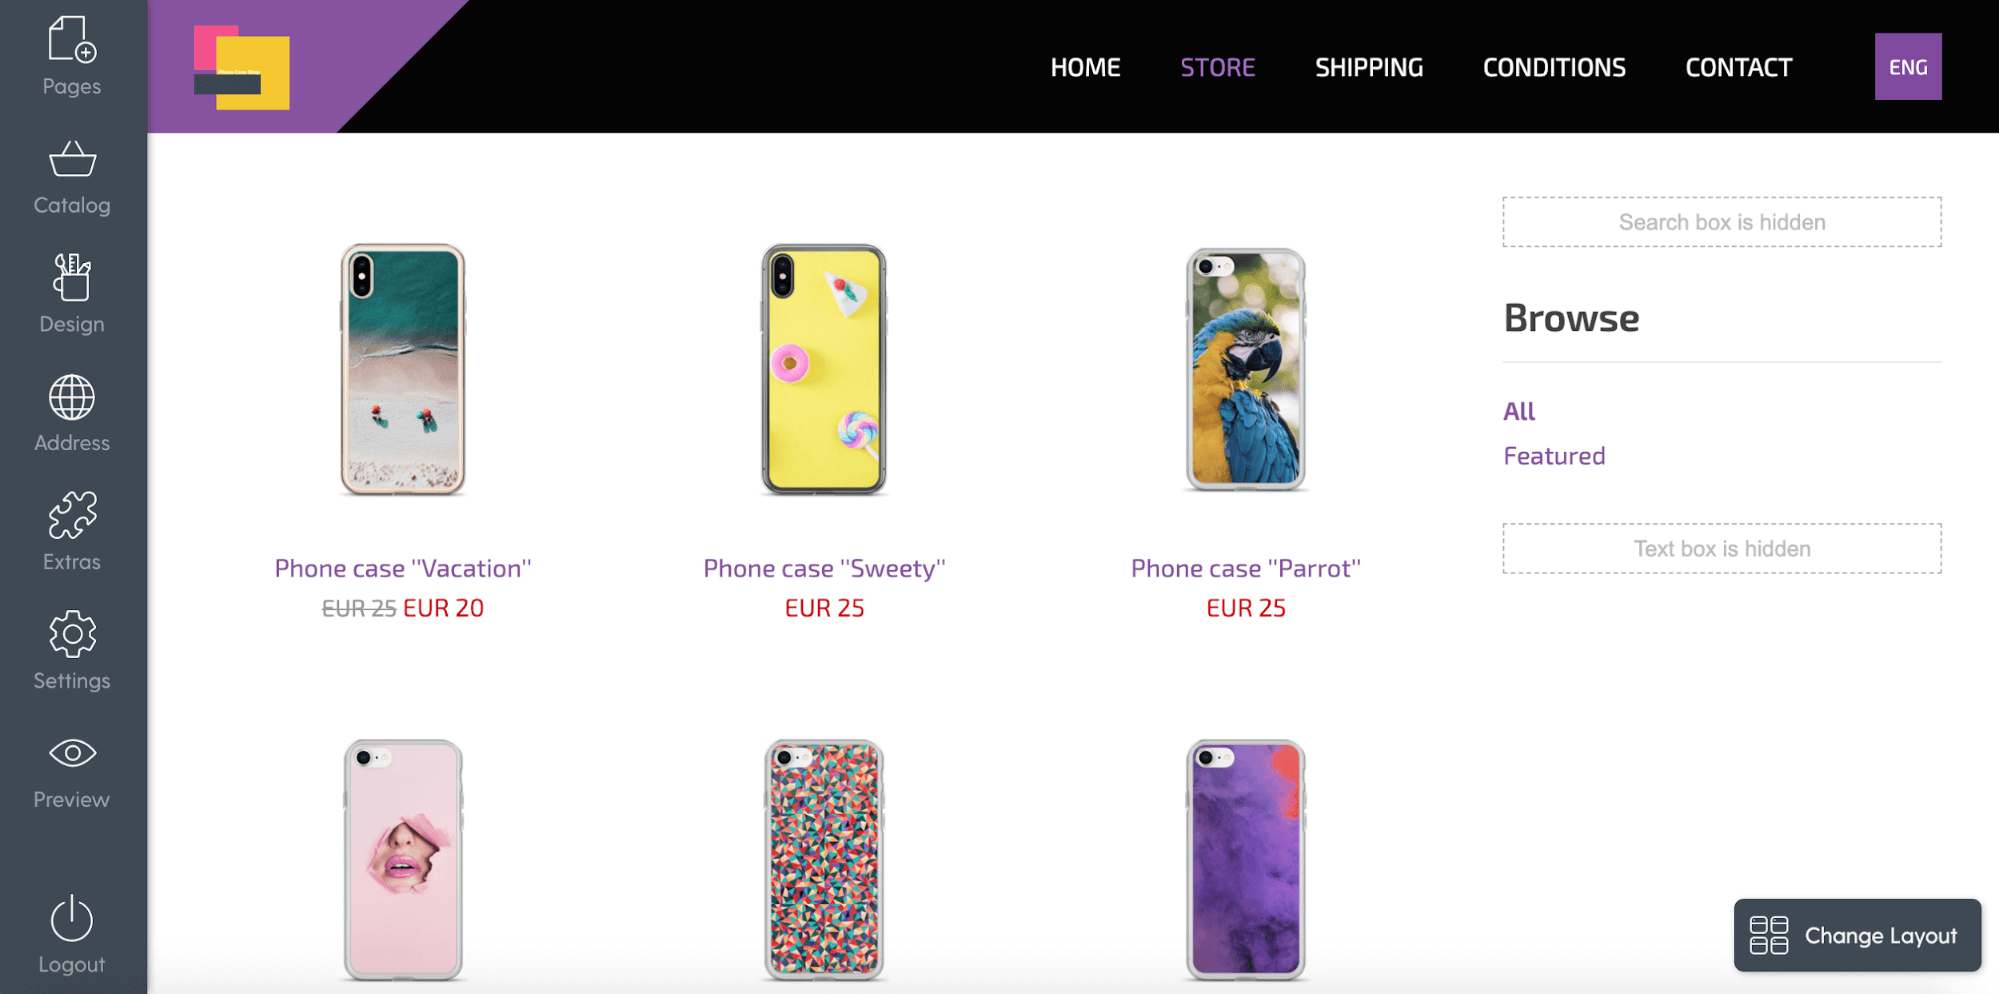
You can change your product layout to fit your product, the number of products you sell (a few or many) and product images you have (horizontal or vertical).
For example, if you sell many products, three products per row will do. However, if you only offer a few items, you may want to change the layout to two images per row - that will make the images bigger and your shop look ''fuller''.
Also, if you sell products with details that you want your customers to notice when they open the catalog view (eg., jewelry), fewer and bigger images per row are recommended.
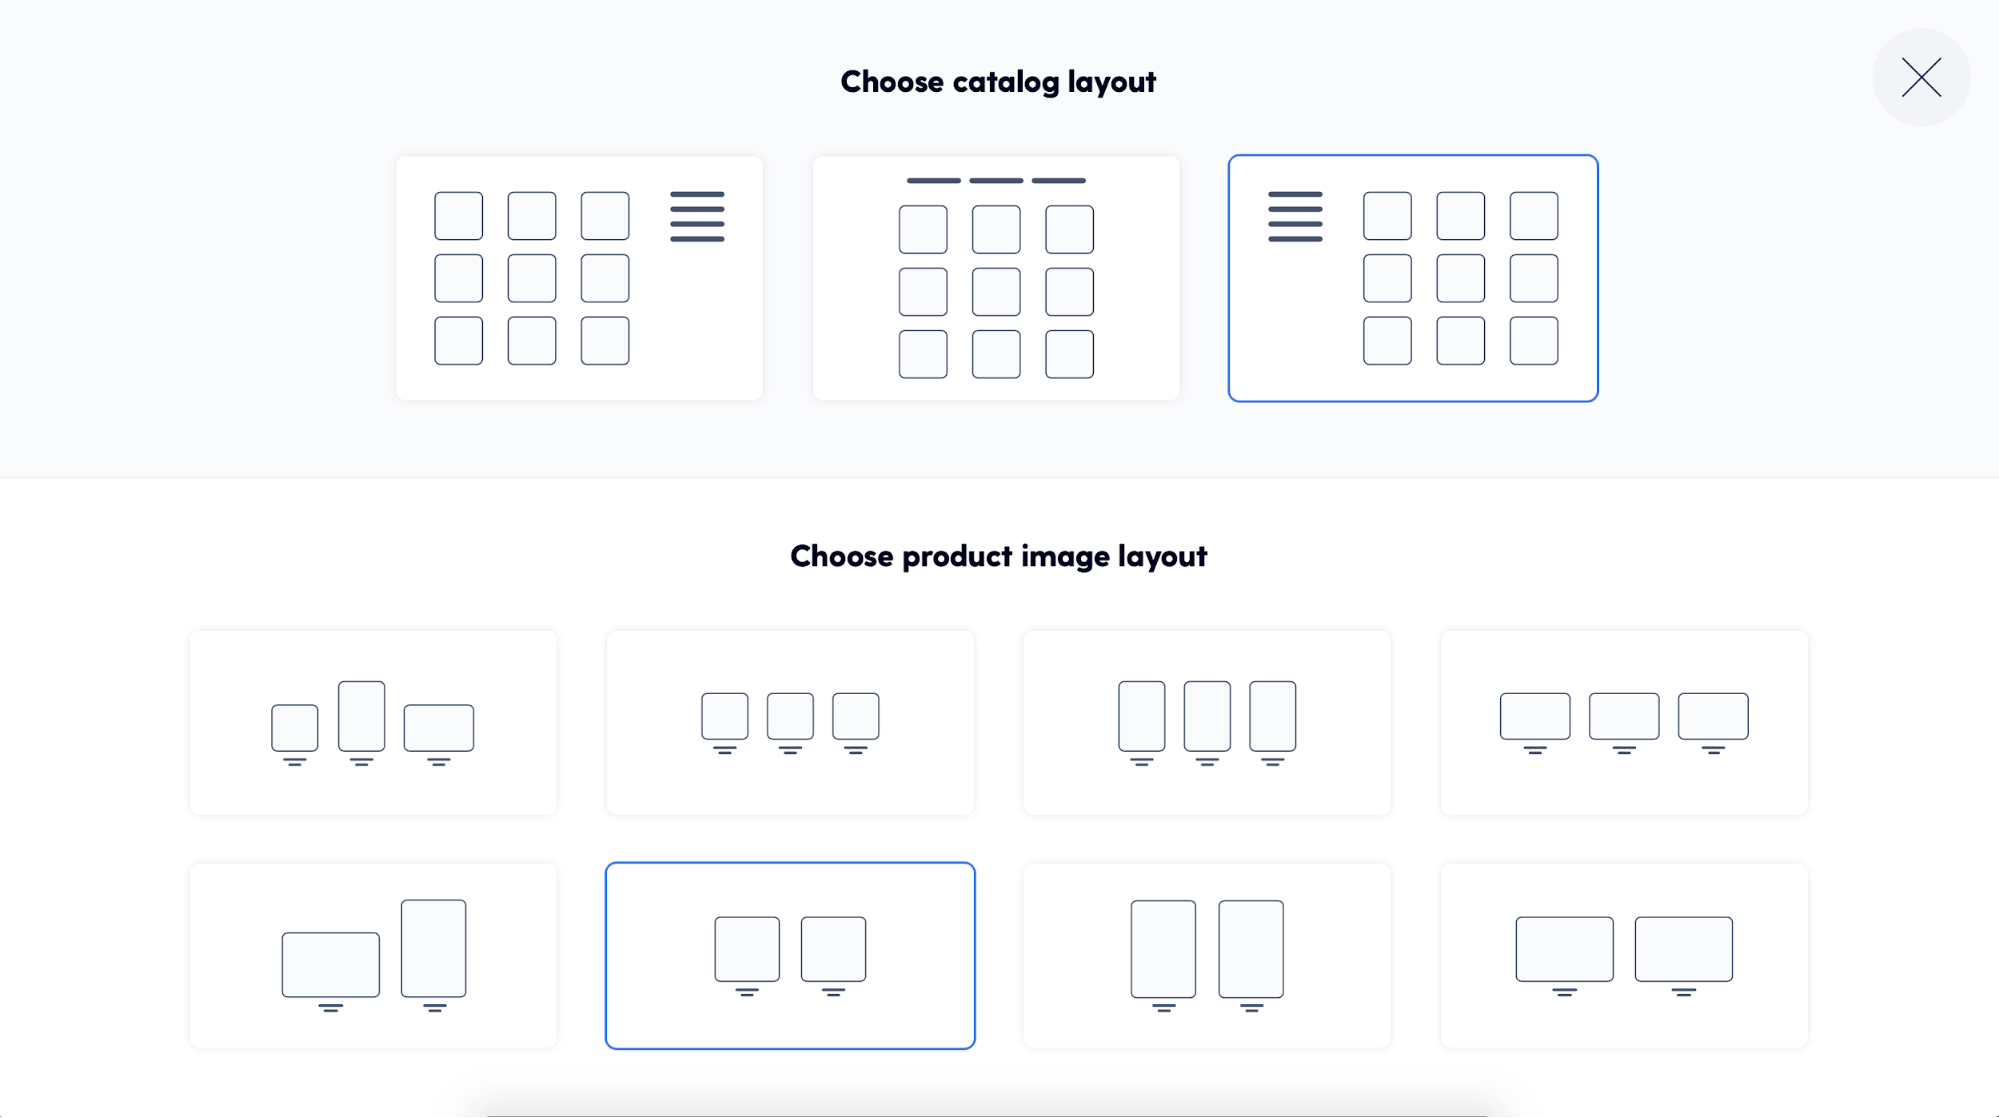
To change the layout, click ''Change layout'' → ''Choose product image layout'':
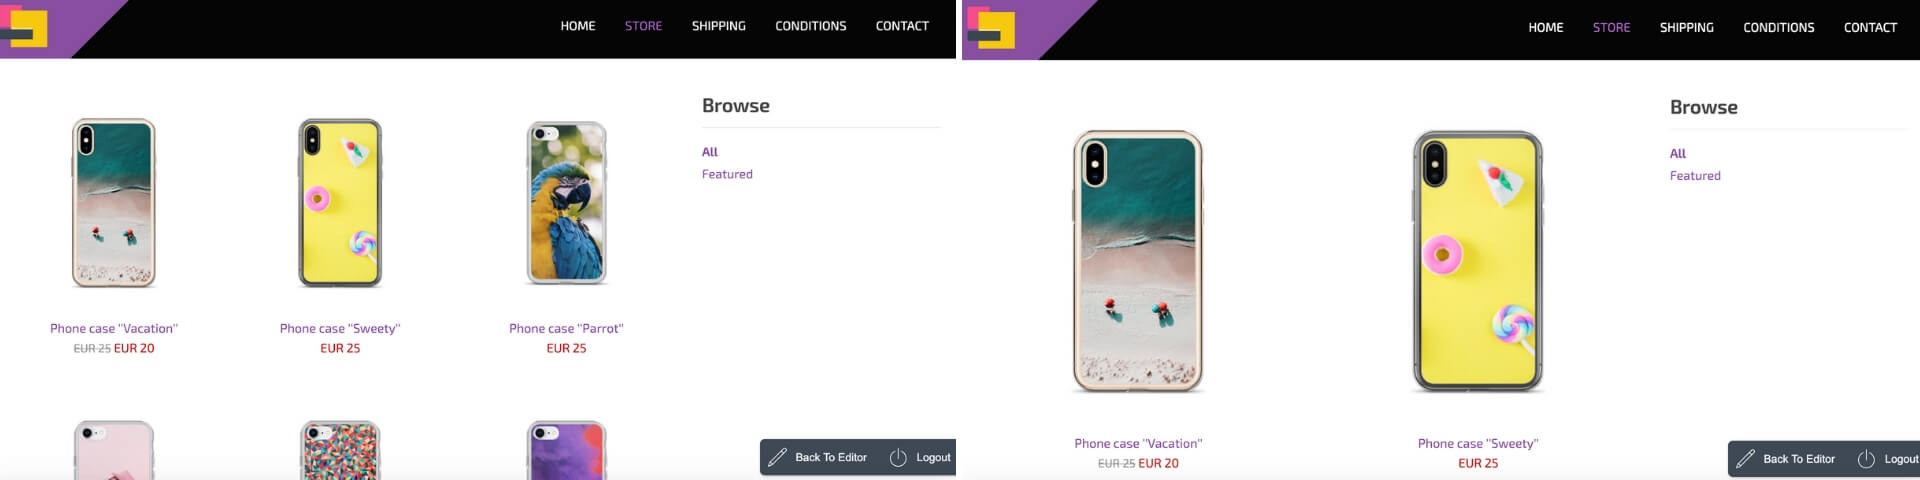
This is how our test shop looks with product image layouts showing three vs. two images per row:
Step 4: Important additional information.
Make sure your customers can find the information they need to make their buying decision and place the order:
Add shipping info
Do you ship worldwide?
On average, how long does it take to ship a product within Europe, to the USA or Australia?
On average, how much does it cost?
Are customs included in the price?
Include all this information, so that customers know what to expect because there's nothing worse than unexpected costs that get added at the checkout.
State your terms and conditions
This is where you inform your buyers about things like:
- Privacy policy (eg., what happens with their email address when they give it to you)
- Cookies and monitoring (if you track your visitors, let them know)
- Specific rules regarding the product (eg. restriction of reselling or age restrictions)
- Returns and refunds
- Etc.
Pro tip:
Find a sample template online, read it through carefully and customize based on your business and product specifics.
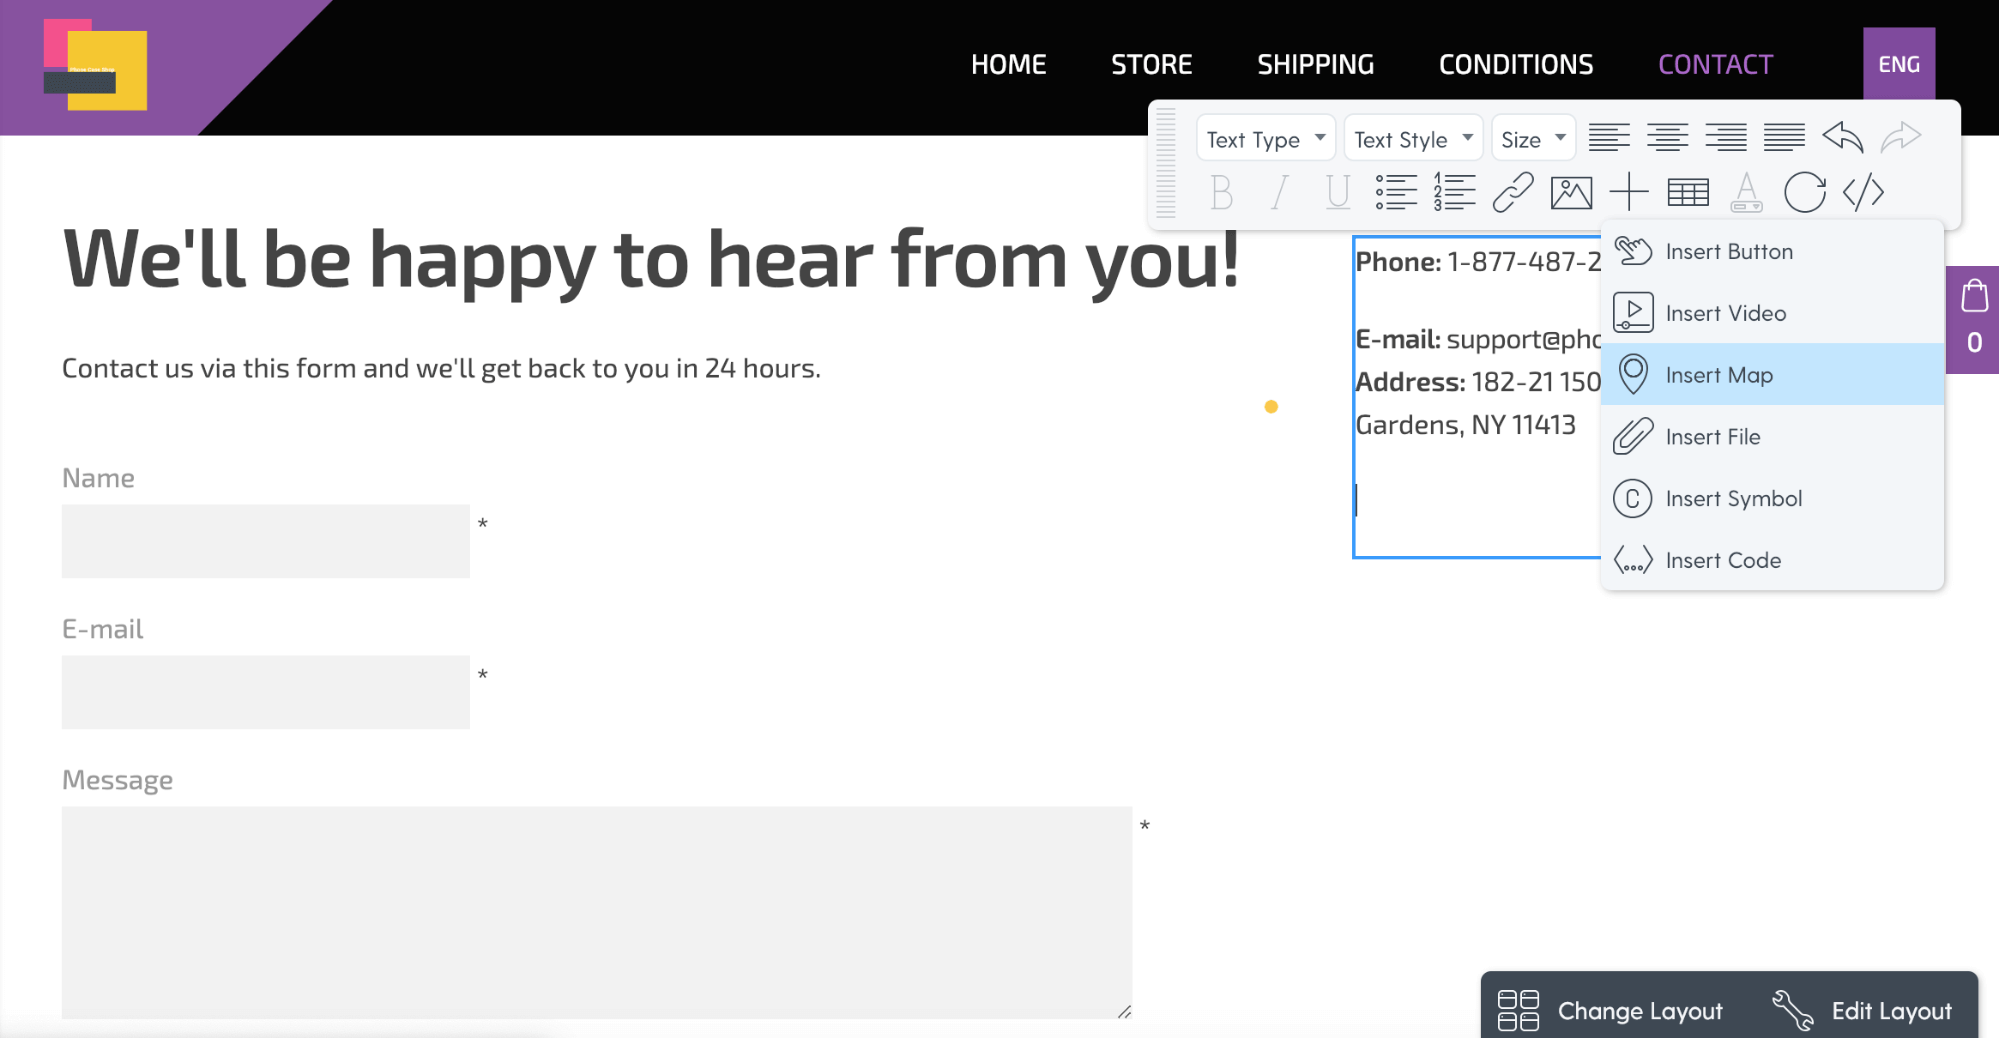
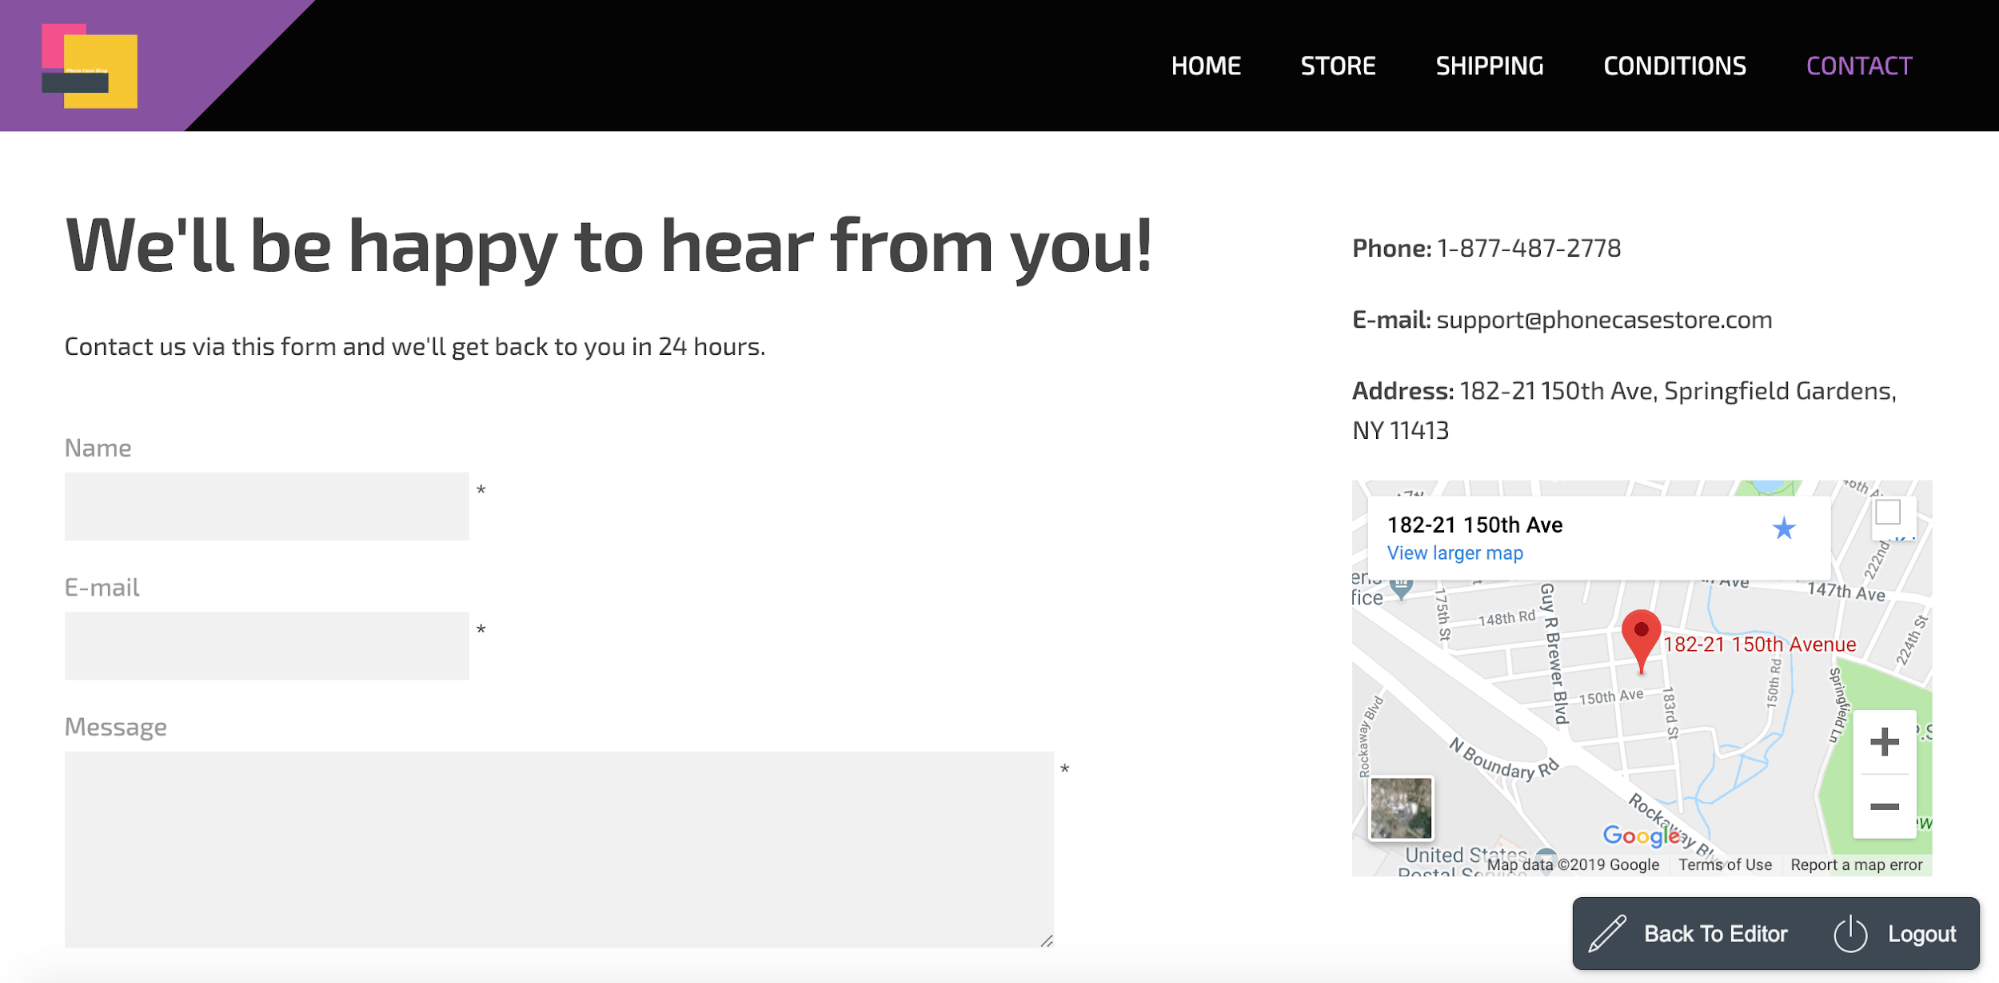
Add your contact information
Easy-to-find contact information makes your business look transparent, trustworthy and reliable. Make it easy for your customers to contact you, and it'll be easier for them to make their buying decision.
Give people various options to contact you:
- A contact form
- Office phone number
- Your email
- Your business address and where to find you on the map:
Step 5: Add payment and delivery options
Now that your store is ready and products are added, the final step us to make sure customers can actually place an order and choose a delivery method.
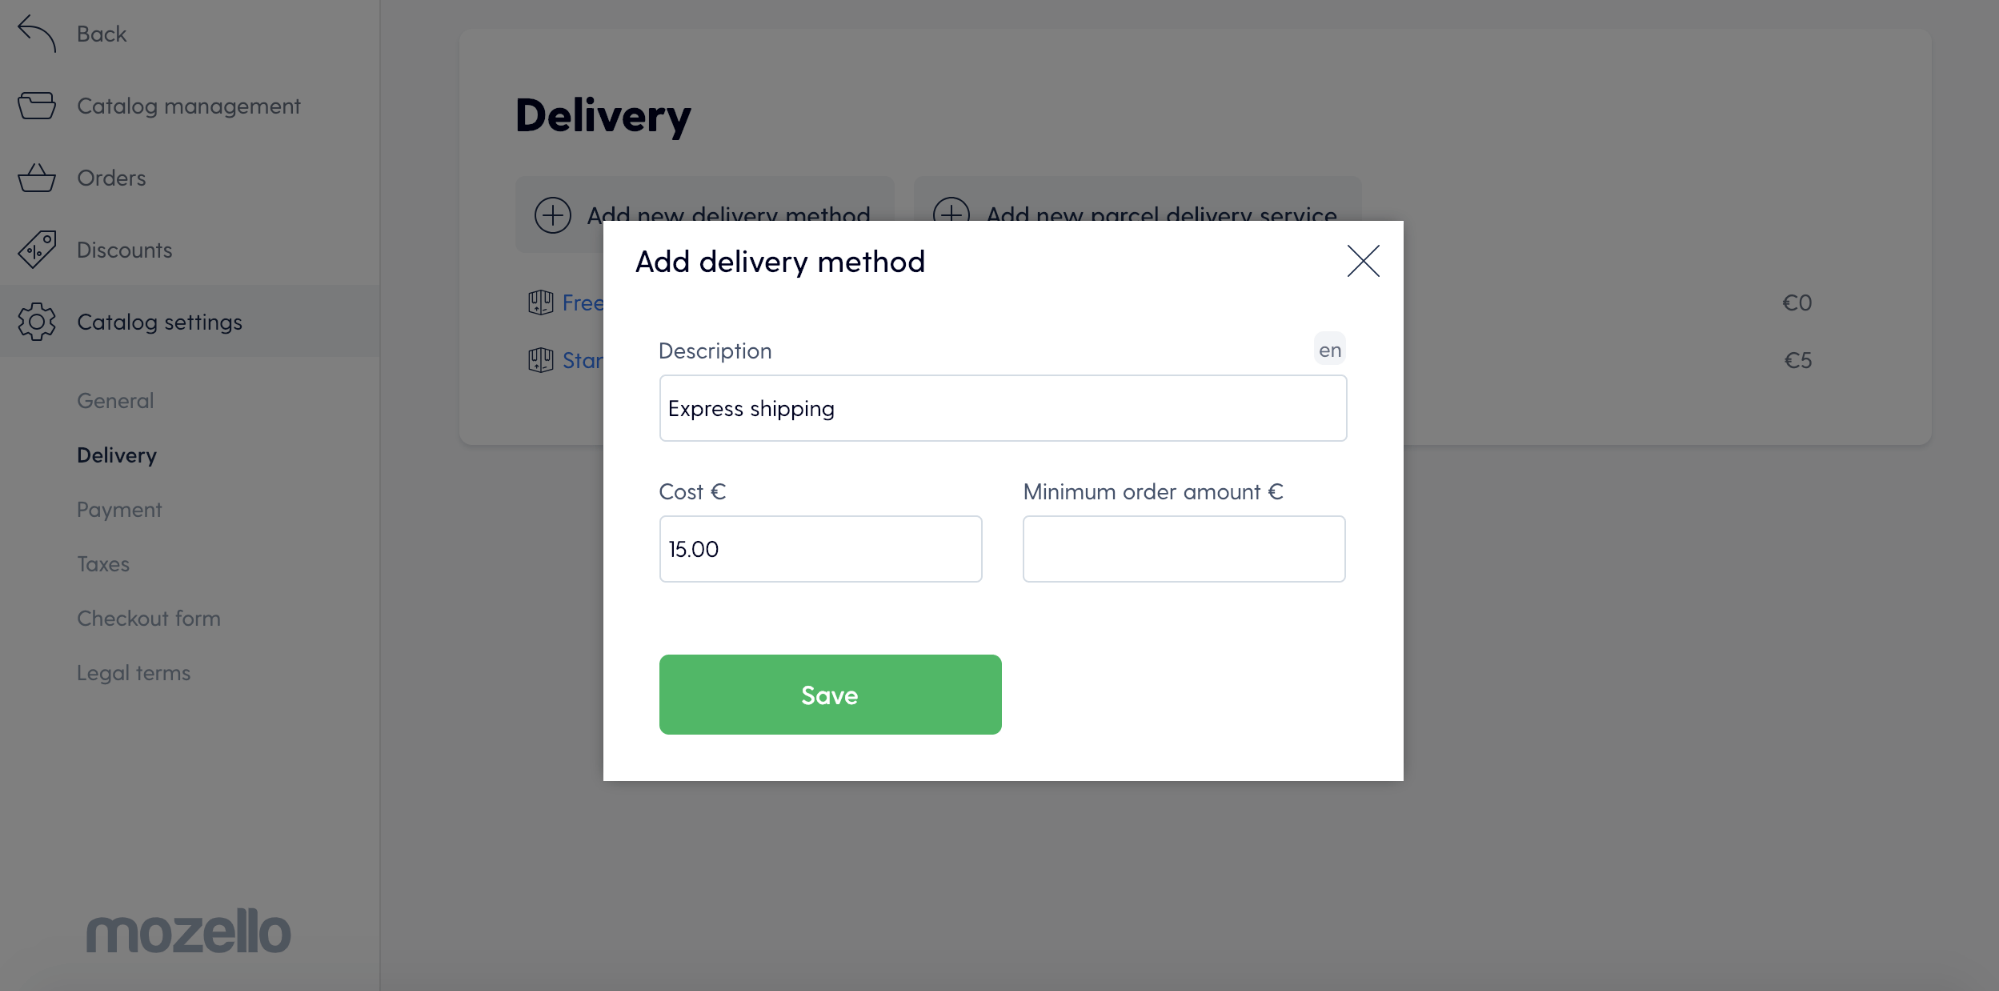
To add delivery options, go to Catalog Settings → Delivery → Add new delivery method → Save.
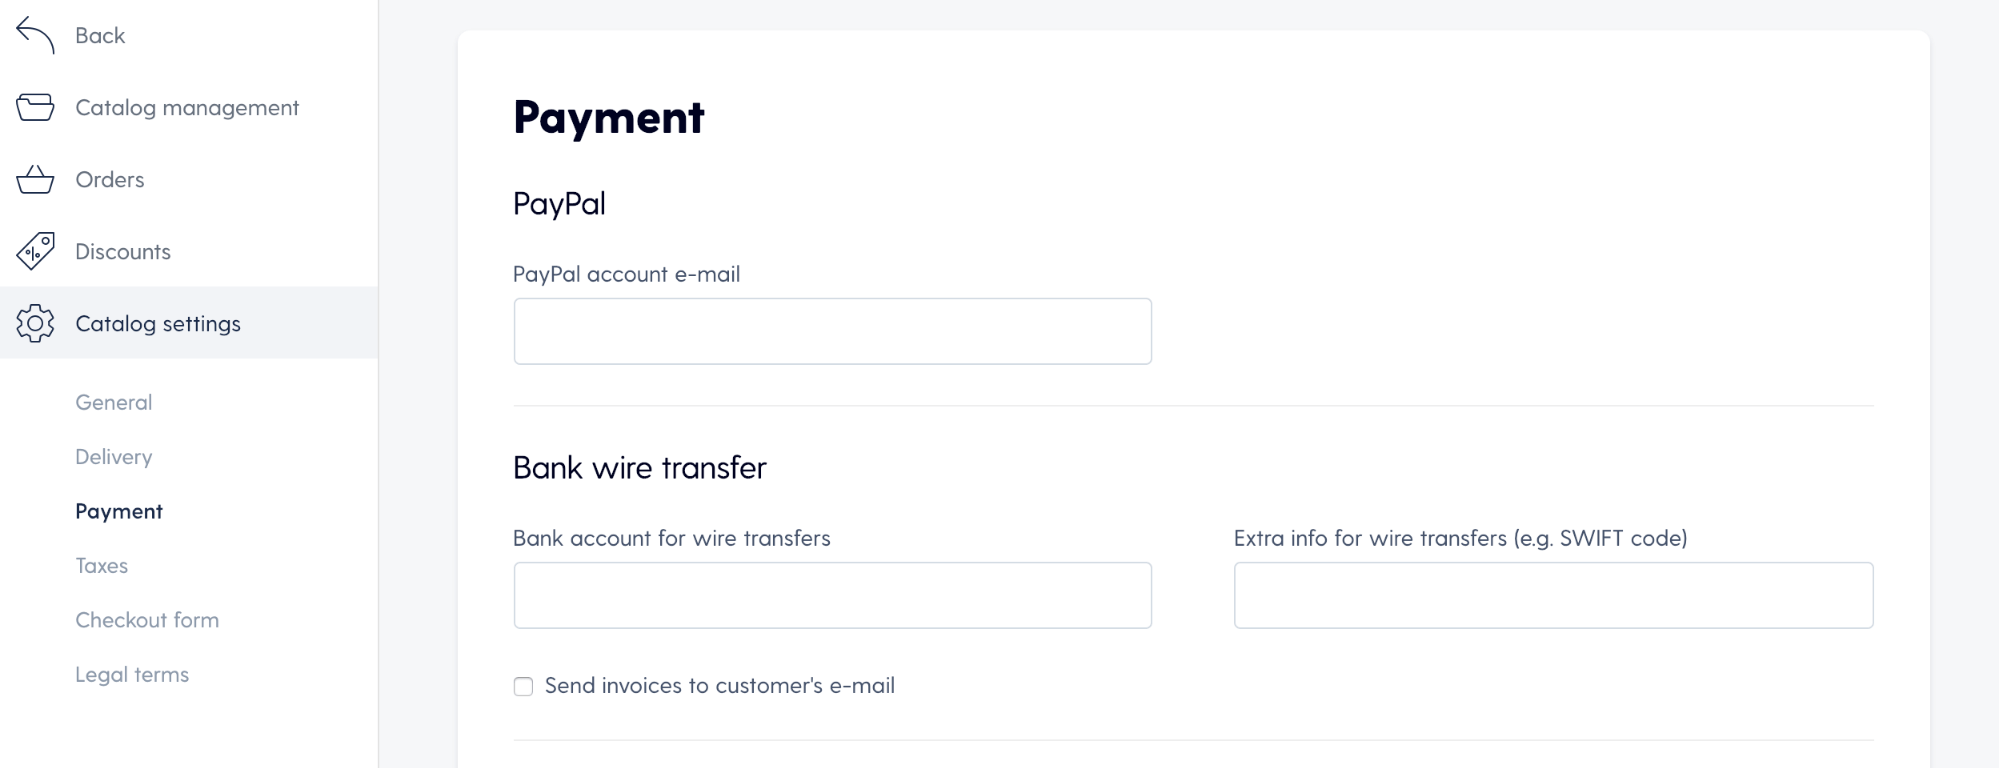
To add payment methods, go to Catalog Settings → Payment.
There are several payment methods Mozello is compatible with: PayPal, bank transfer, cash payments on delivery and card payments (available for Premium Plus users).
To accept PayPal payments, simply copy and paste your PayPal account e-mail:
Now, to activate card payments, you first have to create an account in one of the supported payment platforms and then connect it to Mozello.
For example, to accept payments via Stripe, you have to first create an account on Stripe, then connect it with Mozello. The process is straightforward and takes seconds.
Additionally, in the catalog settings you can choose:
- Store's currency (do you want to accept payments in euro or US dollars?)
- To charge taxes (if you don't include them in your product price)
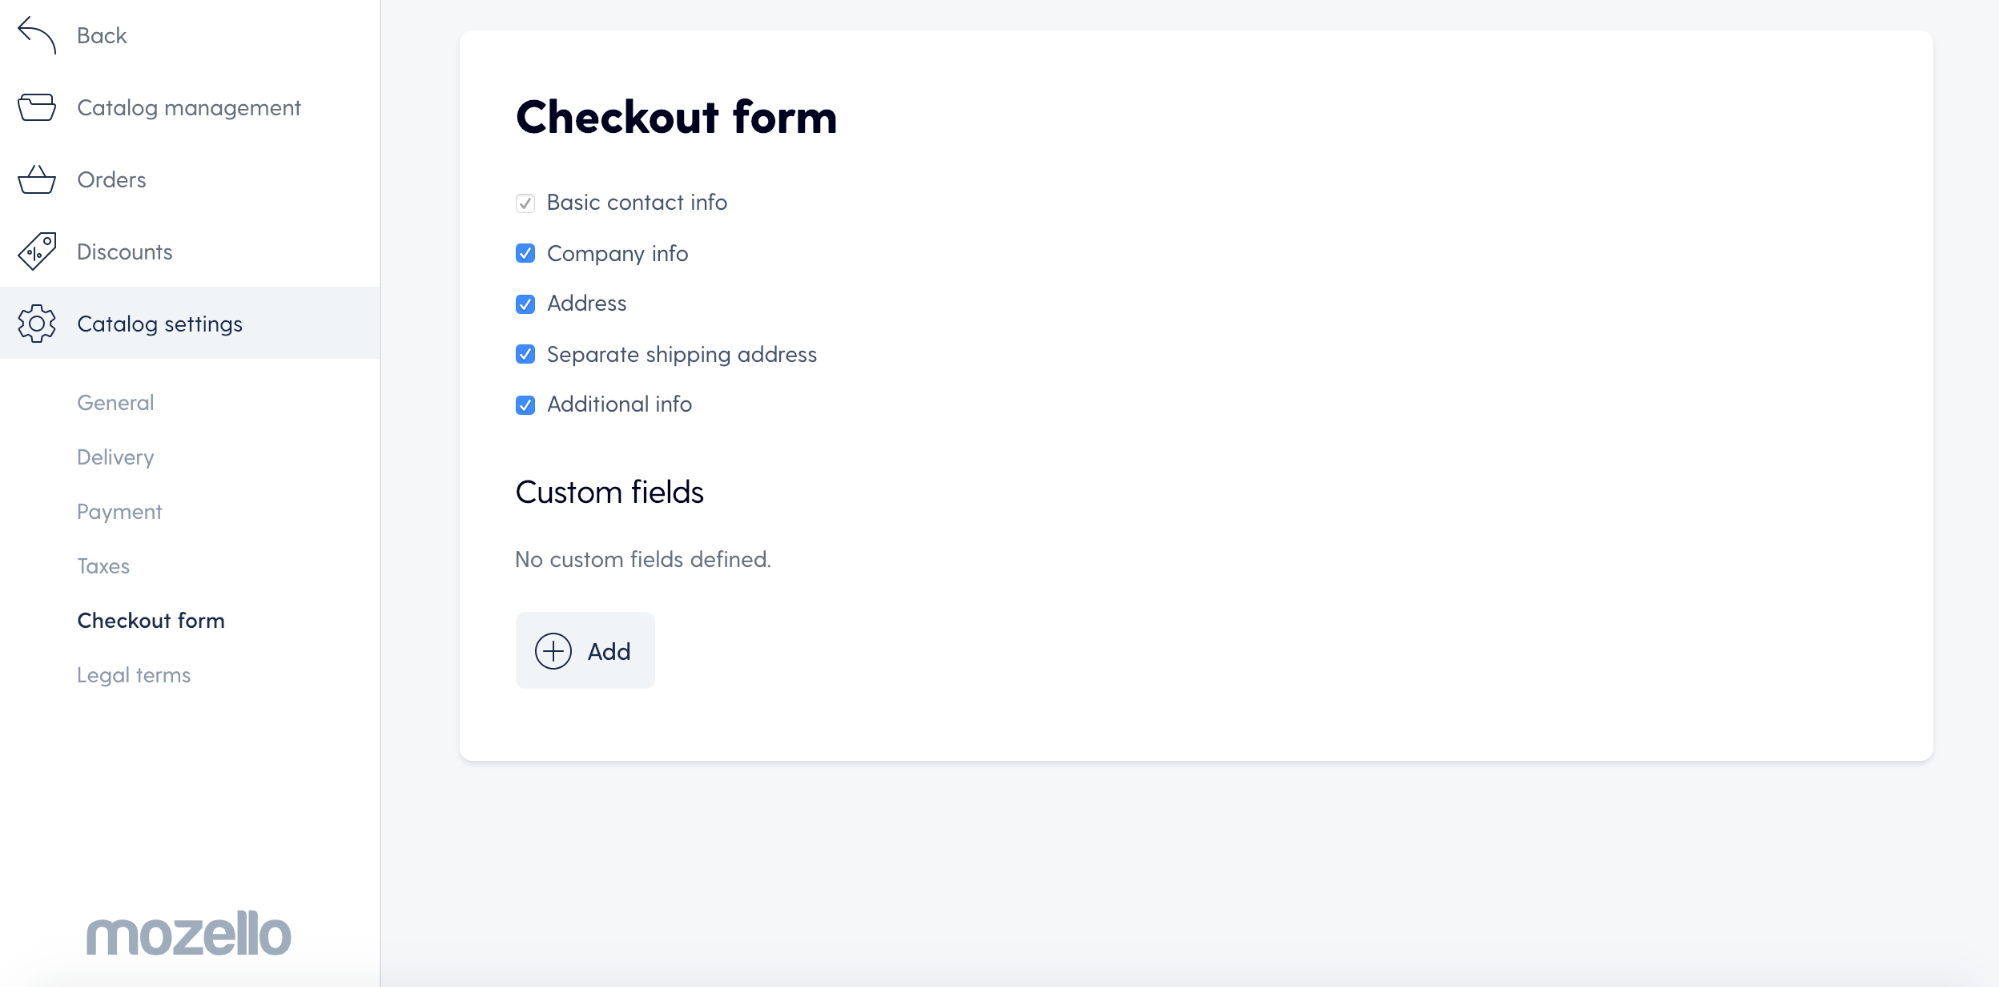
- What information to ask from the customer at the checkout (you can fully customize your checkout form - add or remove fields to get the exact information you need, nothing more and nothing less)
When you've done all this - congratulations, your shop is ready for launching and accepting orders! Read this article on how to make your first online sale - it features seven tried, tested and true tactics that are guaranteed to make you money.
Here are a few things you can start with:
- Post on your social media - let your friends and family know you're in business!
- Create a Facebook ad (this complete and detailed guide will help you)
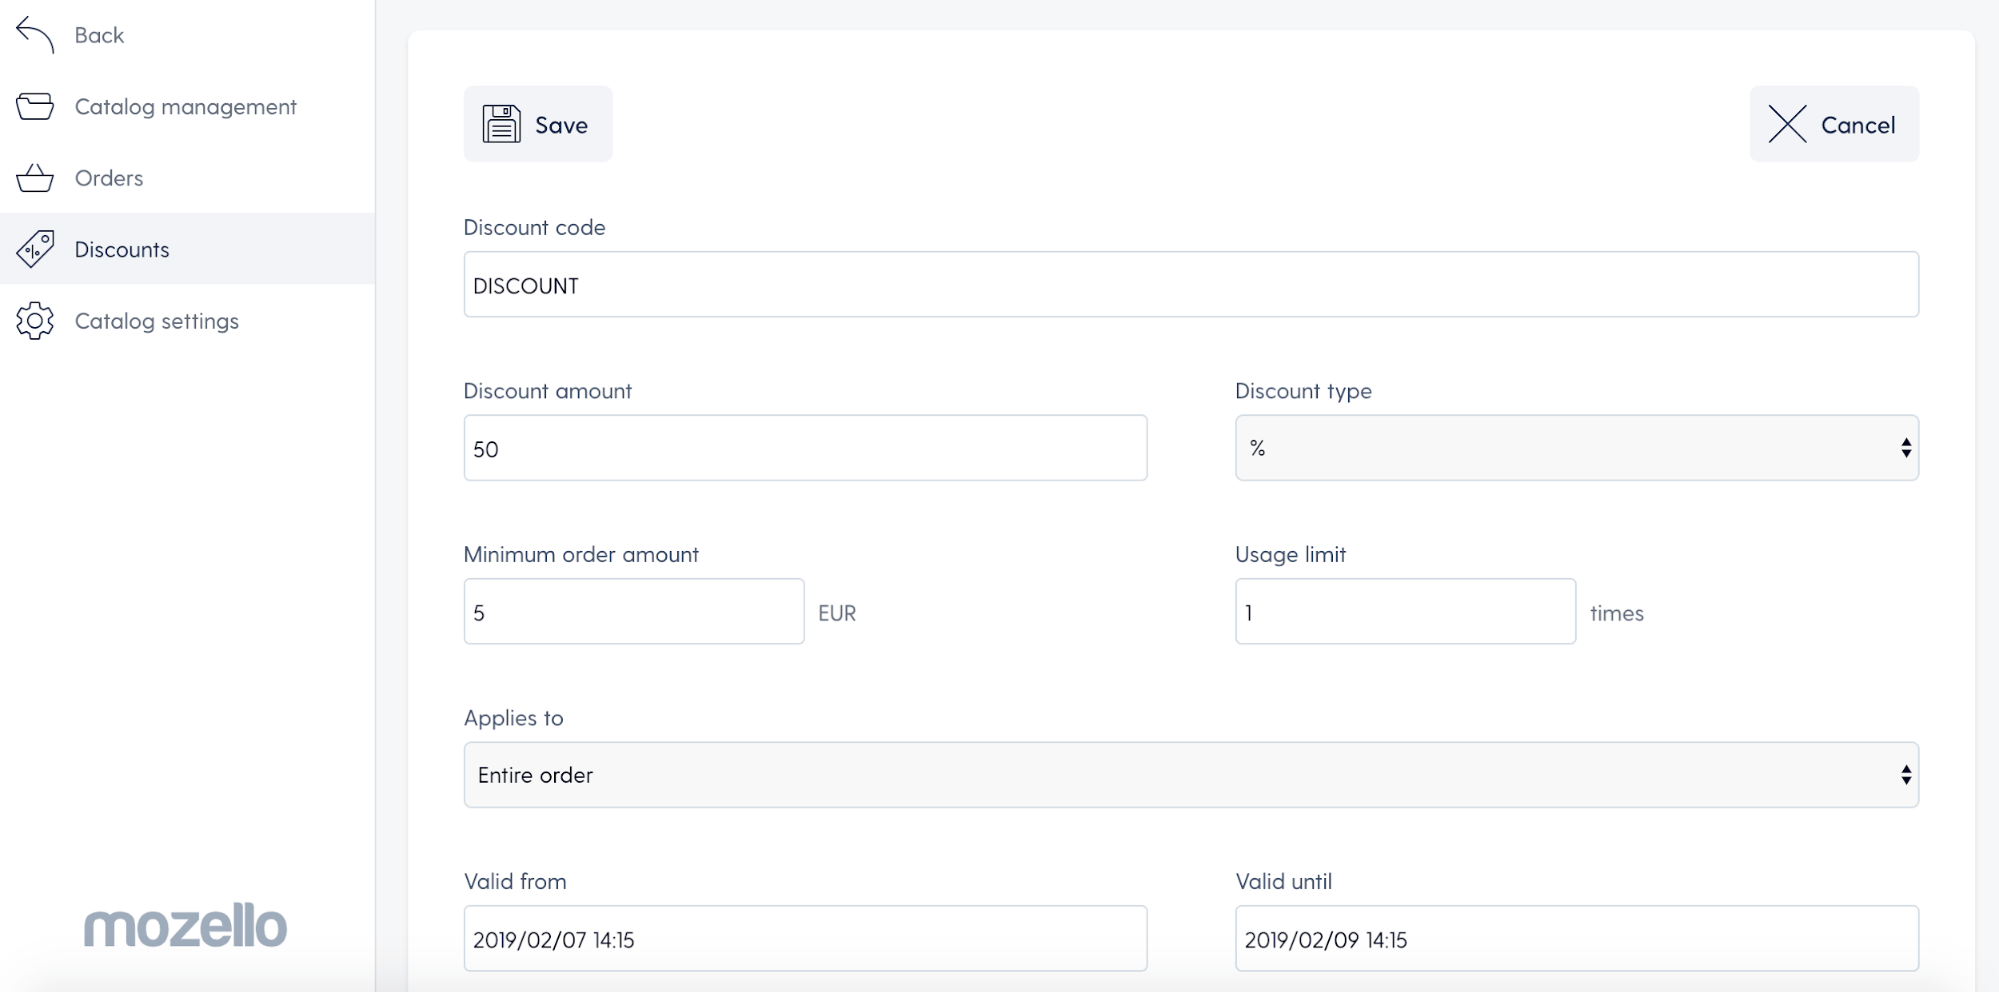
- Offer a ''welcome'' discount and promote it on social media, relevant forums, etc. To create a discount code, go to Catalog → Discounts → Create discount. Create it, save it and share it! (Note that this feature is available for Premium Plus users only.)
Good luck and we can't wait to hear your success story in the comments below!
And if you run into any question, need suggestions or help with anything - feel free to reach out to our support team by writing us at support@mozello.com.